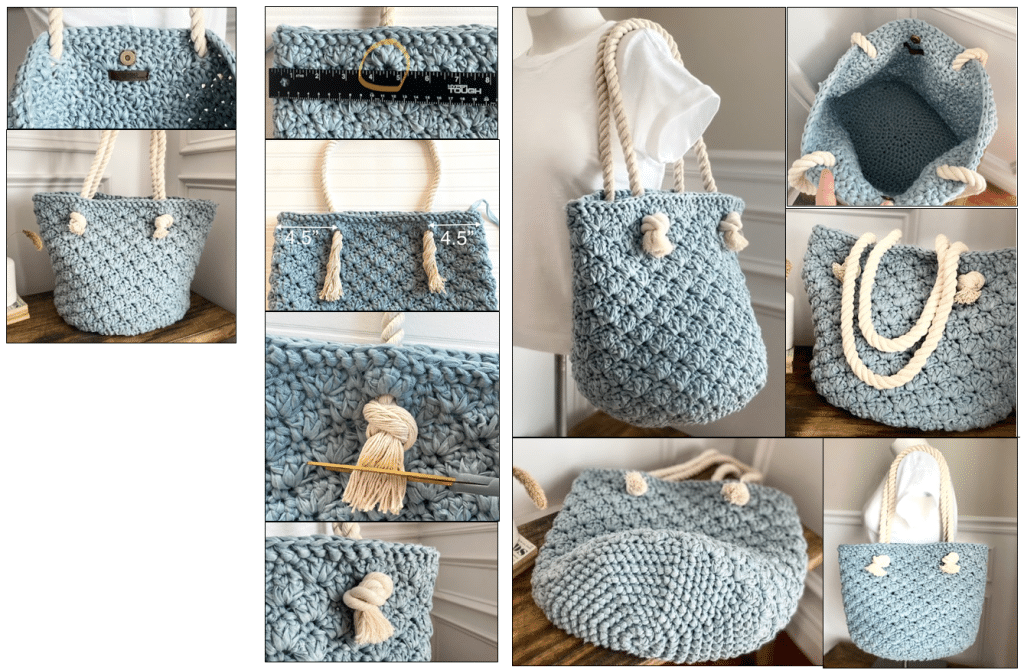
This spacious bag is ideal for the beach, market, pool, or pretty much anywhere. It has rope handles and a circular bottom. Using one strand of really bulky yarn OR two strands of Lion Brand Rewind Tape Yarn, the bag comes together rather quickly. I’ve included more step-by-step images to the pattern in addition to the YouTube tutorials for Rounds 1-4 and Rounds 11–12.
Skill Level: Easy
Terminology:
- US Standard Crochet Terminology
Yarn:
- 4 skeins of Lion Brand Rewind Tape Yarn in the color Marbles (Bulky, size 5, 3.5 oz/100g, 219 Yds/skein)
- **You will be holding 2 strands of yarn together to make the bag.
- *You can also use a single strand of super bulky, size 6 yarn (approximately 270 Yds)
Other Materials
- Sharp scissors
- Measuring tape
- Yarn needle
- Magnetic snap (optional)
- stitch marker
- 84” of a 1/2” – 3/4” thick cotton braided rope (see link to 3/4” rope below)
- Sewing needle and matching thread for sewing on the magnetic snap (optional)
Crochet Hooks
- US M/9 mm
Abbreviations
- st(s) = stitch(es)
- slst = slip stitch
- Ch(s) = chain(s)
- hhdc = herringbone half-double crochet
- sc = single crochet
- dc = double crochet
Gauge:
- In the pattern, at the end of Round 4, the piece should measure approximately 4.5” across.
Approximate Measurements
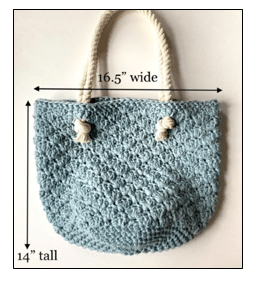
- 14” tall x 16.5” wide when laid flat
Stitch Guide
- Single Crochet (sc): insert hook next st, yarn over, pull through work, yarn over, pull through 2 loops
- Herringbone Half-double Crochet (hhdc): yarn over, insert hook into the next st, yarn over and pull through work and 1 loops (2 loops on hook), yarn over and pull through all 2 loops
- Double Crochet (dc): yarn over, insert hook into next st, yarn over and pull through work, {yarn over and pull through 2 loops} 2 times
Pattern Notes
Please be sure to check your gauge at the end of Round 4. This textured tote is worked in the round from the bottom up. You will use a double strand of LB Rewind Tape yarn or a single strand of a super bulky, size 6 yarn.
The stitch count for each round can be found at the end of each round in parenthesis. When making the bottom of the bag, place a stitch marker in the first st of each round to keep track of where the round begins and ends.
Refer to the stitch guide above as needed. I have included several links to my YouTube tutorials in the pattern. Click each underlined link to be directed to the video.

The Pattern
The bottom of the bag is made in a continuous round. Place a st marker in the first st of each Round. To view my YouTube tutorial for Rounds 1-4, click on the link below.
=>Right-Handed: Video Tutorial
=>Left-Handed: Video Tutorial
Round 1: holding 2 strands of yarn together and using a M/9 mm hook, make the magic ring, Ch 1 (DOES NOT count as a st), work 8 sc into the ring, pull tail tightly to close ring (8)
Round 2: work 2 hhdc in each st around (16)
Round 3: {hhdc in next st, 2 hhdc in next st} repeat around (24)
Round 4: {hhdc in each of the next 2 sts, 2 hhdc in next st} repeat around (32)
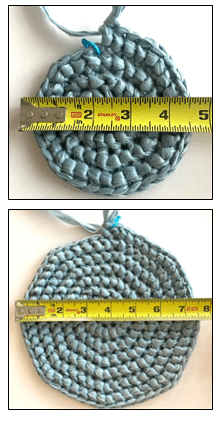
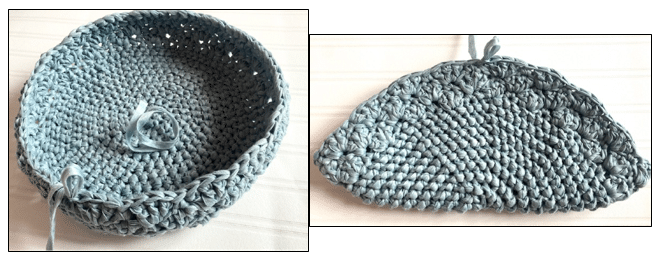
At the end of Round 4, the piece should measure approximately 4.5” across (see photo to right).
Round 5: {hhdc in each of the next 3 sts, 2 hhdc in next st} repeat around (40)
Round 6: {hhdc in each of the next 4 sts, 2 hhdc in next st} repeat around (48)
Round 7: {hhdc in each of the next 5 sts, 2 hhdc in next st} repeat around (56)
At the end of Round 7, the bottom of the bag should measure approximately 7.5” across (see photo to right).
Round 8: {hhdc in each of the next 6 sts, 2 hhdc in next st} repeat around (64)
Round 9: {hhdc in each of the next 7 sts, 2 hhdc in next st} repeat around (72)
Round 10: hhdc in each st around until one st remains, sc in
last st, remove the st marker and set aside, slst in first st to join (72)
At the end of Round 10, the bottom of the bag should measure approximately 10” across.
You are now finished making the bottom of the bag. You will now begin each round with either a Ch 1 or Ch 2 . The Ch 1 and Ch 2 DO NOT count as sts. At the end of each round, slst in the top of the first st to join.
Round 11: Ch 1, skip first st, sc in next st, skip st, 3 dc in next st, {skip st, sc in next st, skip st, 3 dc in next st} repeat around, join (72)To view my YouTube tutorial for Round 11, click on the link below.
=>Right-handed: Video Tutorial
=>Left-handed: Video Tutorial
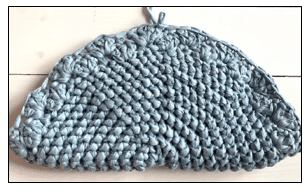
Round 12: Ch 2, 3 dc in first st, skip st, sc in next st, skip st, {3 dc in next st skip st, sc in next st, skip st} repeat around, join (72)
To view my YouTube tutorial for Rounds 12 and 13, click on the link below.
=>Right-handed: Video Tutorial
=>Left-handed: Video Tutorial
Round 13: repeat Round 11 (72)
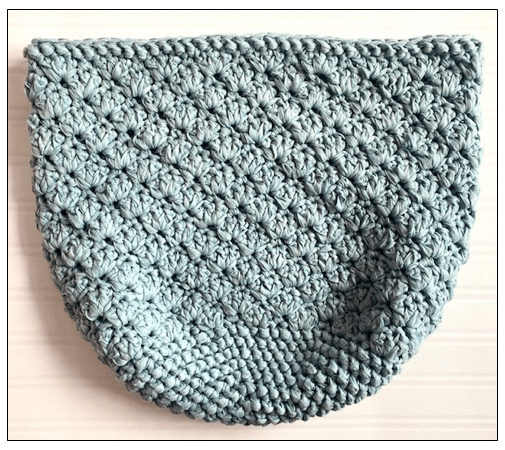
Rounds 14 – 27: repeat Rounds 12 and 11
Finishing Round: Ch 1, hhdc in the first st and in each st around, join, fasten off leaving a 6” tail for weaving in at the end of the pattern (72)See instructions on the next page for adding the rope handles.
Adding the Rope Handles
Cut 2, 42” x 3/4” pieces of cotton braided rope. Lay the bag flat in front of you so your tail is on one side. Measure approximately 4.5” from each side of the bag.
Working from the inside of the bag out, thread one end of the rope through the space at the base of the 3 dc cluster from round
27. I circled this space in yellow in the photo to the right. Repeat instructions for the other end of the rope. Tie a tight knot with each end of the rope. Trim the ends of the rope so that they are even.
Flip the bag over and repeat the above instructions for the other rope handle. Be sure the two handles line up with one another.
Weave in your tail and any remaining loose ends with a yarn needle. Using a needle and matching thread, sew a magnetic purse snap to the inside of your bag (optional). Your bag should now be finished.
