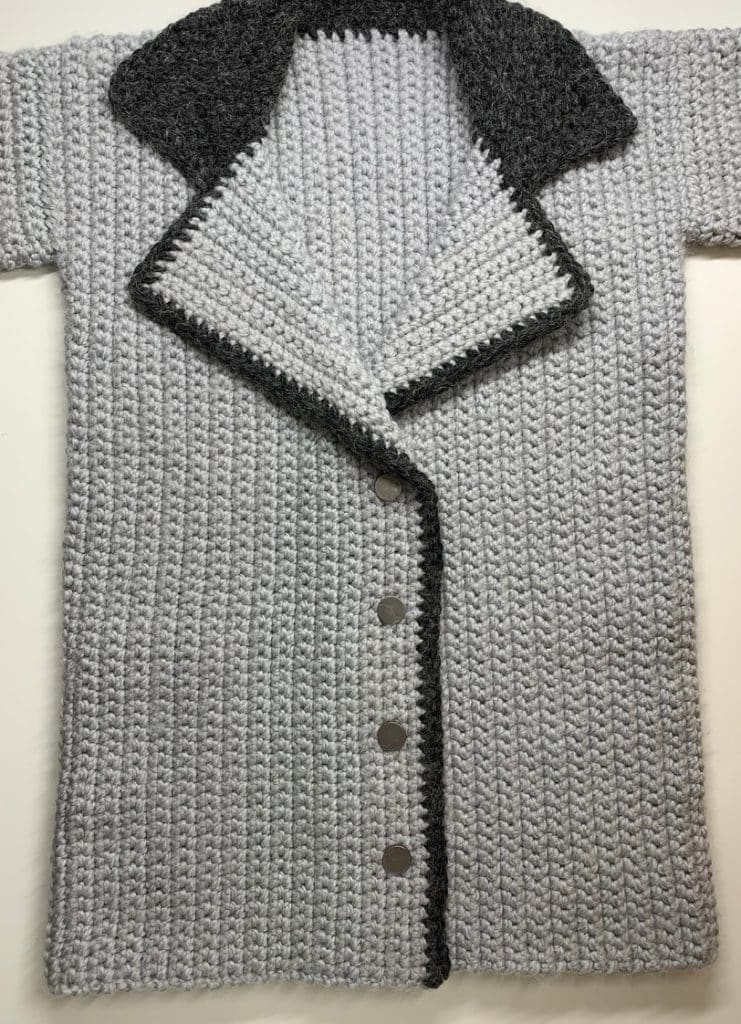
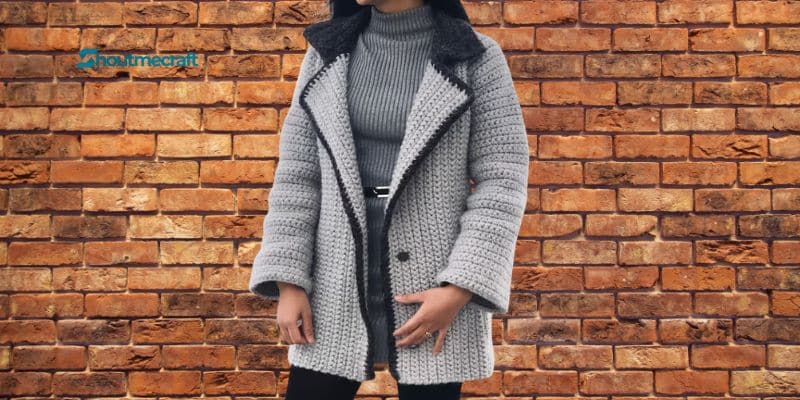
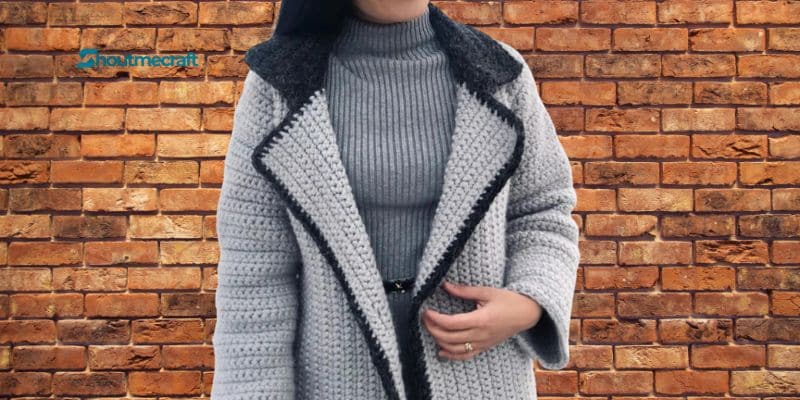
Crochet Jacket Pattern – From the moment I conceived of this Hearth Side crochet jacket, I had elevated expectations for it. It has been a lengthy and arduous process to develop the design.
But now that it has arrived, I can say that it is everything and more that I could have ever imagined. The appearance, the atmosphere, and the photographs all turned out splendidly.
I cannot wait for everyone else to have precisely the same experience!
Skill: Easy
Materials
- I used 2 color of Buttercream Luxe craft Alpaca solid #6 Super bulky yarn
- 6mm crochet hook
- Scissors
- Yarn needle
- Stitch markers
- 4 Buttons (1″)
Stitches used & code (US Term)
- ch = chain
- sc = single crochet
- sk = skip
- REP = repeat
- st = stitch(es)
- sp = space
- RS = right side
- WS = wrong side
- “ = inches
Video Tutorial:
Notes:
- This pattern is written in English US terminology
- This pattern made as US women’s sizes XS(S, M, L, XL, XXL)
- This jacket is made in 5 separate pieces and then sewn together. The collar is added after.
In this picture I have demonstrated with size small
Yarn needed
- Color A Gray = 1060(1100, 1160, 1200, 1260, 1300) yards
- Color B Night = 60(60, 70, 70, 80, 80) yards
Gauge blocked: 10.5 sc X 11 rows = 4″
Measurements (After blocked)
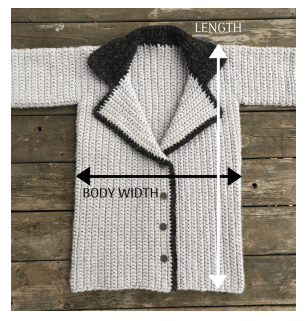
- XS = 16 ” Body width across X 26.66″ Length
- S = 17.45″ Body width across X 26.66″ Length
- M = 20.36″ Body width across X 27.80″ Length
- L = 21.81″ Body width across X 27.80″ Length
- XL = 24.72″ Body width across X 28.95″ Length
- XXL = 26.18″ Body with across X 28.95″ Length
BACK PANEL
Note: The chain will start as the length of the jacket. The rows will be the width.
Row 1 (RS) Color A: ch 71(71, 74, 74, 77, 77), 1 sc into second ch from hook and each ch across.
Total of 70( 70, 73, 73, 76, 76 ) sc
Row 2 (WS) Color A: Turn, ch 1 (do not count as a st), 1 sc into each st across. Total of 70(70, 73, 73, 76, 76) sc
Row 3 – Row 44(48, 56, 60, 68, 72): REP Row 2 Color A
*The end of row 44(48, 56, 60, 68, 72) cut the yarn
LEFT FRONT PANEL (WHEN YOU WEAR IT)
Note: The chain will start as the length of the jacket. The rows will be the width.
Row 1 (RS) Color A: ch 71(71, 74, 74, 77, 77), 1 sc into second ch from hook and each ch across.
Total of 70(70, 73, 73, 76, 76) sc
Row 2 (WS) Color A: Turn, ch 1 (do not count as a st), 1 sc into each st across. Total of 70(70, 73, 73, 76, 76) sc
Row 3 – Row 15(17, 21, 23, 27, 29): REP Row 2 Color A
Row 16(18, 22, 24, 28, 30) Color A: Turn, ch 1 (do not count as a st),1 sc into each st until you have 62(62, 65, 65, 68, 68) sc. Total of 62(62, 65, 65, 68, 68) sc
Row 17(19, 23, 25, 29, 31) Color A: Turn, ch 1 (do not count as a st), 1 sc into each st across.
Total of 62(62, 65, 65, 68, 68) sc
Row 18(20, 24, 26, 30, 32) – Row 30(32, 36, 38, 42, 44): REP Row 17(19, 23, 25, 29, 31)
*The end of row 30(32, 36, 38, 42, 44) cut the yarn
RIGHT FRONT PANEL (WHEN YOU WEAR IT)
Note: The chain will start as the length of the jacket. The rows will be the width.
Row 1 (RS) Color A: ch 71(71, 74, 74, 77, 77), 1 sc into second ch from hook and each ch across.
Total of 70(70, 73, 73, 76, 76) sc
Row 2 (WS) Color A: Turn, ch 1 (do not count as a st), 1 sc into each st across. Total of 70(70, 73, 73, 76, 76) sc
Row 3 – Row 15(17, 21, 23, 27, 29): REP Row 2 Color A
The end of row 15(17, 21, 23, 27, 29) cut the yarn and leave a 14-20″ long tail for sewing the shoulder seam.
Row 16(18, 22, 24, 28, 30) Color A: Turn, sk 8(8, 8, 8, 8, 8), Add a new yarn into next st and then,ch 1 (do not count as a st), 1 sc into the same st that we just added new yarn, 1 sc into each st across. Total of 62(62, 65, 65, 68, 68) sc
Row 17(19, 23, 25, 29, 31) Color A: Turn, ch 1 (do not count as a st), 1 sc into each st across.
Total of 62(62, 65, 65, 68, 68) sc
Row 18(20, 24, 26, 30, 32) – Row 27(29, 33, 35, 39, 41): REP Row 17(19, 23, 25, 29, 31)
Row 28(30, 34, 36, 40, 42) Color A: Turn, ch 1 (do not count as a st),1 sc into each of next 26(26, 29, 29, 32, 32) st, next we’re going to make the button holes,
*ch1, sk next st, 1 sc into each of next 8 st* REP from *TO* across. Total of 62(62, 65, 65, 68, 68) st (Including the ch)
Row 29(31, 35, 37, 41, 43) Color A: Turn, ch 1 (do not count as a st), 1 sc into each st and each ch across. Total of 62( 62, 65, 65, 68, 68 ) sc Row 30(32, 36, 38, 42, 44): Turn, ch 1 (do not count as a st), 1 sc into each st across, then cut the yarn. Total of 62(62, 65, 65, 68, 68) sc
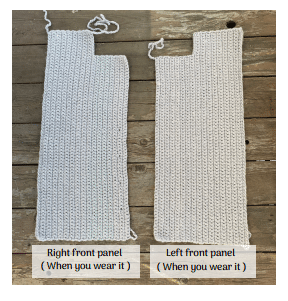
SLEEVES (MAKE 2)
Note: The chain will start as the width around your arm. The rows will be the length.
Row 1 (WS) Color A: ch 34(36, 38, 40, 42, 44), 1 sc into second ch from hook and each ch across.
Total of 33(35, 37, 39, 41, 43) sc
Row 2 (RS) Color A: Turn, ch 1 (do not count as a st), 1 sc into each st across. Total of 33(35, 37, 39, 41, 43) sc
Row 3 – Row 48(48, 48, 48, 48, 48): REP Row 2 Color A
*All the sizes are the same length. If you want a shorter sleeve, just make less rows. If you want a longer sleeve, just keep repeating row 2 more times.
The end of row 48(48, 48, 48, 48, 48) cut the yarn and leave 40-60″ long tail
JOINING THE PIECES TOGETHER
SEW THE BACK AND 2 FRONT PANELS
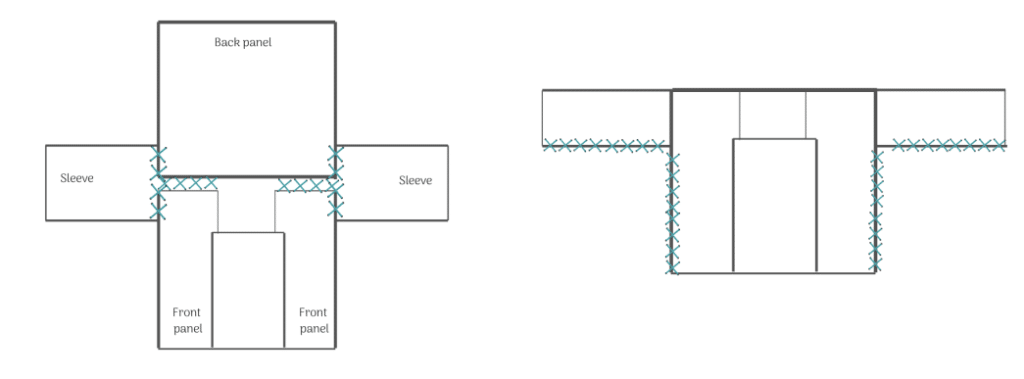
Take the back and 2 front panels, place them with correct side facing down, we’ll sew in the wrong side.
Using the tail we left earlier on the right front panel, we’ll sew the right front panel into the back panel at the shoulder seam.
For the left shoulder seam, we didn’t leave a tail, so we need to cut a new strand of yarn, 10-16 inches long to sew the left front panel into the back panel at the shoulder seam using method of choice.
SEW THE SLEEVES TO THE MAIN PANEL
With the main panel correct side facing down. Place your sleeves correct side facing down and start sewing on the wrong side with your tail again.
The shoulder seam of the main panel should be in the middle of the sleeves panel and even on both sides
SEW THE JACKET TOGETHER
Fold your jacket in half at the shoulder seam with the correct side facing each other, we’ll sew on the wrong side. Cut a new strand of yarn 60-70″ long, enough to sew the side and the sleeve.
Start sewing from the bottom up to the side seam until you reach the armpit and continue sewing the sleeve side seam until you reach the end of the sleeve and then weave all the ends (Check picture below)
CROCHET THE COLLAR
Turn your jacket right side out. We’ll crochet the collar on the right side. All The sizes are made the same
Row 1 Color B: sk 10 rows/st from the corner of the left collar (Left collar when you wear it) and add new yarn into next row/st and then, ch 1 (do not count as a st), 1 sc into the same st that we just added new yarn, 1 sc into each st around the neck area and back down to the other side (Right collar) until you have 10 rows/st left. Total of 40(40, 40, 40, 40, 40) sc *If you have a couple less or more st, it’s ok
(Check picture below)

Row 2 Color B: Turn, ch1 (do not count as a st), 1 sc into each st across. Total of 40(40, 40, 40, 40, 40) sc. Check picture below
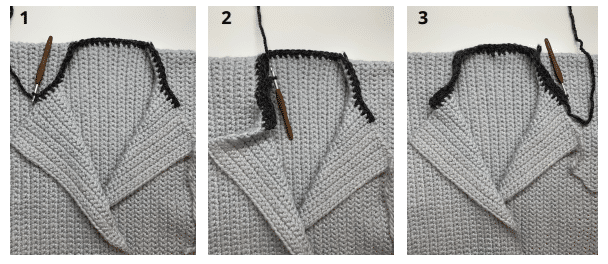
Row 3 – ROW 11(11, 11, 11, 11, 11): REP Row 2
*The end of row 11(11, 11, 11, 11, 11) do not cut the yarn, we’ll use the same yarn to crochet around the edge
CROCHET AROUND THE COLLAR EDGES
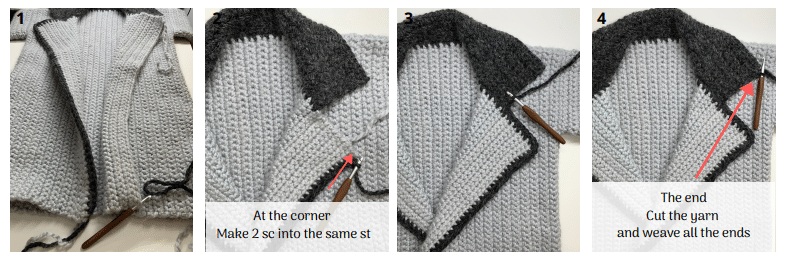
For the collar edges. All the size are made the same. We’ll crochet on the right side first (Right side when you wear it). Using the same yarn that we used to make the collar.
Color B: Make 1 sc into each st until you reach the bottom of the right front panel (Check picture below)

The left edge (Left side when you wear it).
Color B: Add a new yarn into the bottom left corner and then, ch 1 (do not count as a st), 1 sc into the same st that we just added new yarn, 1 sc into each st until you reach the top collar corner (Check picture below).
Adding the Buttons
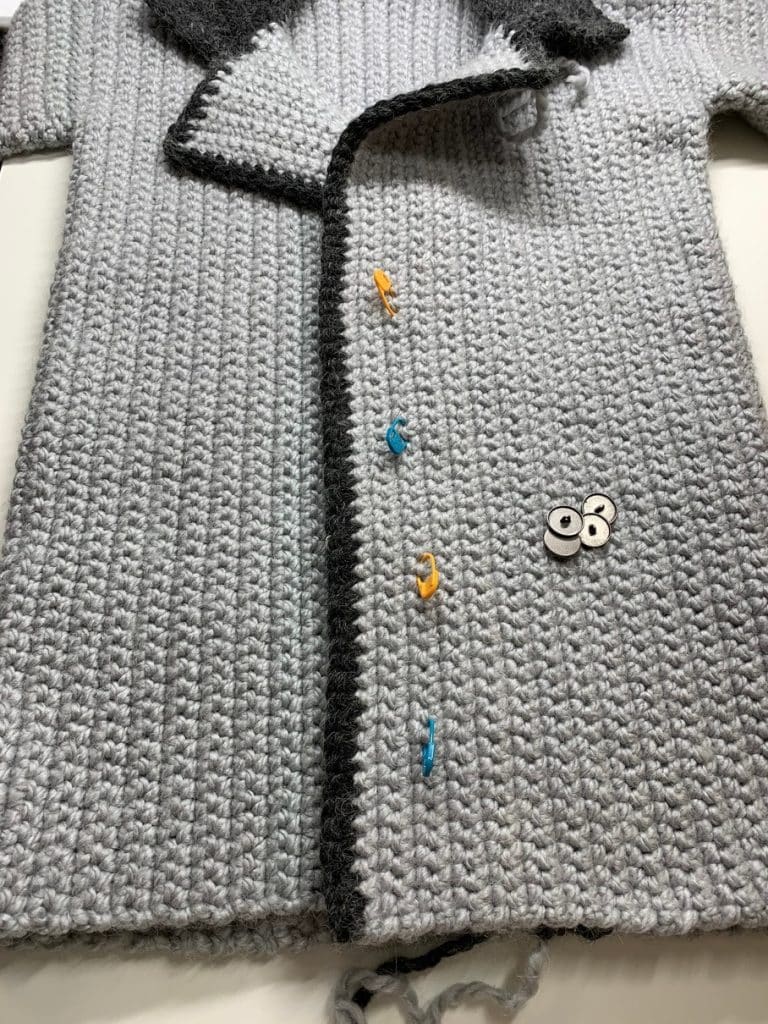
The placement of the buttons will depend on how you want your jacket to fit. I will give some written instructions below but you can adjust these to your preference.
We’ll sew the buttons into the left front panel(when you’re wearing it).
Starting at the bottom, count 8 stitches up and 6 rows in for the placement of your first button. Place a stitch marker into the 9th stitch and count up another 8 stitches, repeating the same until you have 4 buttons. Weave all the ends. (Check the picture below).
