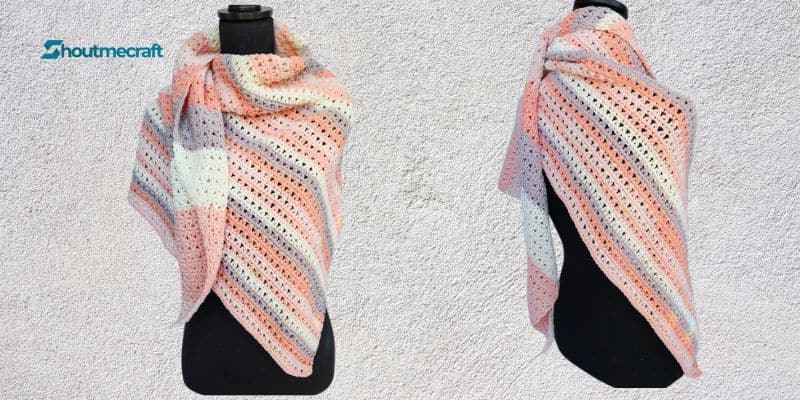
The crochet wrap design for the In Bloom crochet triangular shawl is simple to make and ideal for springtime crocheting. The crossing double crochet stitch lends charm to this asymmetrical crochet shawl design, which comes together swiftly and effortlessly.
For this crochet triangular shawl, you can use your chosen yarn or, for added individuality, a self-striping Caron Cotton Cake, like I have.
You may make beautiful gifts with this crochet design for every woman in your life. Birthday, Mother’s Day, or just because gifts. She will adore it!
Skill Level : Advanced Beginner
Yarn Requirements
- Medium (4) weight yarn of your choice. You will need approximately: 17.5 ounces or 1,060 yards.
Yarn Used
- Caron Cotton Cakes in colorway Frozen Yogurt. I used just shy of 2 cakes.
Tools & Notions
- 5 mm (H-8) hook Scissors Tapestry needle
- Stitch markers, if you prefer them
Size
- Depth: Approx 31 inches
- Wingspan: Approx 63 inches
Abbreviations
Abbreviations are in Standard US terms.
- Ch – Chain
- Sc – Single crochet
- Dc – Double crochet
- St – Stitch
- CDC – Crossed double crochet* See special stitch on next page.
Pattern Notes
- Chain 1 does not count as a stitch,
- Ch – Chain
- Sc – Single crochet
- Dc – Double crochet
- St – Stitch
- CDC – Crossed double crochet* See special stitch on next page.
- Chain 2 always counts as a double crochet.
- This pattern works on a two row repeat. You can make this asymmetrical shawl as big or small as you prefer. Keep working the repeats until you have the shawl size you prefer.
- This shawl is asymmetrical. To achieve this, we always increase by one stitch on the same side of the shawl.
- The repeats will lead you through increasing.
- Each row adds one stitch to the stitch count.
- This pattern calls for a Magic Circle. However, if you prefer to use the chain 3, slip stitch to close method, you’re welcome to do so.
Gauge
Check gauge after Row 12. It should be approx 4 inches high along the straight side. Gauge won’t make or break this pattern. You can continue crocheting rows or stop crocheting rows when you reach your desired size.
Note: I am a tight crocheter, so my tension is usually tighter than others. Learn more about gauge and what this means here.
Special Stitch – CDC (Crossed Double Crochet)
The Crossed Double Crochet, or CDC, is worked over 2 stitches using 2 double crochet stitches. Here is how you will work a CDC:
Step One: Skip 1 stitch and place 1 double crochet in the next.
Step Two: Now we want to place a double crochet in the stitch we skipped.
We do not need to chain, go behind the post or do anything fancy here. Simply yarn over, insert your hook into the skipped stitch and finish the double crochet as normal.
Crossed Double Crochet completed!
When you see the pattern calling to “work 2 cdc”, you will know to work Step One and Step Two 2 times across the pattern. Once you’ve completed this row, every stitch of your row will be worked into.
Remember: There is a photo tutorial at the end of the PDF to help you through, if you need it.
Additionally, if you’d like a video tutorial.
This video tutorial is for a baby blanket, but it uses the same stitch and a similar repeat, so it will provide visual assistance.
Special Stitch – Magic Circle
This pattern is written to use a magic circle. You can use the magic circle or you can chain 3 and slip stitch to the first chain made to create a circle to work into. Your choice! If you don’t know how to work a magic circle but would like to learn, I do have my video tutorial here.
Pattern Instructions
Create a Magic Circle (click for tutorial) or chain 3, sl st to first ch made to form a circle.
Row 1 – In magic circle, ch 2 (does NOT count this time) and place 3 dc. (3)
Row 2 – Ch 1, turn. 2 sc first st, 1 sc next 2 stitches. (4)
Row 3 – Ch 2 (counts here and throughout), turn. Work 1 cdc across the row, place 2 dc in last st. (5)
Row 4 – Ch 1, turn. 2 sc first st, 1 sc each st to end. (6)
Row 5 – Ch 2 , turn. Place 2 cdc across the row, place 2 dc in last st. (7)
Row 6 – Ch 1, turn. 2 sc first st, 1 sc each st to end. (8)
Row 7 – Ch 2, turn. Place cdc’s across the row until 1 st remains, place 2 dc in last st. (9)
Rows 8 through 146 – Repeat Rows 6 and 7 in sequence.
For example, Row 8 will be a repeat of Row 6 and Row 9 will be a repeat of Row 7.
Alternatively, you can work the two repeat rows until you reach the size you prefer.
Working through Row 146 will bring you to the size listed in the pattern specifications at the top of the PDF.
Your last repeat (if you reach Row 146 or you’re working to your own length), should be a repeat of Row 6 (the single crochet row).
Finish off, weave ends. You can add a border if you prefer, in the sample you see I chose not to.
Depending on the yarn you’ve chosen, you may prefer to block your shawl (100% acrylic yarn may need blocking). I did not block mine as the cotton blend held the shape well.
Picture Tutorial – Crossed Double Crochet
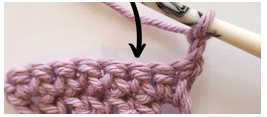
Step One: Skip 1 stitch.
If you’re not used to counting the chain 2 as a stitch, it kind of looks like you’re skipping 2 stitches. But remember, that chain 2 counts so we are technically skipping one.
Double crochet in the next stitch. A black arrow in the image above shows you which stitch to put a double crochet in.
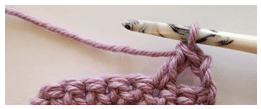
This is what your work should look like.
Step Two: Now we want to place a double crochet IN the stitch we skipped. The next image shows the stitch to work into.
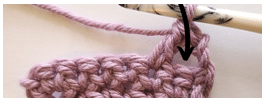
We do not need to chain, go behind the post or do anything fancy here. Simply yarn over, insert your hook into the skipped stitch, pull up a loop. Yarn over, pull through two, yarn over pull through two.
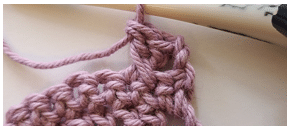
The above image is how your finished crossed double crochet looks. For all following “cdc”, work the steps above across the row.
Row 1: In Magic Circle, chain 2 (does NOT count this time) and place 3 dc. (3)
After completing this, you should have 3 stitches.
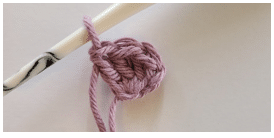
Row 2 – Ch 1, turn. 2 sc first st, 1 sc next 2 stitches. (4)
To create the asymmetrical triangle, we only increase on one side. In your first stitch, place 2 single crochet.
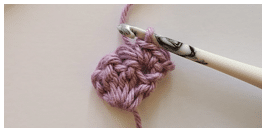
Once you’ve placed 2 single crochet in the first stitch, place 1 single crochet in each of the last two stitches.
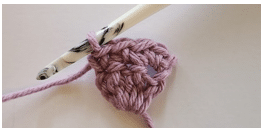
At the end of this row, you’ll have 4 stitches (up from 3 because we worked an increase at the beginning).
The side we put the increase on in this row will be the side we ALWAYS increase on. So on the next row, the increase will be in the last stitch.
Row 3 – Ch 2 (counts here and throughout), turn. Work 1 cdc across the row, place 2 dc in last st. (5)
To begin this row, chain 2 and turn. We are going to work one crossed double crochet on this row. The pictures below show me doing this, but refer to the cdc stitch tutorial for an in depth walkthrough.
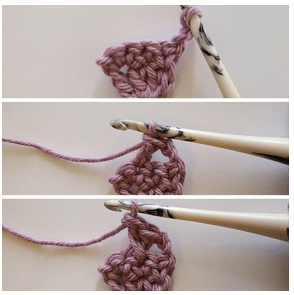
Once we’ve completed this crossed double crochet, we have one stitch remaining.
Place two double crochet in the last stitch, which completes our increase. We now have 5 stitches at the end of this row instead of four.
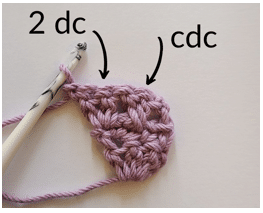
This is what your work should look like so far. I’ve labeled the stitches above so you can identify them.
Row 4 – Ch 1, turn. 2 sc first st, 1 sc each st to end. (6)
The same as Row 2, we chain 1 and turn. Place 2 single crochet in the first stitch and one in each of the remaining stitches. At the end, we will now have 6 stitches.
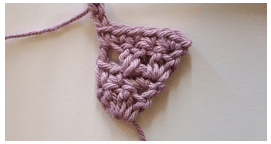
This is what your work should look like after Row 4.
Row 5 – Ch 2 , turn. Place 2 cdc across the row, place 2 dc in last st. (7)
This row is similar to Row 3 (and all the following rows that have cdc in them). To begin this row, chain 2 and turn. We will work 2 crossed double crochet across this row.
The pictures below show me doing this, but refer to the cdc stitch tutorial for an in depth walkthrough.
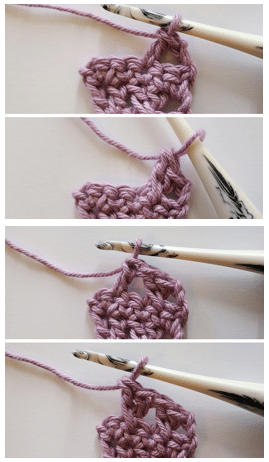
Here I’ve completed two crossed double crochet. There is one stitch remaining.
We want to put two double crochet in the last stitch to increase. At the end of this row, we have 7 stitches.
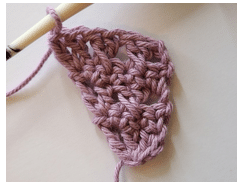
This is how your work will look at the end of Row 5.
As we continue working up rows, the crossed double crochet stitches will begin standing on their own more and be much more noticeable.
All the following rows are worked exactly the same. The only difference in each row is that they will always grow by one stitch. You’ll notice that on your next crossed double crochet row, you’ll work three crossed double crochet, and then four on the next cdc row, and then five, etc.
This is an asymmetrical shawl, so the triangle is going to grow on only one side.
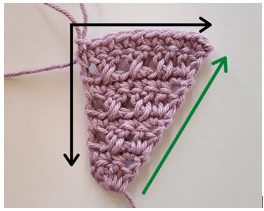
The above image shows how this triangle is increasing. The black arrows indicate a 90 degree angle, which will always be “straight”. The green arrow indicates the side of the shawl we are increasing on, and you can see how it slowly increases to make a wider shawl.
The increased side (green arrow) is your “wingspan” size. This is the side of the shawl that will wrap around your shoulders.
So, if you’re crocheting until the shawl reaches your preferred size, you’ll reference size based on the wingspan.
That’s all there is to it. Continue working rows for as long as you prefer, or as written in the pattern for approximately the same size as the design.