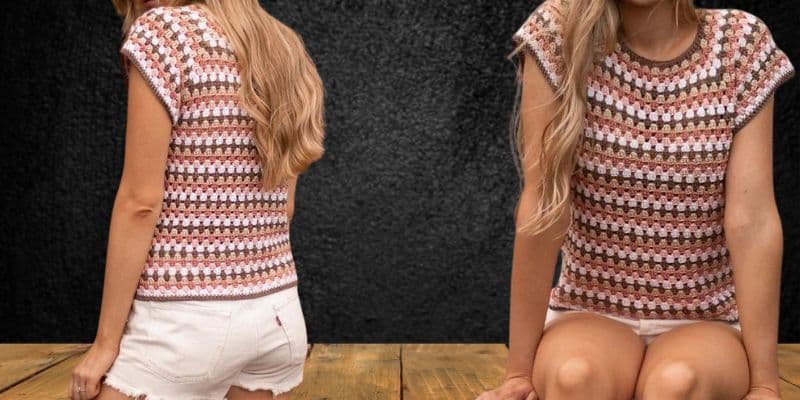
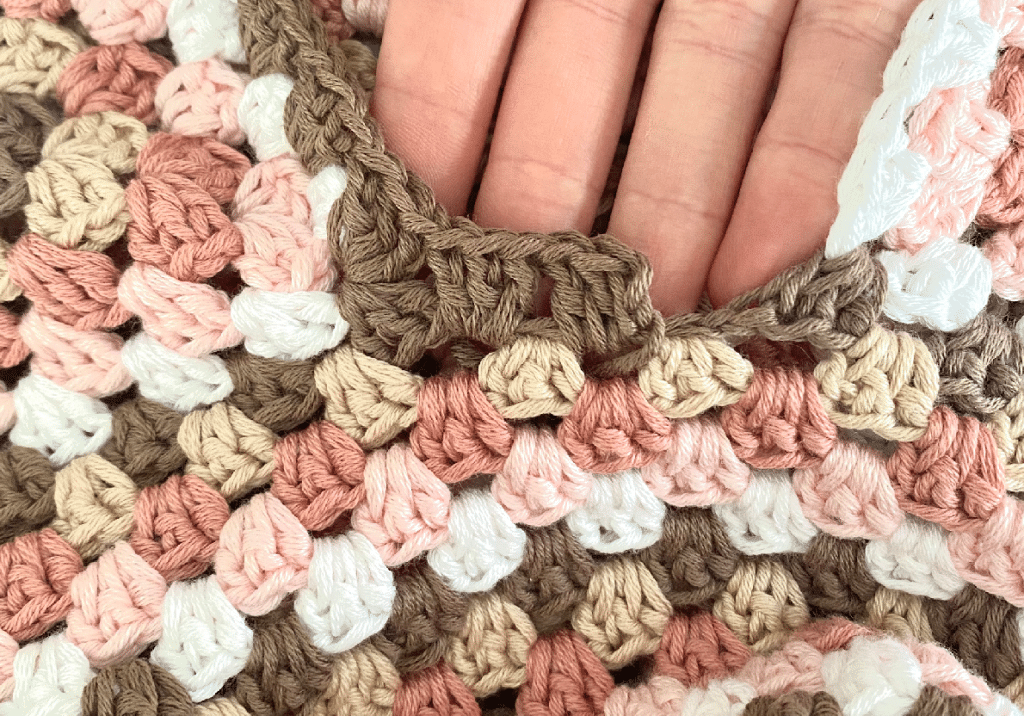
Quensha Top Crochet Pattern – One preconception connected with knitting and crochet is that they belong to “grandmas.” This is great; grandmas are wonderful, but I believe we should be free to pursue our preferred pastimes at any age. When someone asks you where you got this top—which they will—you can tell them you created it and that it is essentially granny stitch crocheted.
SKILL LEVEL : Easy +
MATERIALS
350, (375, 425, 475, 500), (550, 600, 650, 700) grams / 815, (870, 985, 1100, 1160), (1275, 1395,
1510, 1625) yards Lion Brand Coboo yarn; 1, (1, 1, 1, 1), (2, 2, 2, 2) balls in each color Taupe, Tan, Mauve, Pale Pink, and White.
Size G-6 (4.0 mm) crochet hook Tapestry Needle to weave in ends
NOTE ON YARN: To make this more cost effective, you can use more colors for the higher sizes and use more full balls. For example, with size 5X you may choose to use 7 colors, each in a 100g ball of yarn
GAUGE
14 stitches and 11 rows = 4” in granny stitch using size 4.0 mm crochet hook.
Note on gauge: We are counting each DC as a stitch NOT the 3DC clusters that makes up each gran- ny stitch cluster. This gauge is quite stretchy so be sure not to stretch fabric when you are measuring gauge.
CONSTRUCTION NOTES
This pattern is worked seamlessly from the top, down. You will begin at the neckline, increase in a raglan style to shape your sleeves and body, and then separate. Your body will be finished first, followed by each sleeve. This top is shown using 5 colors and switching after each row in the same order through- out the sweater. You may use more or less colors depending on your preference.
NOTE: In this pattern, the ch3 at the end each row counts as the first double crochet for the next row.

DIMENSIONS
XS, (S, M, L, XL), (2X, 3X, 4X, 5X)
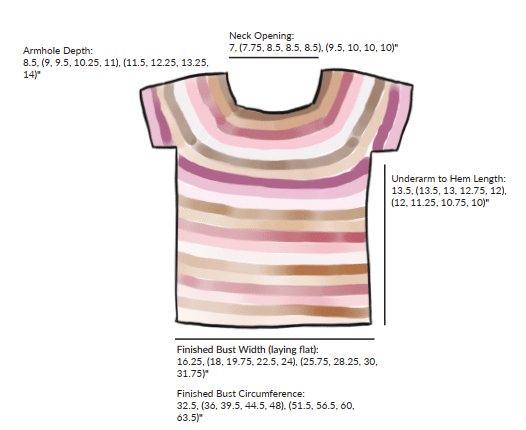
Bust/Chest Circumference: 32.5, (36, 39.5, 44.5, 48), (51.5, 56.5, 60, 63.5)”
Length: 22.5, (23, 23, 23.5, 23.5), (24, 24, 24.5, 24.5)”
Pattern is written for smallest size with changes for larger sizes in parenthesis. When only one number is given, it applies to all sizes. To keep track of your size, you may highlight or circle all numbers for your chosen size before you begin.
ABBREVIATIONS (Crochet):
This pattern is written using U.S. English terminology
- [ ] = work instructions within brackets as many times as directed.
- ( ) = work instructions within parenthesis as directed.
- * = repeat the instructions following the single asterisk as directed.
- BLO = back loop only CH = chain stitch
- DC = double crochet
- GAP SP = gap space, this is referring to the gap that is creat- ed between each double crochet cluster
- HDC = half double crochet RS = right side
- SC = single crochet SLST = slip stitch SP = space
- ST = stitch STS = stitches
- WS = wrong side
HELP CHOOSING SIZE
This top is designed to be worn with 0-4” of positive ease. Model is 6’ tall, has a 33” bust, and is wear- ing a size Small with 3” of positive ease. For best fit, choose a size that is 0-4” larger than your corre- sponding bust measurement. For example, if your bust is 45”, you would wear a size XL.

PATTERN INSTRUCTIONS
In Color A, ch 86 (92, 98, 92, 92) (98, 104, 104, 104).
Round 1: in 3rd ch from hook, DC, DC across once in each ch. With new color, slst to join in round, ch3. [84, (90, 96, 90, 90), (96, 102, 102, 102) sts].
2: 2 DC in same st as ch, [skip 2 sts, 3 DC into next st] 5 (5, 5, 4, 4) (4, 4, 4, 4) times, ch2, [skip 2, 3 DC into next st] 8 (9, 10, 10, 10) (11, 12, 12, 12) times, ch2, [skip 2, 3 DC into next st] 6 (6, 6, 5, 5) (5, 5, 5, 5) times, ch2, [skip 2, 3 DC into next st] 8 (9, 10, 10, 10) (11, 12, 12, 12) times, ch2. With new color, slst to join with 1st st, ch3. [92, (98, 104, 98, 98), (104, 110, 110, 110) sts].
Note: You have now set up to shape your raglans. Your piece will look like a rectangle and each ch2 space is a corner. The second and fourth sides will be the body, and the first and third sides will be the sleeves. You will now increase in the chain spaces on each row to shape the raglan yoke.
3: 2 DC in the ch sp right below the slst, 3 DC in each gap space to the ch2 sp, * (3 DC, ch2, 3 DC) in the ch2 sp, 3 DC in each gap sp to the next ch2 sp. Rep from * to last ch sp, 3 DC, ch2, slst with new color to join, ch3. [104, (110, 116, 110, 110), (116, 122, 122, 122) sts].
Repeat row 3 9, (10, 11, 14, 16), (17, 19, 21, 23) more times. [212, (230, 248, 278, 302), (320, 350, 374, 398) sts].
4: 2 DC in the ch sp right below the slst, 3 DC in each gap sp to the ch2 sp, * (3 DC, ch1, 3 DC) in the ch2 sp, 3 DC in each gap sp to the next ch2 sp. Rep from * to last ch sp, 3 DC, ch1, slst with new color to join, ch3. [220, (238, 256, 286, 310), (328, 358, 382, 406) sts].
5: 2 DC in the ch sp right below the slst, 3 DC in each gap sp to the ch1 sp, *3 dc in the ch 1 sp, 3 DC in each gap sp to the next ch1 sp. Rep from * to last ch sp, slst with new color to join, ch3. [216, (234, 252, 282, 306), (324, 354, 378, 402) sts].
Body:
You will now separate your yoke to form two sleeves and join the body of your sweater.
6: 2 DC in ch sp below slst, ch6, skip next 17 (18, 19, 21, 23) (24, 26, 28, 30) gap spaces, 3 DC in next 19 (21, 23, 26, 28) (30, 33, 35, 37) gap spaces, ch6, skip next 17 (18, 19, 21, 23) (24, 26, 28, 30) gap spaces, 3 DC in each gap sp to end of round, slst with new color to join, ch3. [120, (132, 144, 162, 174), (186, 204, 216, 228) sts].
7: skip 4 sts, 3 DC in 5th st (the second ch of the ch6), skip 2, 3 DC in next st, 3 DC in each gap sp until next ch6 sp, 3 DC in second ch st, skip 2, 3 DC in next ch st, 3 DC in each gap sp until last st, 2 DC in the final gap st next to the ch3, slst with new color to join, ch3.
8: 2 DC in ch sp below slst, 3 DC in each gap sp to end of round, slst with new color to join, ch3.
9: skip the gap sp below the slst join, 3 DC in next gap sp, 3 DC in each gap sp to end of round, 2 DC in gap sp under slst join, slst with new color to join, ch3.
Repeat rounds 8-9 until body measures 13.5, (13.5, 13, 12.75, 12), (12, 11.25, 10.75, 10)” from underarm join. You may work more or less rows at this point to make your top longer or shorter. On the last round, ch2 at the end instead of ch3.
Final Round: 1 DC in each st around (be sure to work into the stitches, not the gap spaces), slst to join.
Pull the last stitch all the way through to secure, cut yarn leaving a tail to weave in.
Sleeves:
You will now work each sleeve.
Starting at the center underarm st, begin working in the color next in sequence for your sleeves. See fig. 1 for help understanding where your underarm st clusters will go.

1: ch3 into center underarm sp, 2 DC in this same sp, 3 DC in each gap sp around sleeve, slst with new color to join, ch3. [60, (63, 66, 72, 78), (81, 87, 93, 99) sts].
2: skip the gap sp below the slst join, 3 DC in next gap sp, 3 DC in each gap sp to end of round, 2 DC in gap sp under slst join, slst with new color to join, ch3. 3: 2 DC in ch sp below slst, 3 DC in each gap sp to end of round, slst with new color to join, ch3.
Repeat rounds 2-3 once more. You may work more rows at this point if you want your sleeves to be longer.
Final Round: 1 DC in each st around (be sure to work into the stitches, not the gap spaces), slst to join.
Pull the last stitch all the way through to secure, cut yarn leaving a tail to weave in.
Repeat for second sleeve.
Finishing:
Weave in all ends to secure.
To block, soak in warm water and lay flat to dry. Enjoy!