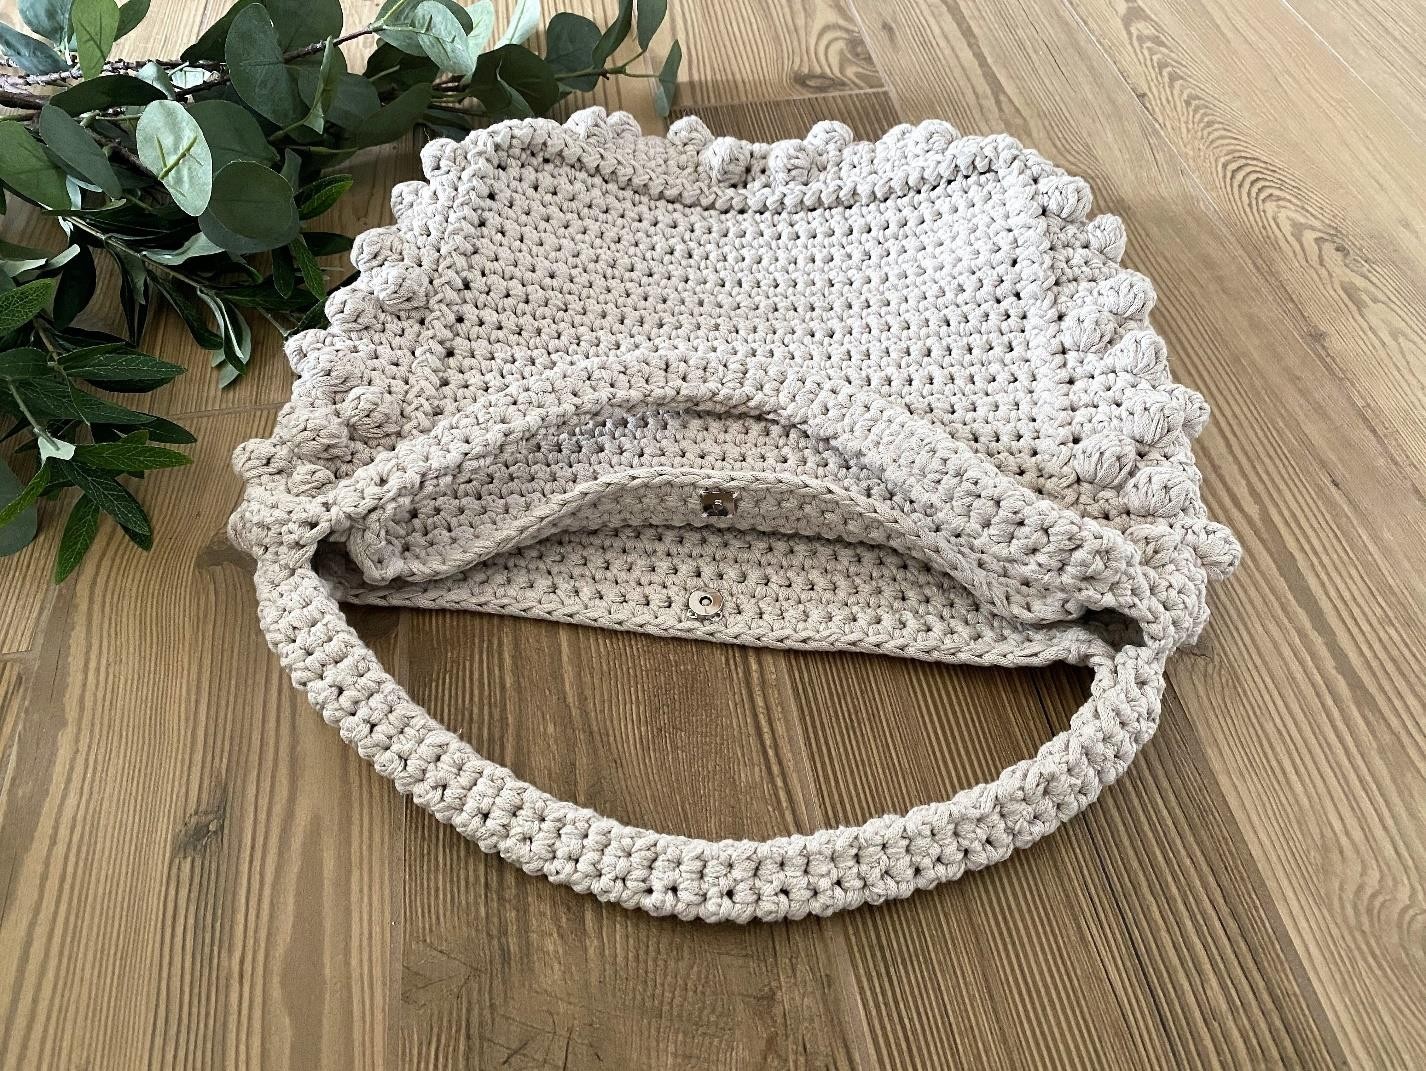
Patten includes all necessary information for bag making process. It is very detailed and has a lot of photos.
FINISHED MEASUREMENTS
- Width 39 cm (15,5“)
- Height till the handle 27 cm (10,5“)
- Depth 12 cm (5“)
- Handle length 42 cm (16,5“)
MATERIALS
Crochet hook: 6 mm (US J-10)
USED Yarn:
Name and weight: Super Bulky (5-6 wpi) HOOOKED RIBBONXL
Colour: SANDY ECRU
Meterage: 131 yards (120 meters)
Unit weight: 250 grams (8.82 ounces)
Quantity: 3 balls
* You can use the yarn of other producers with the same characteristics.
GUAGE:
11 stitches and 12 rows = 4 inches (10cm) in single crochet
STITCH CLOSSARY AND SYMBOLS
1. Chain

2. Single crochet USA (in UK double crochet)

3. Cluster (in UK Treble Cluster)
YO, insert hook in stitch & draw up a loop, YO & draw through 2 loops on hook repeat 3 times into the same stitch (you should end up with 5 loops on the hook), YO & draw through all loops on hook.
4. Bobble – to make the bobble make cluster into one stitch and single crochet into the next stitch
- Single crochet – sc
- Bobble – bob
- Repeat – rep
- Chain – ch
- RS – right side
- WS – wrong side
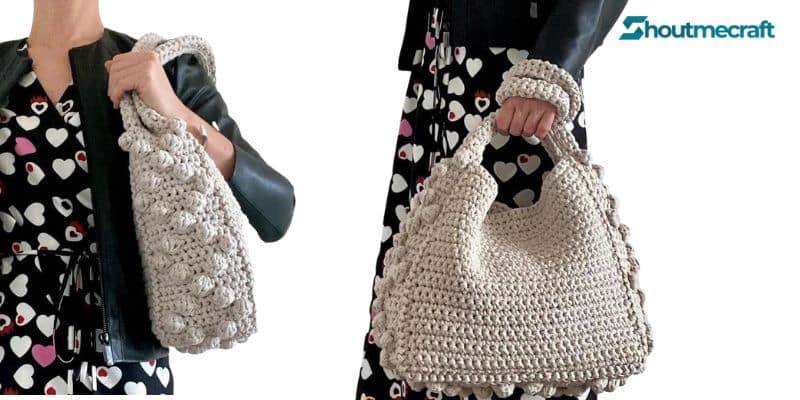
FRONT AND BACK PARTS
Row 1(RS): make chain of 31 sts, starting from the second chain make 30 sc, turnRows 2-28: ch1, 30 sc, turn
Finished crocheting fix the last stitch pathing the yarn tail through it.
Make the second piece by the same way!
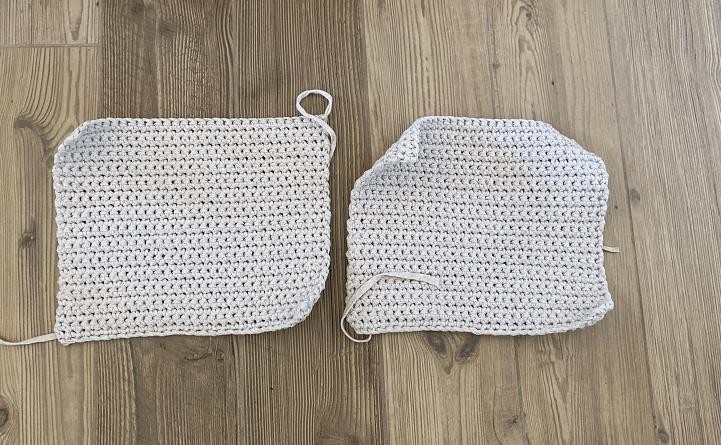
BOTTOM SIDES AND HANDLES PART
The Bottom, sides and handles part are crocheted as one piece.
Starts from the half of the bottom, coming to one side, after this coming to handle, after this coming to second side and at the end the second half of the bottom!
Starts with the first half of the bottom and 1 side! Video Link:
Row 1(RS): make chain of 13 sts, starting from the second chain make 12 sc, turn
Row 2: ch1, 1sc, bob, 6sc, bob, 1sc, turn
Row 3: ch1, 12sc, turn
Row 4: ch1, 3sc, bob, 2sc, bob, 3sc, turn
Row 5: ch1, 12sc, turn
Row 6: ch1, 5sc, bob, 5sc, turn
Row 7: ch1, 12sc, turn
Row 8: ch1, 3sc, bob, 2sc, bob, 3sc, turn
Row 9: ch1, 12sc, turn
Row 10: ch1, 1sc, bob, 6sc, bob, 1sc, turn
Row 11: ch1, 12sc, turn
Row 12: ch1, 3sc, bob, 2sc, bob, 3sc, turn
Row 13: ch1, 12sc, turn
Row 14: ch1, 5sc, bob, 5sc, turn
Row 15: ch1, 12sc, turn
Row 16: ch1, 3sc, bob, 2sc, bob, 3sc, turn
Row 17: ch1, 12sc, turn
Row 18: ch1, 1sc, bob, 6sc, bob, 1sc, turn
Row 19: ch1, 12sc, turn
Row 20: ch1, 3sc, bob, 2sc, bob, 3sc, turn
Row 21: ch1, 12sc, turn
Row 22: ch1, 5sc, bob, 5sc, turn
Row 23: ch1, 12sc, turn
Row 24: ch1, 3sc, bob, 2sc, bob, 3sc, turn
Row 25: ch1, 12sc, turn
Row 26: ch1, 1sc, bob, 6sc, bob, 1sc, turn
Row 27: ch1, 12sc, turn
Row 28: ch1, 3sc, bob, 2sc, bob, 3sc, turn
Row 29: ch1, 12sc, turn
Row 30: ch1, 5sc, bob, 5sc, turn
Row 31: ch1, 12sc, turn
Row 32: ch1, 3sc, bob, 2sc, bob, 3sc, turn
Row 33: ch1, 12sc, turn
Row 34: ch1, 1sc, bob, 6sc, bob, 1sc, turn
Row 35: ch1, 12sc, turn
Row 36: ch1, 3sc, bob, 2sc, bob, 3sc, turn
Row 37: ch1, 12sc, turn
Row 38: ch1, 5sc, bob, 5sc, turn
Row 39: ch1, 12sc, turn
Row 40: ch1, 3sc, bob, 2sc, bob, 3sc, turn
Row 41: ch1, 12sc, turn
Row 42: ch1, 1sc, bob, 6sc, bob, 1sc, turn
Row 43 (RS): ch1, 12sc, turn
Row 44 (WS): ch1, 12sc, turn
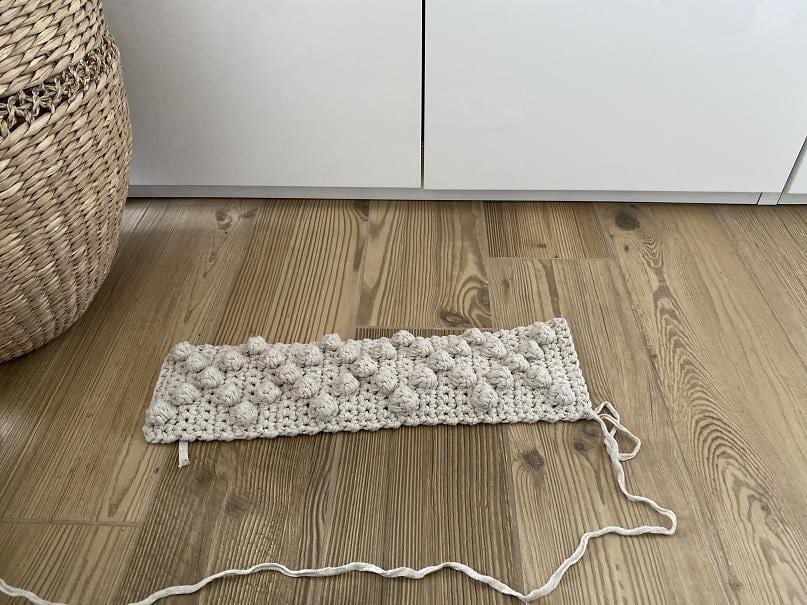
Continue crocheting the handle part in the same piece! Video Link:
Row 1-43: ch1, 5sc, turn
Finished crocheting fix the last stitch pathing the yarn tail through it.
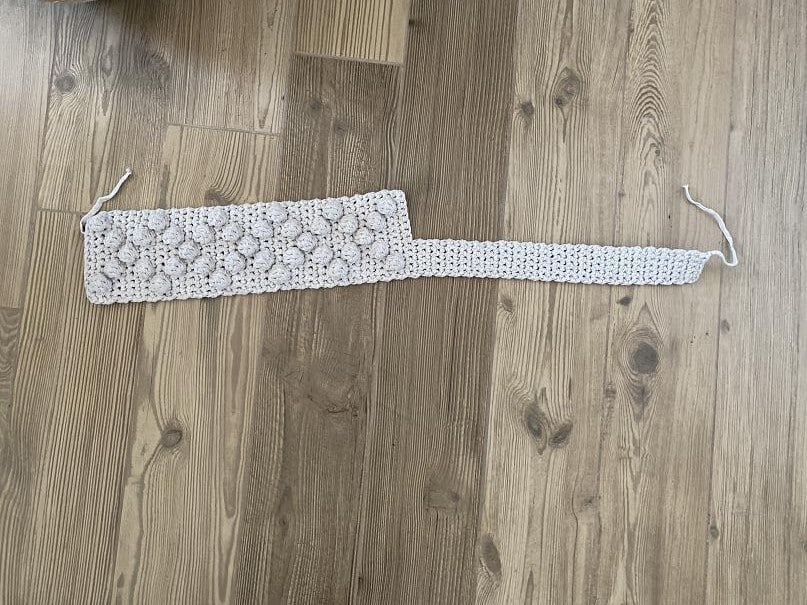
Attach yarn to the fifth stitch counted from the other side and start crocheting the second part of the handle. First Row should be made from the Right Side!
Row 1-43: ch1, 5sc, turn
Finished crocheting DON’T FIX the last and leave it free as the next row will starts from it!
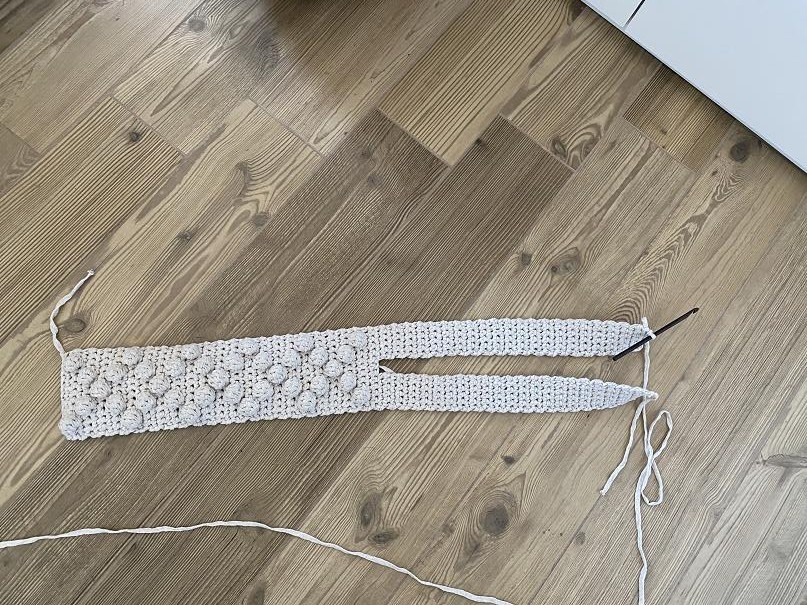
Next Row should be crocheted from the Wrong side!
Row 44: ch 1, 5sc, 2ch, 5sc into thr second part of the handle, turn
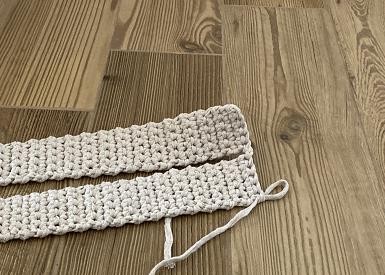
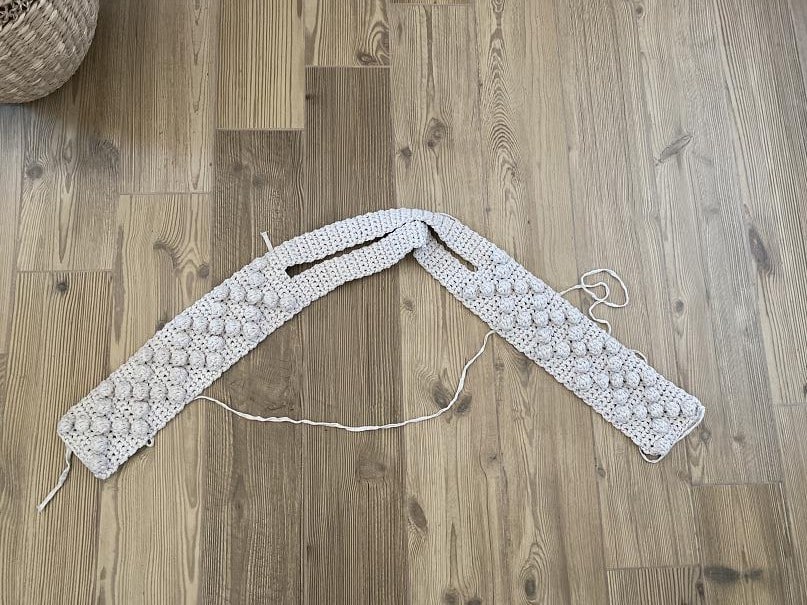
Finish with the second side and second half of the bottom!
Video Link:
Row 1(RS): ch1, 12 sc, turn
Row 2: ch1, 1sc, bob, 6sc, bob, 1sc, turn
Row 3: ch1, 12sc, turn
Row 4: ch1, 3sc, bob, 2sc, bob, 3sc, turn
Row 5: ch1, 12sc, turn
Row 6: ch1, 5sc, bob, 5sc, turn
Row 7: ch1, 12sc, turn
Row 8: ch1, 3sc, bob, 2sc, bob, 3sc, turn
Row 9: ch1, 12sc, turn
Row 10: ch1, 1sc, bob, 6sc, bob, 1sc, turn
Row 11: ch1, 12sc, turn
Row 12: ch1, 3sc, bob, 2sc, bob, 3sc, turn
Row 13: ch1, 12sc, turn
Row 14: ch1, 5sc, bob, 5sc, turn
Row 15: ch1, 12sc, turn
Row 16: ch1, 3sc, bob, 2sc, bob, 3sc, turn
Row 17: ch1, 12sc, turn
Row 18: ch1, 1sc, bob, 6sc, bob, 1sc, turn
Row 19: ch1, 12sc, turn
Row 20: ch1, 3sc, bob, 2sc, bob, 3sc, turn
Row 21: ch1, 12sc, turn
Row 22: ch1, 5sc, bob, 5sc, turn
Row 23: ch1, 12sc, turn
Row 24: ch1, 3sc, bob, 2sc, bob, 3sc, turn
Row 25: ch1, 12sc, turn
Row 26: ch1, 1sc, bob, 6sc, bob, 1sc, turn
Row 27: ch1, 12sc, turn
Row 28: ch1, 3sc, bob, 2sc, bob, 3sc, turn
Row 29: ch1, 12sc, turn
Row 30: ch1, 5sc, bob, 5sc, turn
Row 31: ch1, 12sc, turn
Row 32: ch1, 3sc, bob, 2sc, bob, 3sc, turn
Row 33: ch1, 12sc, turn
Row 34: ch1, 1sc, bob, 6sc, bob, 1sc, turn
Row 35: ch1, 12sc, turn
Row 36: ch1, 3sc, bob, 2sc, bob, 3sc, turn
Row 37: ch1, 12sc, turn
Row 38: ch1, 5sc, bob, 5sc, turn
Row 39: ch1, 12sc, turn
Row 40: ch1, 3sc, bob, 2sc, bob, 3sc, turn
Row 41: ch1, 12sc, turn
Row 42: ch1, 1sc, bob, 6sc, bob, 1sc, turn
Row 43 (RS): ch1, 12sc, turn
ASSEMBLING
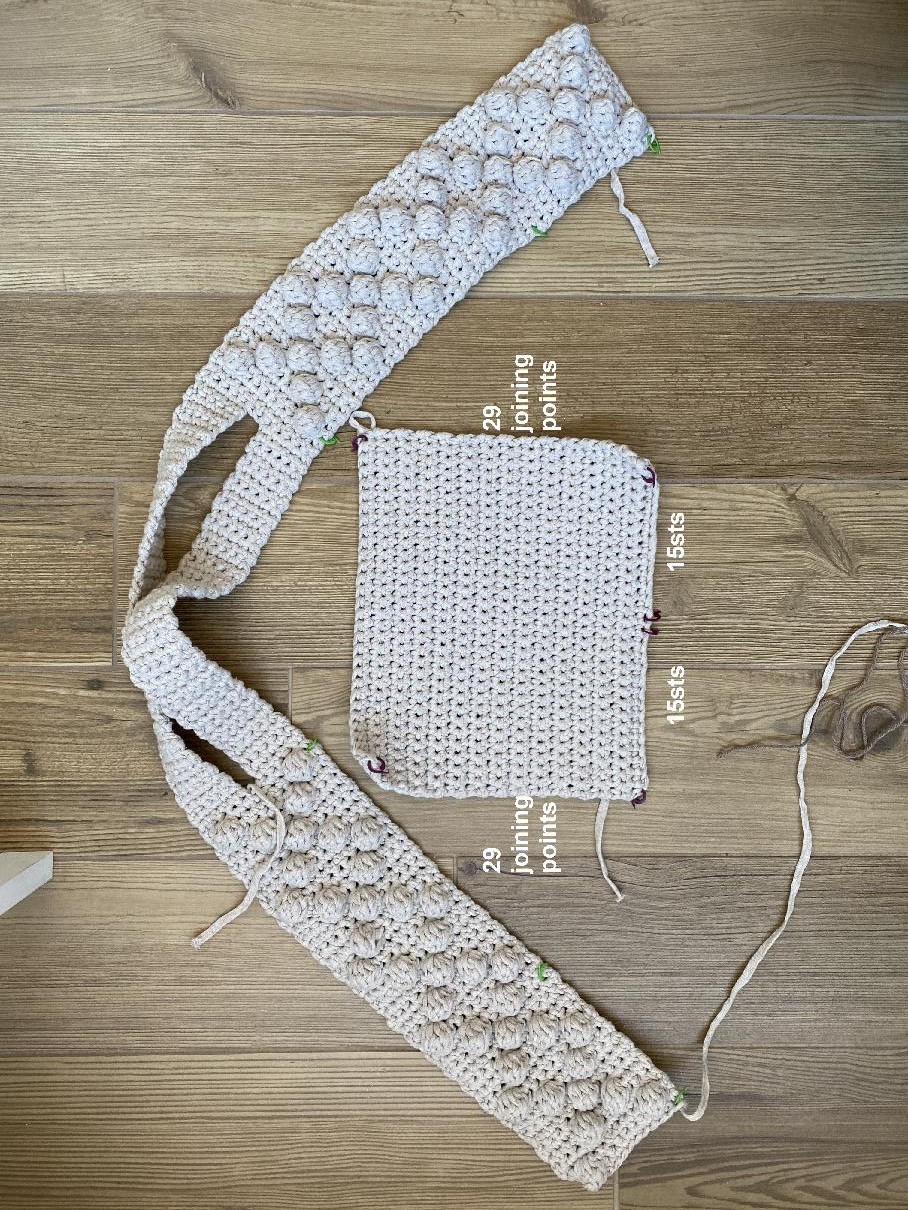
To make assembling more easy mark the joining points
Put the markers into each angle of the front and back parts and pout the markers into 2 middle stitches of the bottom of front and back parts!
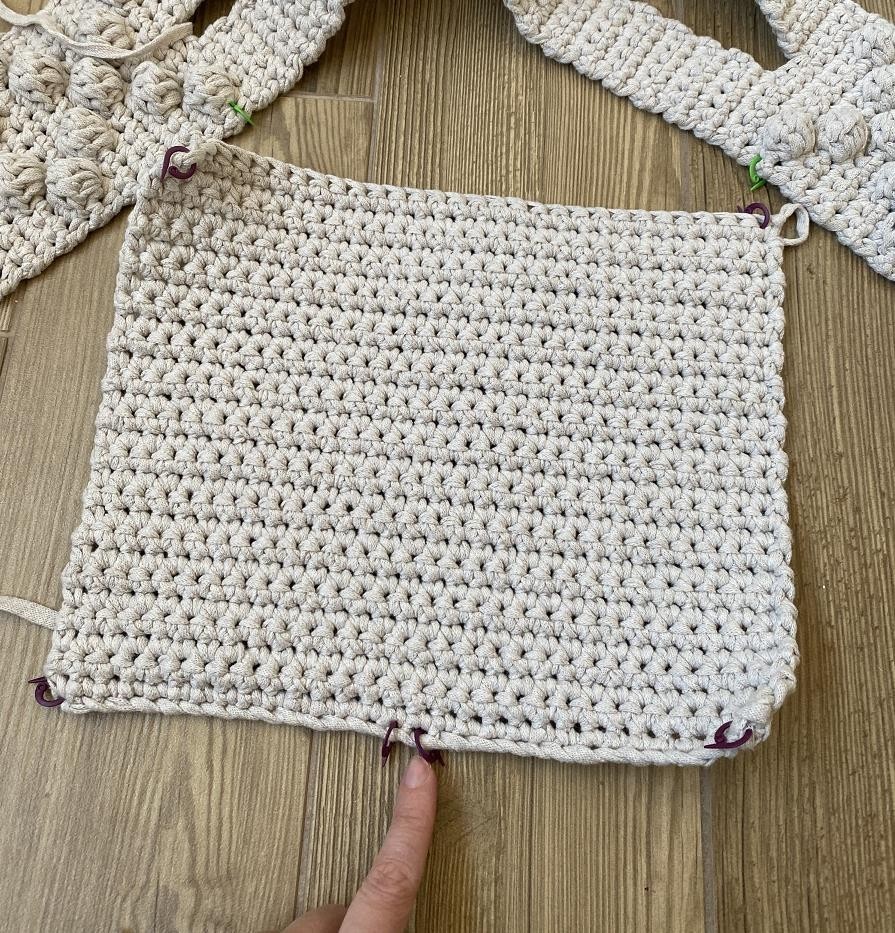
Put the markers to each side of the Bottom, Sides, Handle Part
One marker to the angle, one marker to the 15th joining point (row) counting the marker as the first and the second marker to the 29th joining point (row) counting second marker as the first one
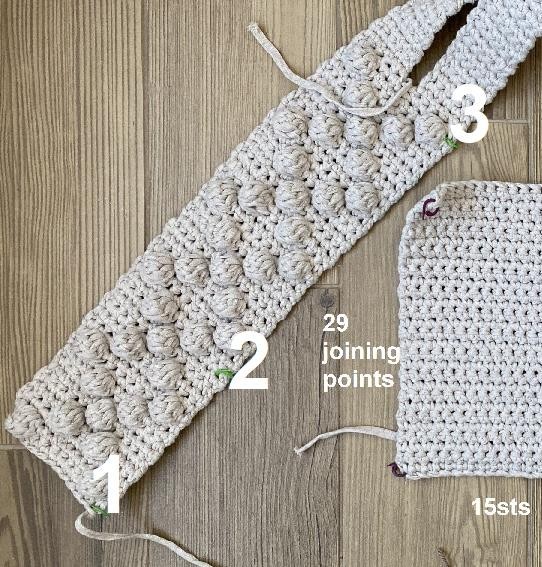
Start joining the parts from the top angle of the front part and the third marker of the Bottom, Sides, Handle Part
Making slip stitch to one and second parts repetitively
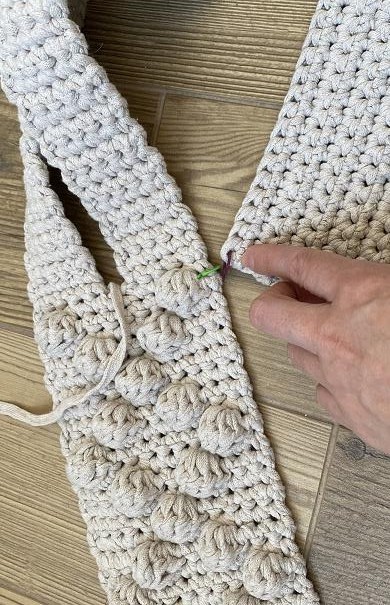
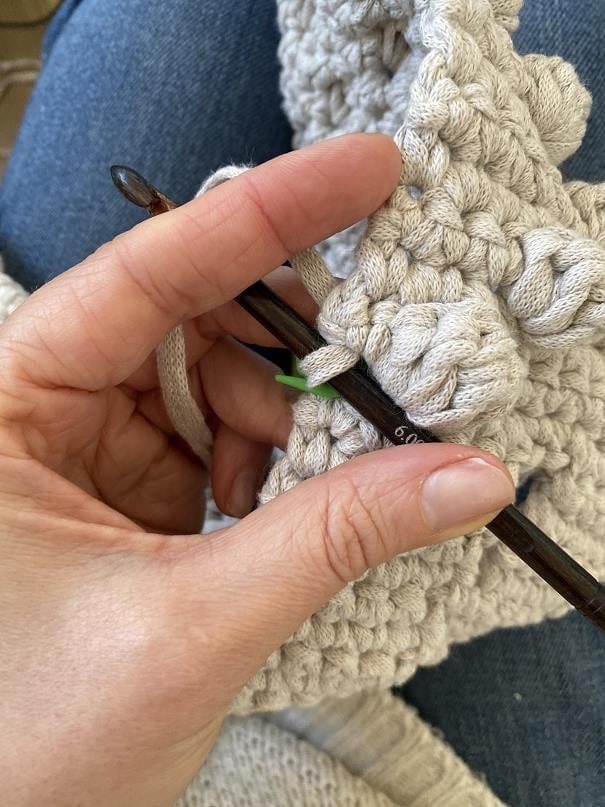
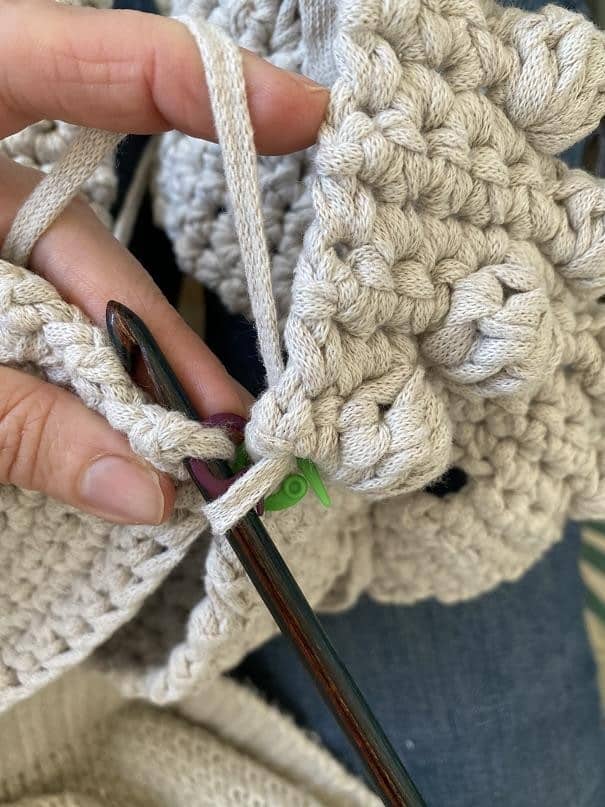
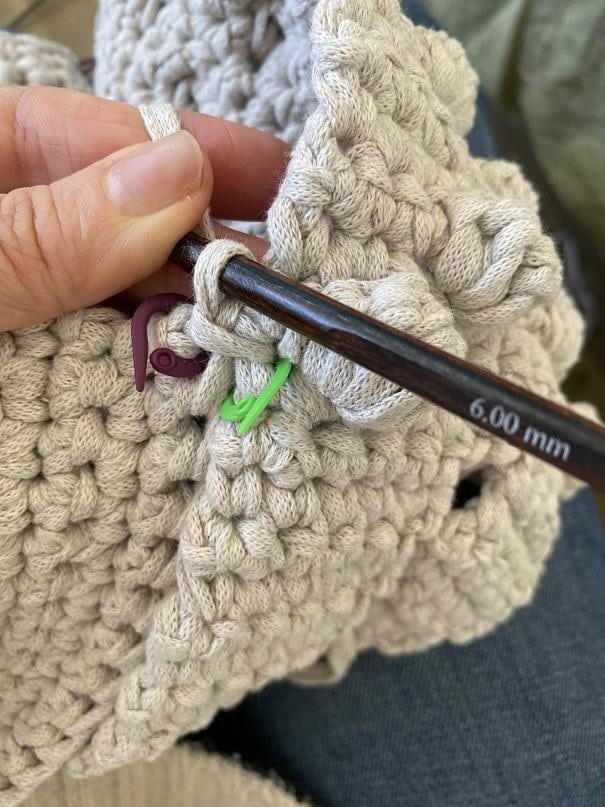
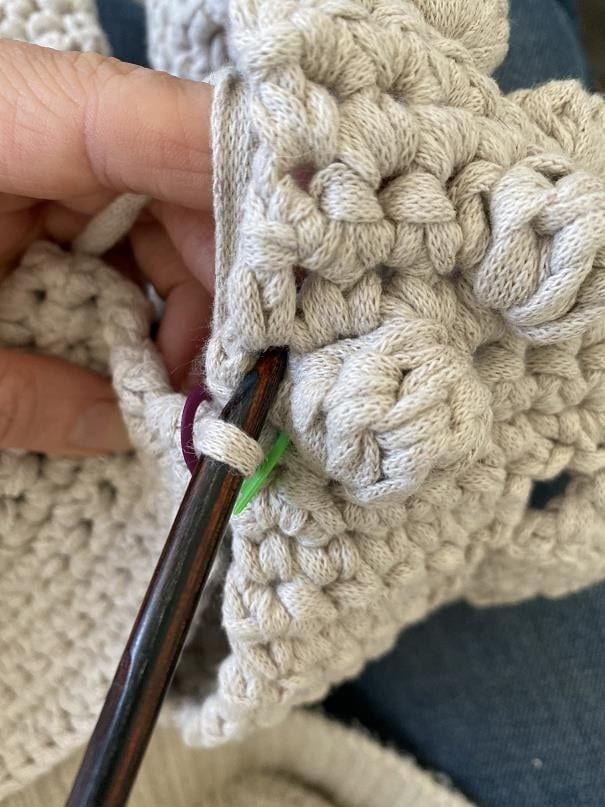
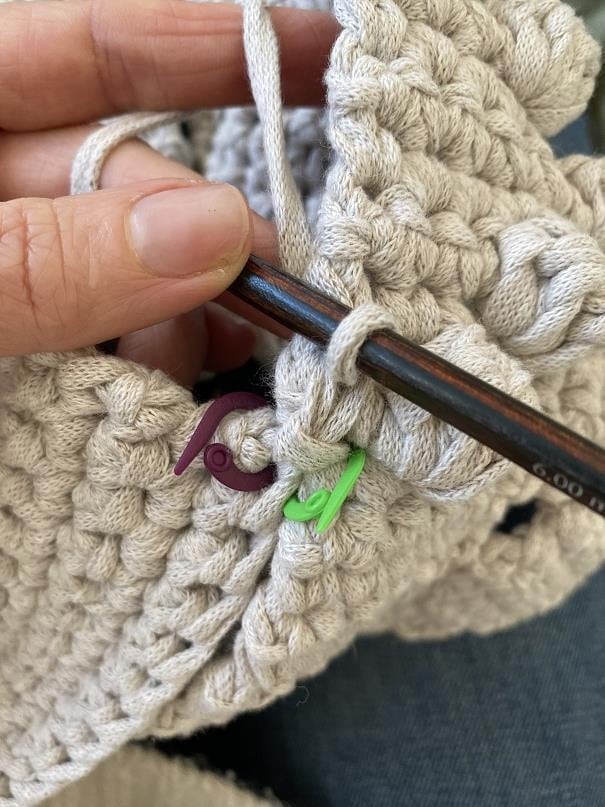
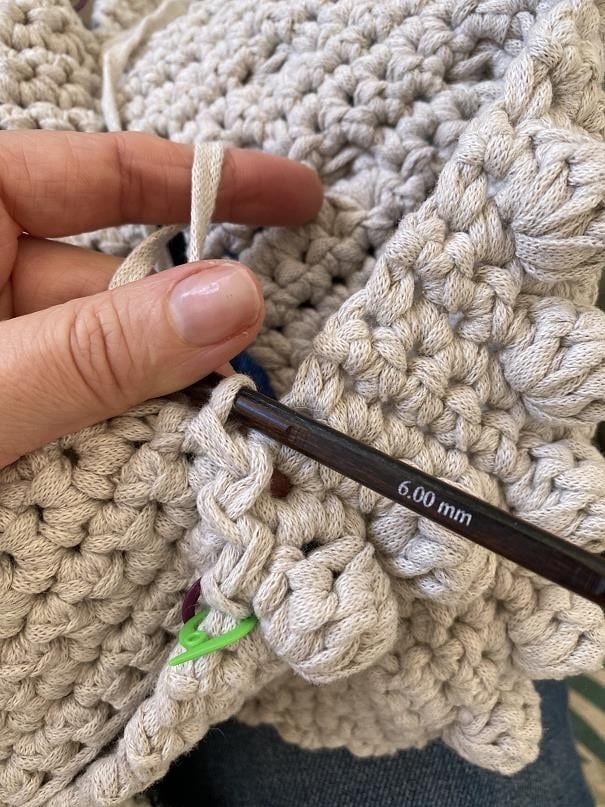
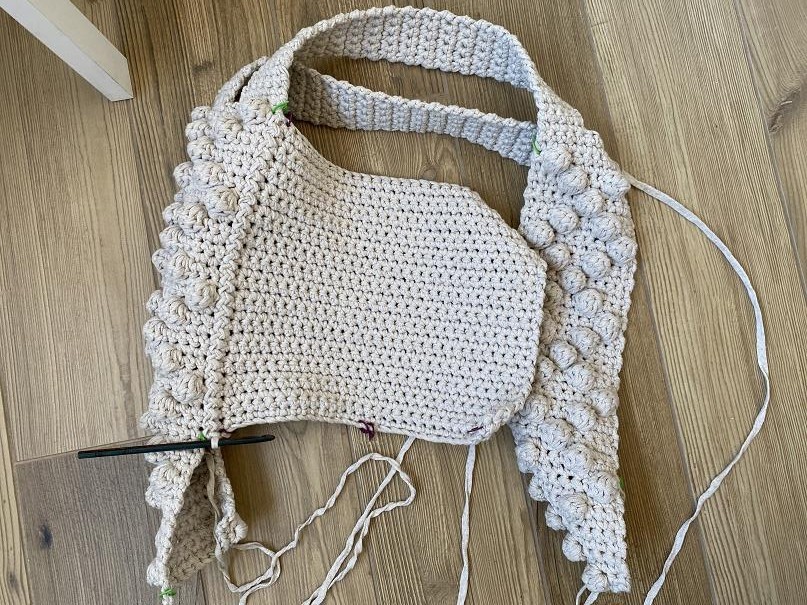
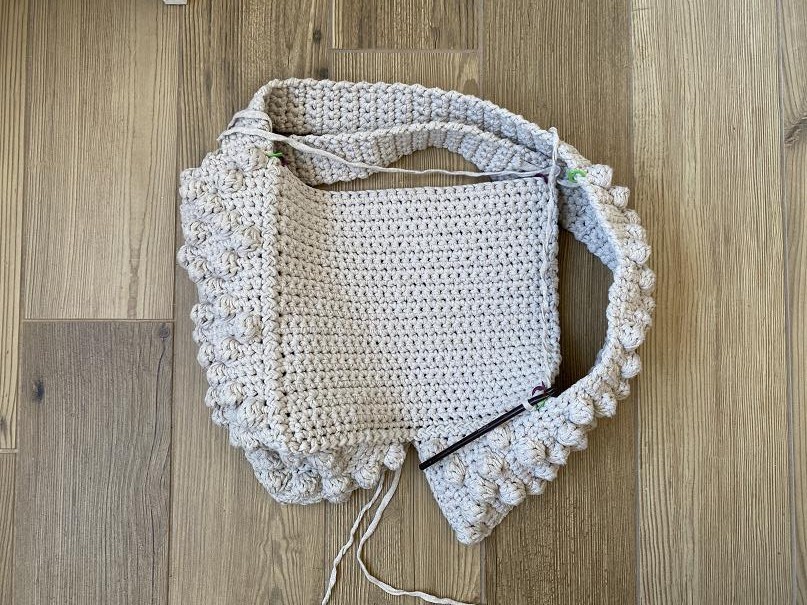
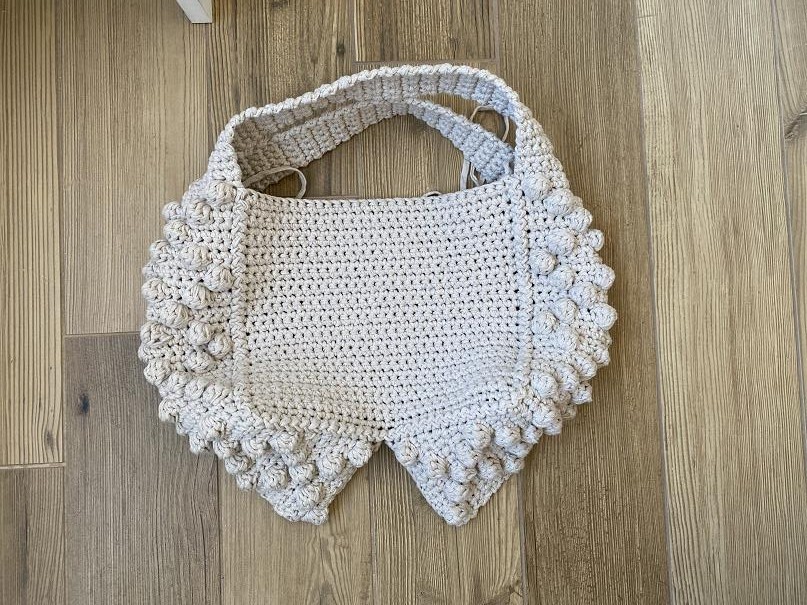
While joining the parts check the marker points to be sure that you are not missing any joining point from any of the side.
Finished assembling of the parts CLOSE THE BOTTOM. I just path the yarn tail from side to side closing it stitch by stitch.
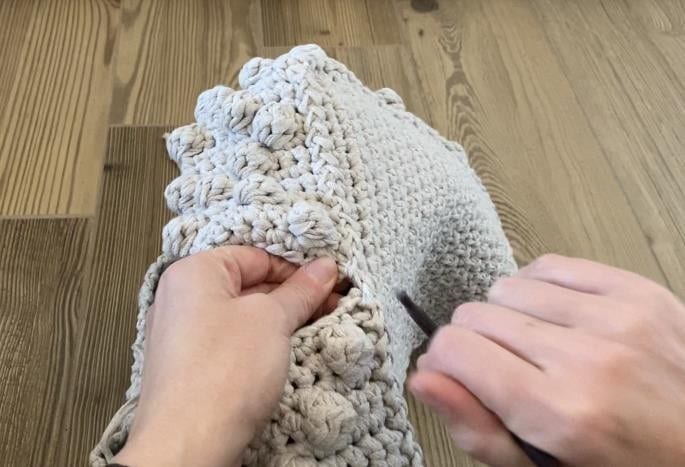
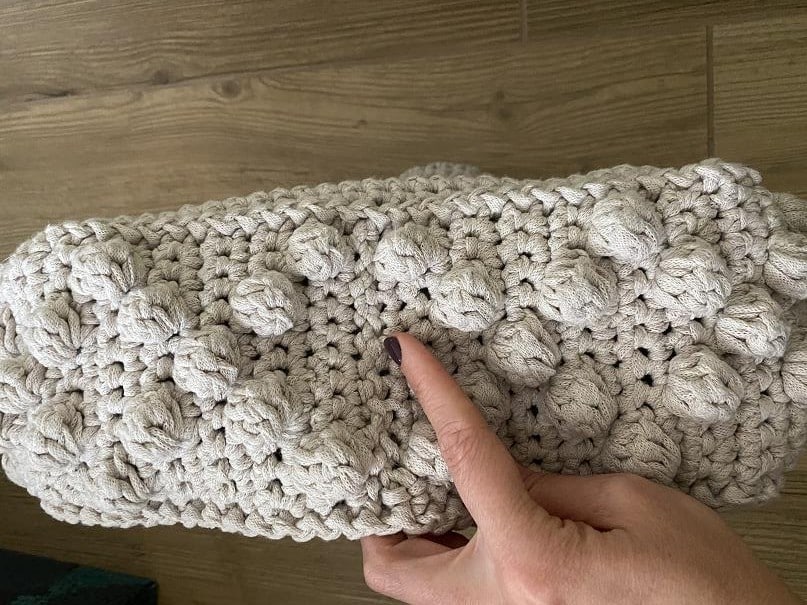
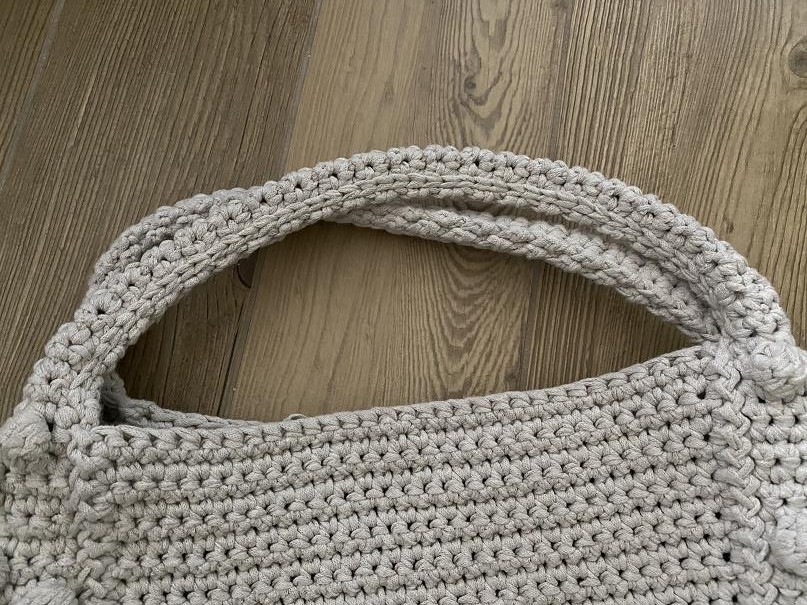
FINISH HANDLES joining 2 sides of each handle by slip stitch
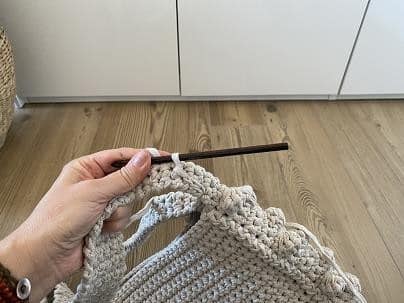
Attach magnetic closure. Your bag is ready!
