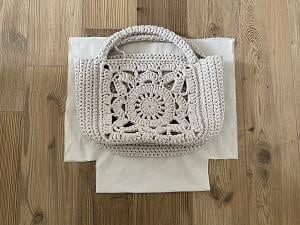
Patten includes all necessary information for bag making process including bottom reinforcement and lining. It is very detailed and has a lot of photos. GUAGE
FINISHED MEASUREMENTS
- Width 40 cm (16“)
- Height till the handle 24 cm (9,5“)
- Depth 14 cm (5,5“)
- Handle length 34 cm (13,5“)
MATERIALS
Crochet hook: 5 mm (US H-8)
USED Yarn:
Name and weight: Super Bulky (5-6 wpi) HOOOKED RIBBONXL
Colour: SANDY ECRU
Meterage: 131 yards (120 meters)
Unit weight: 250 grams (8.82 ounces)
Quantity: 3 balls
* You can use the yarn of other producers with the same characteristics.
Lining fabric: 70cm x 50cm (28“ x 20“)
Magnetic closure for bags Tapestry needle
GUAGE:
11 stitches and 12 rows = 4 inches (10cm) in single crochet
STITCH CLOSSARY AND SYMBOLS
1. Chain
2. Single crochet USA (in UK double crochet)
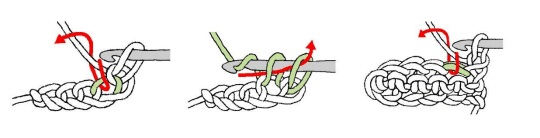
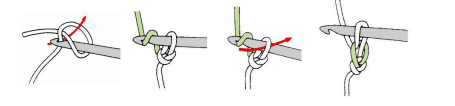
3. Double crochet (in UK treble)
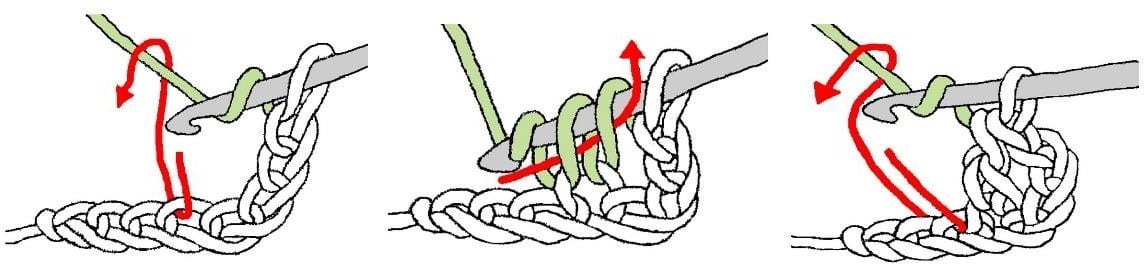
YO & insert hook into next st, YO & draw up a loop (3 loops on hook), (YO & draw through 2 loops) twice
4. Slip Stitch

Slip stitch is the shortest crochet stitch used for joining, shaping & taking yarn to another part of motif or work (button hole for example)
Single crochet – sc Double crochet – dc Repeat – rep
Chain – ch
Slip stitch – sl st
PATTERN IS WRITTEN IN USA TERMS!
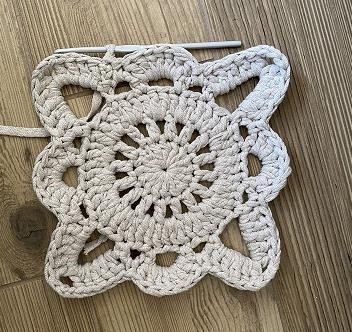
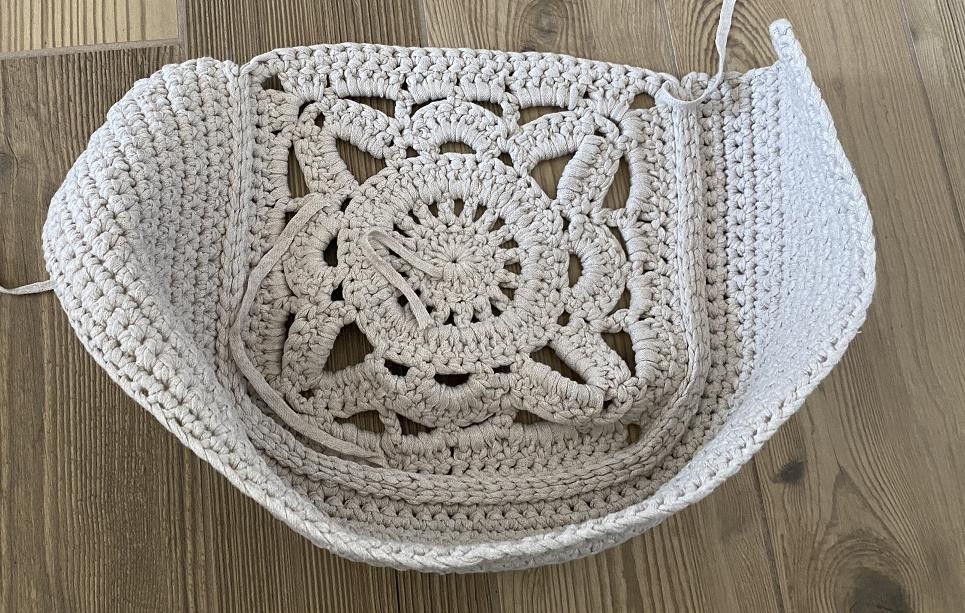
FRONT AND BACK PARTS (Granny Square) Video Link:
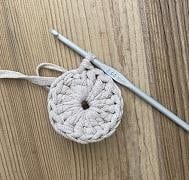
Beginning
1 Magic Ring
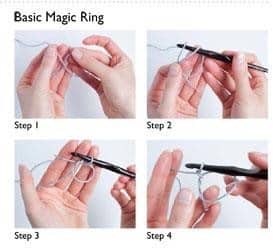
The Basic Magic Ring is the perfect technique for creating projects in the round. In contrast to working into a chain or a chain circle, the basic magic ring allows you to tighten the first row, eliminating any opening.
SCHEME
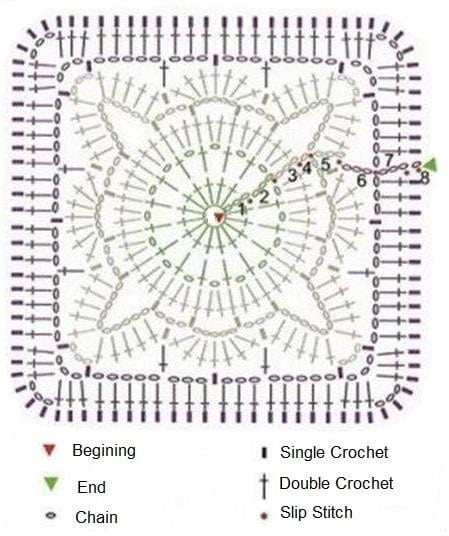
Round 1: 3ch (here and after counts as the first dc, 15dc, sl st into the 3d ch of 3ch to close the round
Round 2: ch4, *1dc, 1ch*, rep from *to* till the end of the round, sl st into the 3d ch of 4ch to close the round
Round 3: ch3, *2dc into space of 1ch, 1dc into dc of the previous round*, rep from *to* till last space of 1ch, 2dc into space of 1ch, sl st to 3d ch of 4ch to close the round
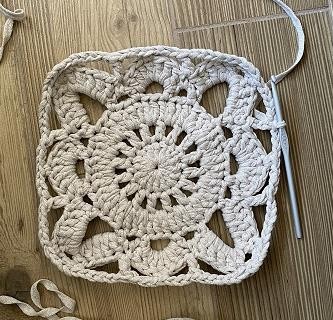
Round 4: ch1 to start the round, *ch10, skiping 2dc make 1sc into the next dc, ch3, skipping 2dc make 1sc into the next dc, ch5, skipping 2dc make 1sc into the next dc, ch3, skipping 2dc make 1sc into next dc*, rep from *to* 2 more times, ch10, skiping 2dc make 1sc into the next dc, ch3, skipping 2dc make 1sc into the next dc, ch5, skipping 2dc make 1sc into the next dc, ch3, sl st to ch1 to close the round

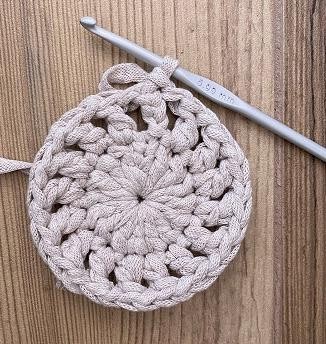
Round 5: ch3, (4dc, ch3, 5dc) into space of ch10, 1sc into space of ch3, 7dc into space of 5ch, 1sc into space of ch3 *(5dc, ch3, 5dc) into space of ch10, 1sc into space of ch3, 7dc into space of 5ch, 1sc into space of ch3 *, rep from *to* till the two more times, sl st to 3d ch of 3ch to close the round
Round 6: ch3 to start the round, ch5, * (1sc, ch3, 1sc) into space of 3ch, 5ch, 1dc into sc of the previous round, ch3, 1sc into the 4th dc made into space of ch5 in the previous round, ch3, 1dc into sc of the previous round, ch5*, rep from *to* 2 more times, (1sc,ch3, 1sc) into space of 3ch, 5ch, 1dc into sc of the previous round, 3ch, 1sc into the 4th dc made into space of ch5 , ch3, sl st into the 3d chain of ch3 to close the round
Round 7: ch3 to start the round, 4dc into space of ch5, *(3dc, ch3, 3dc) into space of ch3, 5dc into space of ch5, 3dc into space of ch3, 3dc into space of ch3, 5dc into space of ch5*, rep from *to* 2 more times, *(3dc, ch3, 3dc) into space of ch3, 5dc into space of ch5, 3dc into space of ch3, 3dc into space of ch3, sl st into 3d cch of ch3 to close the round
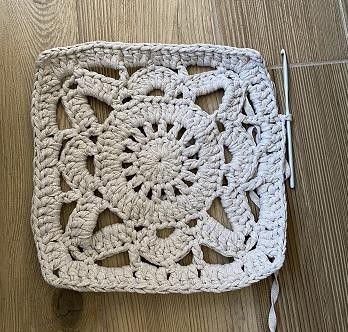
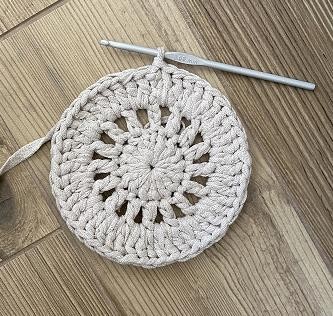
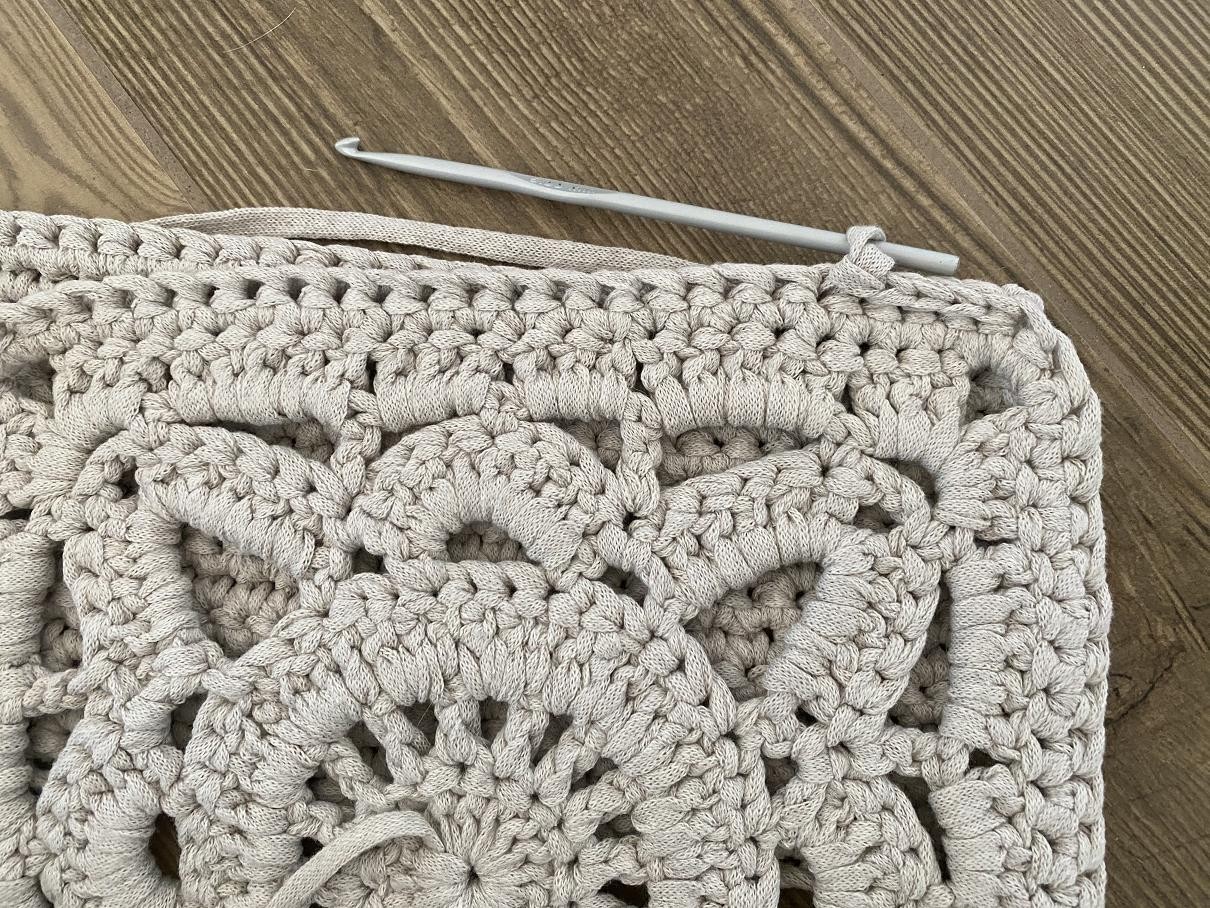
Round 8: ch1 (count as first sc), 7sc into 7dc of the previous round, *3sc into space of ch3, 22sc into 22dc of the previous round*, rep from *to* 2 more times, 3sc into space of ch3, 14sc into 14dc of the previous round, sl st into ch1 to close the round
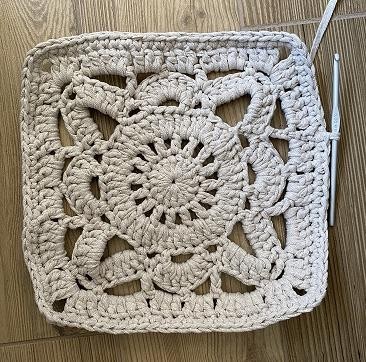
Finished crocheting fix the last stitch pathing the yarn tail through it.
Steam your work to give the perfect shape! Make the second piece by the same way!
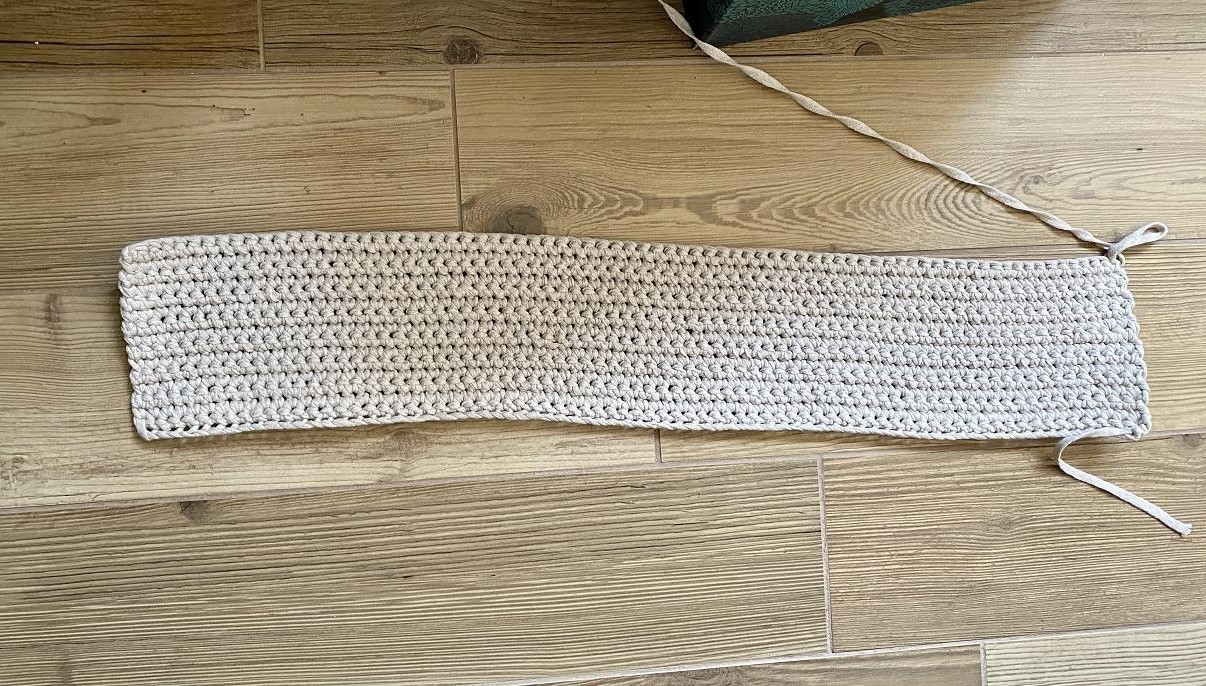
BOTTOM and SIDES (one piece)
The Bottom and sides are crocheted as one piece.
Row 1: make chain of 77 sts, starting from the second chain make 76 sc, turn
Row 2 – 15: ch1, 76 sc, turn
Do not closed the last stitch. It will be used to start the assembling!
Steam!
ASSEMBLING
Join Front, Back and Bottom and Sides by slip stitch from the wrong side
Video Link: https://www.youtube.com/watch?v=YyB0S-hWMB0
Start joining from the second sc of the Granny Square angle. Proceed along 3 sides of Granny Square. The last joined stitch should be the second sc of the third Granny Square angle
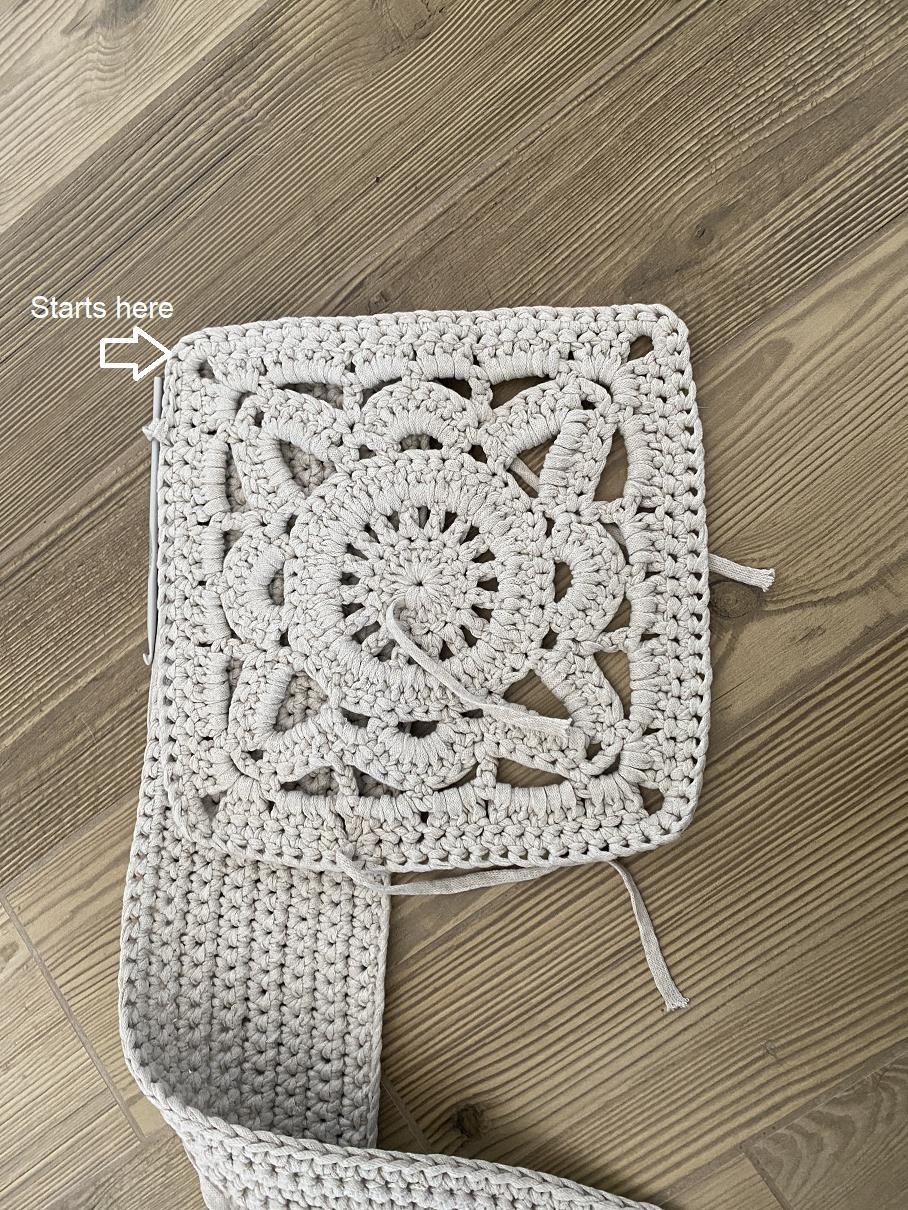
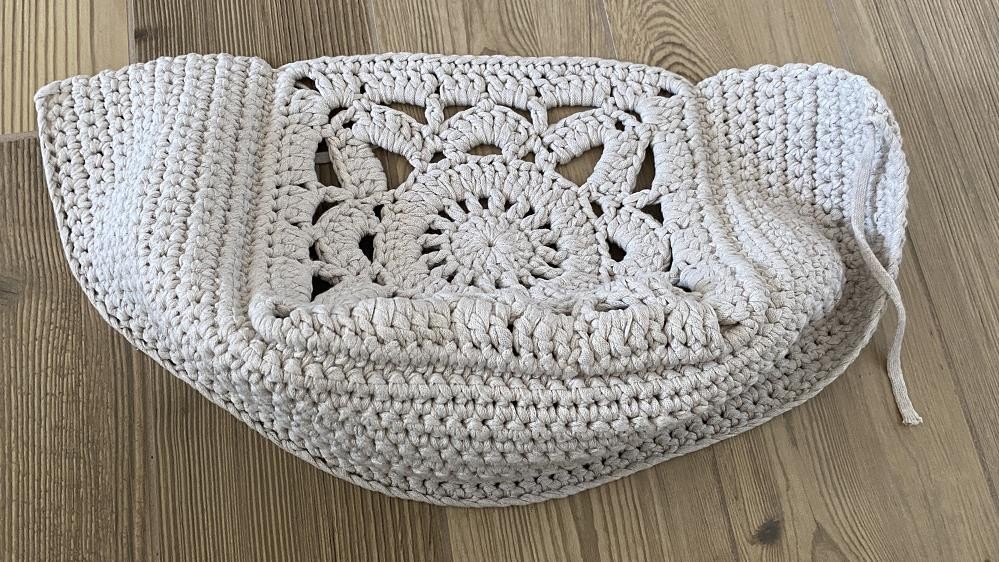
Steam the seam and attach the second part by the same way!
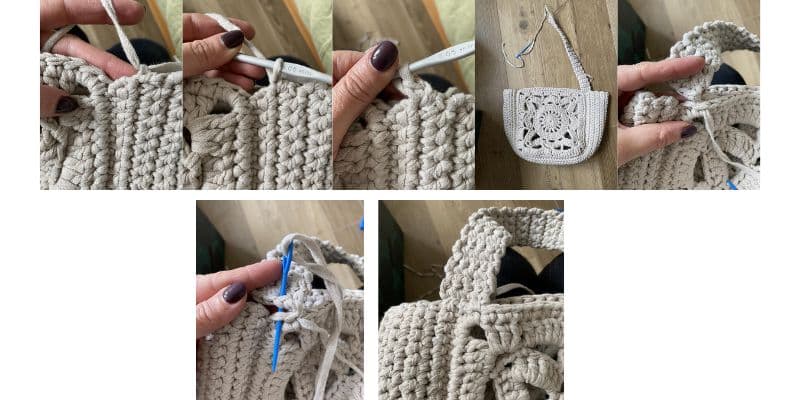
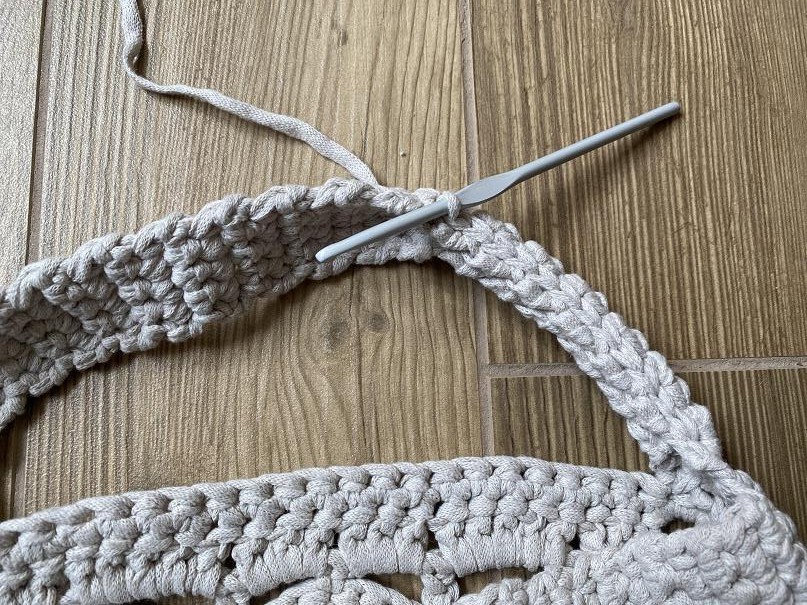
HANDLES
Video Link: https://www.youtube.com/watch?v=nO5dKREQwgE
Joined Front and Back parts to the Sides and bottom part start crocheting handles.
Handles are crocheted from the Right Side.
Row 1: Attach yarn close to the joining seam, YO and pull the yarn through the second row of the Sides and Bottom part to get the loop, make ch1 and 1sc into it, make the second sc into the first row (joining row) of Sides and Bottom Part, make the third sc into the second sc of the 3sc made into angle of the Front part (joining sc), make 4th sc into next sc, turn
Row 2-34: 4sc, turn
Finished crocheting attach the other side of the handle to the other side of the bag by tapestry needle.
Make the second handle by the same way from the other side of the bag!
Finish handles joining 2 sides of it by sl st
LINING
Video Link:
You can use this bag without lining but if you want to use lining follow the below instructions
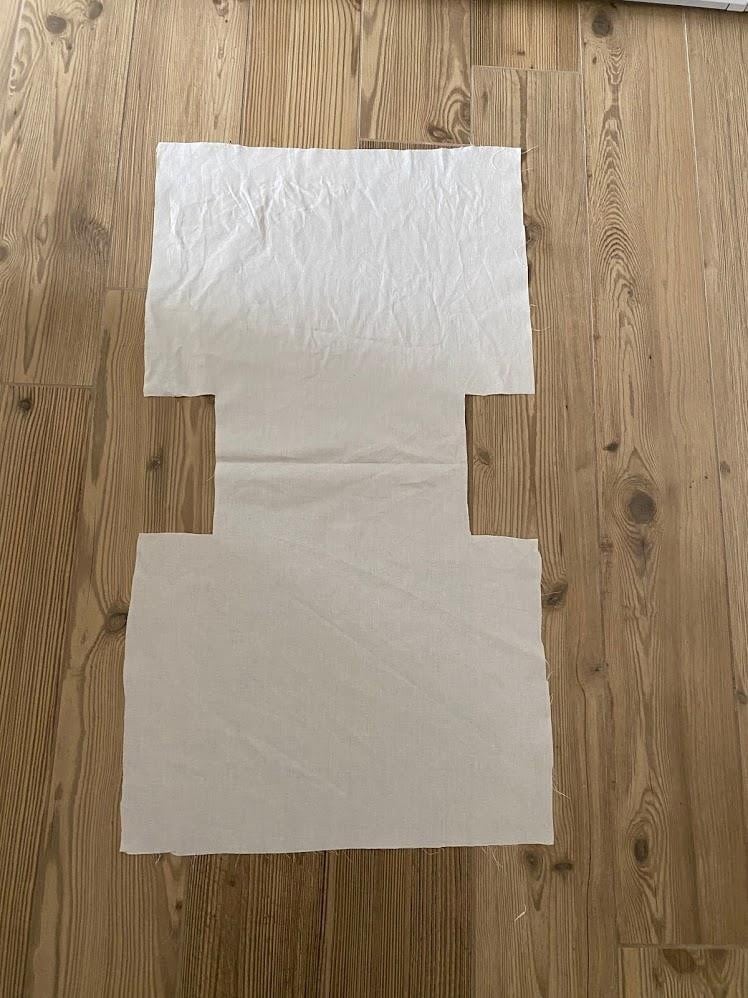
Fold the lining fabric in two and put the bag on it.
Cut following the Bag shape leaving 1 cm from the sides for seaming and on the top for hemming
Make side seams and after this close the bottom to give the final shape of your lining
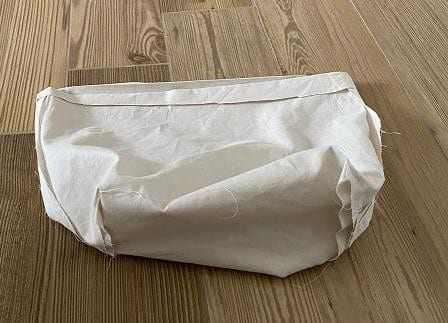
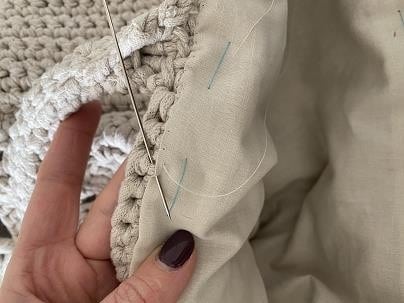
Put the lining inside of your bag and make a temporary seam
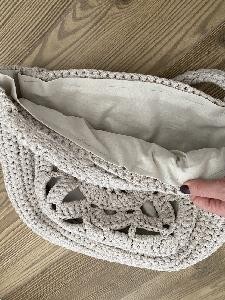
Fix the bottom in 4 angles
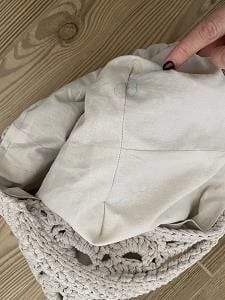
Attach lining to the bag, fix the bottom definately in 4 angles and take away temporary thread you used before.
Attach magnetic closure using the needle and thread and fix the bag shape in the top part od both sides
