Tiger Amigurumi pattern – The pattern is clear to follow with instructions step by step and pictures.
You will need:
- Yarn in desired colour
- I have used chenille yarn in orange and grey and used around half of sekin, crochet hook 4mm. Additional colour white/cream and black.
Needle
- Polyester fibrefill stuffing Eyes, I have used 10mm for grey and 12 mm for orange tiger My ready Tiger have 20 cm
Observation:
- ch chain
- dec decrease
- sc single crochet
- sl st slip stitch
- st stitch
- inc increase
- BLO back loop only
Notes:
Do not join at the end of each round; rounds are worked in continuous spirals or otherwise stated.
Use a stitch marker to mark the beginning of each round. Move the marker up each time you start a new round.

Head and body
Starting with a main colour
1: 6sc in MR (6)
2: inc x 6 (12)
3: (1sc, inc) x 6 (18)
4: (2sc, inc) x 6 (24)
5: (3sc, inc) x 6 (30)
6: (4sc, inc) x 6 (36)
7-9: 36 sc (36)
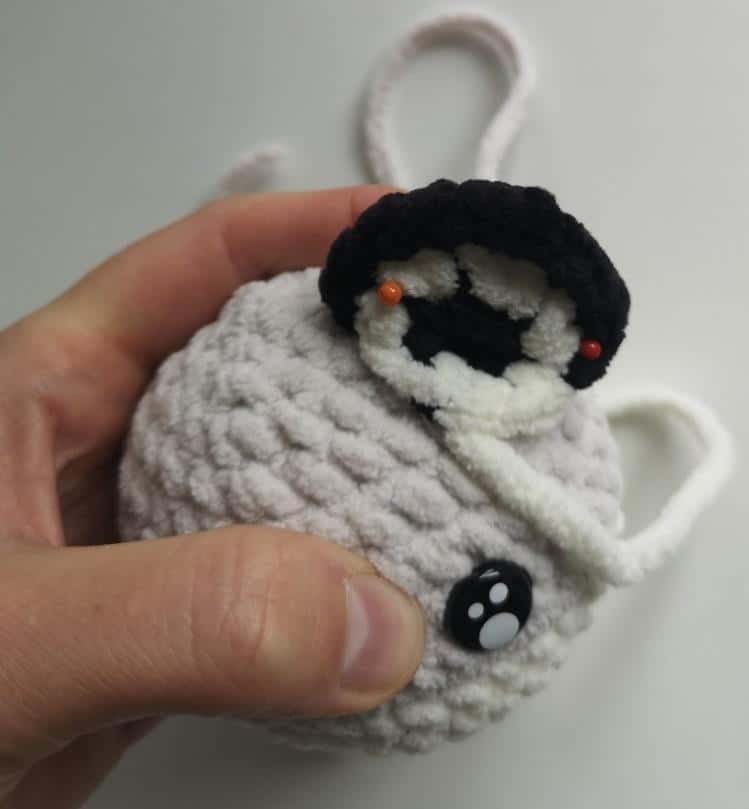
Attach eyes between round 7 and 8, depending on which way you want tiger to be faced you must choose the eyes position. The back of the tiger is indicated where your marker is. As on the photo with my orange marker when you look from the top. Attached eyes in desired place between 6sc.
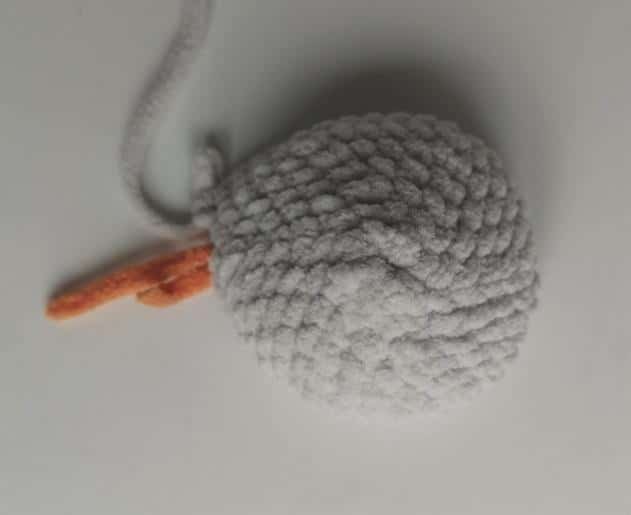
10: Change colour, BLO, 36sc (36)
11: 36sc (36)
12: (4sc, dec) x 6 (30)
13: (3sc, dec) x 6 (24)
14: (2sc, dec) x 6 (18) – Stuff the head
15: (1sc, dec) x 6 (12)
16: Change colour to the main, 12sc
17: chain 13, starting from the second sc from the hook,
12sc on the chain, 1sc in the same space which you start the chain, then 12 sc on the neck. We will work now around chain and neck, creating one big round.
18: 11sc on the chain, inc x 2, 24sc in other side of the chain to the marker (39)
19: 12sc, inc x 3, 24sc (42)
20: (6sc, inc) x 6 (48)
21: 48sc (48)
22: (4sc, inc) x2, 10sc, (4sc, inc) x 2, 18sc (52)
23-27: 52sc (52)
28: 37sc, skip 8sc, 2sc, skip 5sc from this round and 3sc from next round (in total 8sc again passing the marker) 1sc,
29: 5sc, skip 10sc, 2sc, skip 10, 6sc (13) Move marker in this place. In the round you should have 14 sc in total. Staff the body, then add the filling as required.
30: dec x 2, 3sc, dec x 2, 3sc (10)
f/o leaving long tail to sew the hole later on. We create the holes in the bottom of the body for legs.
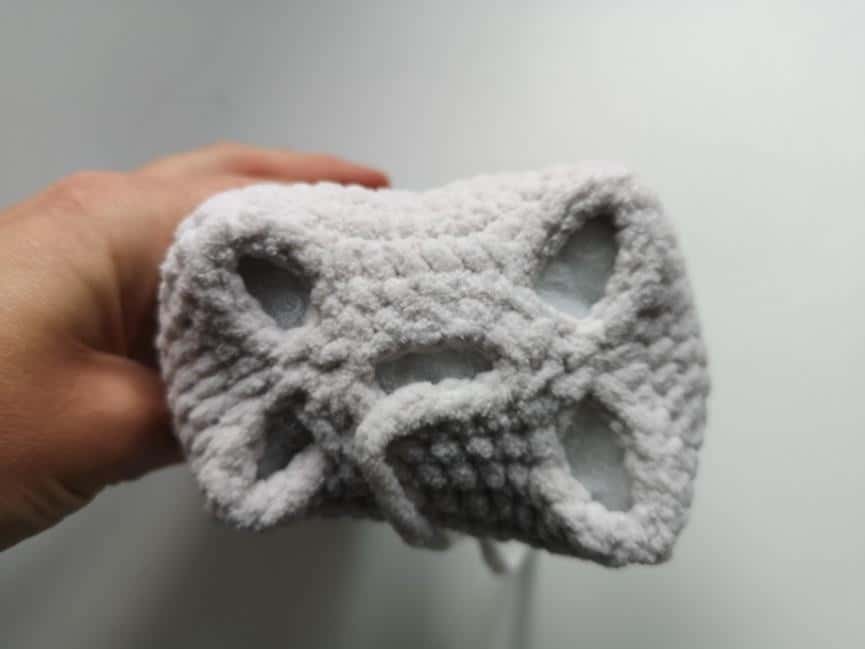
Front Legs
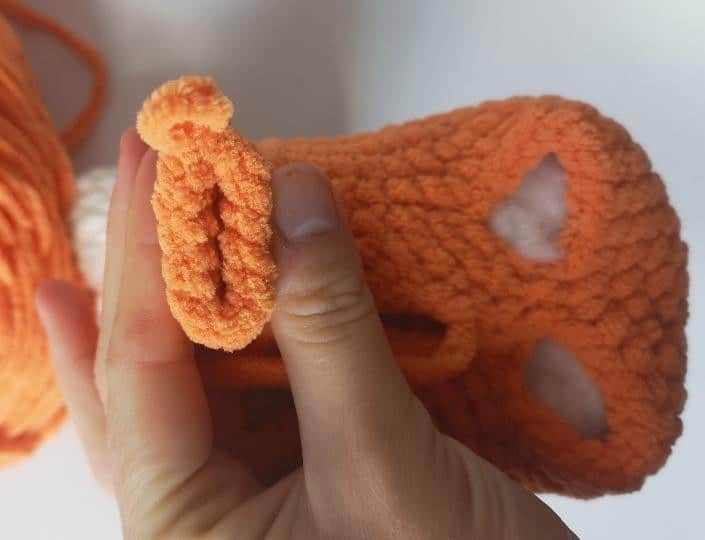
1: Attach yarn and make 13sc in the hole, each leg will be done separately (13)
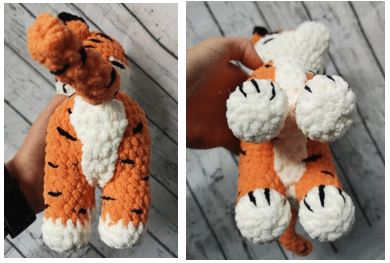
2 – 5: 13sc – fill the leg as required, stop the last row in the middle of the leg, fold them in half to indicate the middle, like on the photograph,put the marker in this place (13)
6: 8sc, inc x 3, 2sc (16)
7: change the colour, 10sc, inc x 2, 4sc (18)
8: 18sc (18)
9: (1sc, dec) x 6 (12)
10: dec x 6 (6) f/o leaving tail and sew the hole.
Back Legs
1: Attach yarn and make 15sc in the hole, each leg will be done separately (15)
2- 3: 15sc
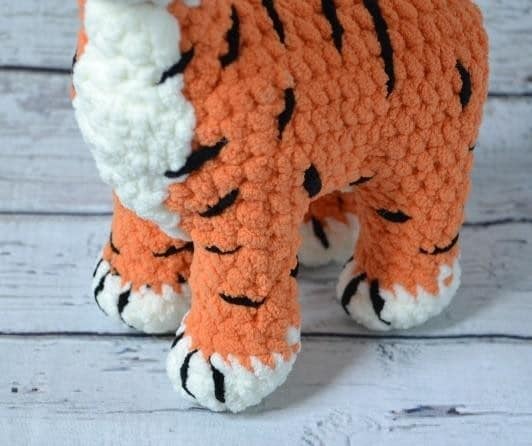
4: dec, 13 sc (14)
5: dec, 12sc (13) fill the leg as required, stop the last row in the middle of the leg, fold them in half to indicate the middle, like on the front legs, put the marker in this place (13)
6: 8sc, inc x 3, 2sc (16)
7: change the colour, 10sc, inc x 2, 4sc (18) 8: 18sc (18)
9: (1sc, dec) x 6 (12)
10: dec x 6 (6) f/o leaving tail and sew the hole.
Muzzle
Made with additional colour
1: 6sc in MR (6)
2: inc x 6 (12)
3: (1sc, inc) x 6 (18)
4: 18sc (18) – f/o leaving long tail.
Sew the nose with pink colour.
Slightly stuff the muzzle and sew into the head.
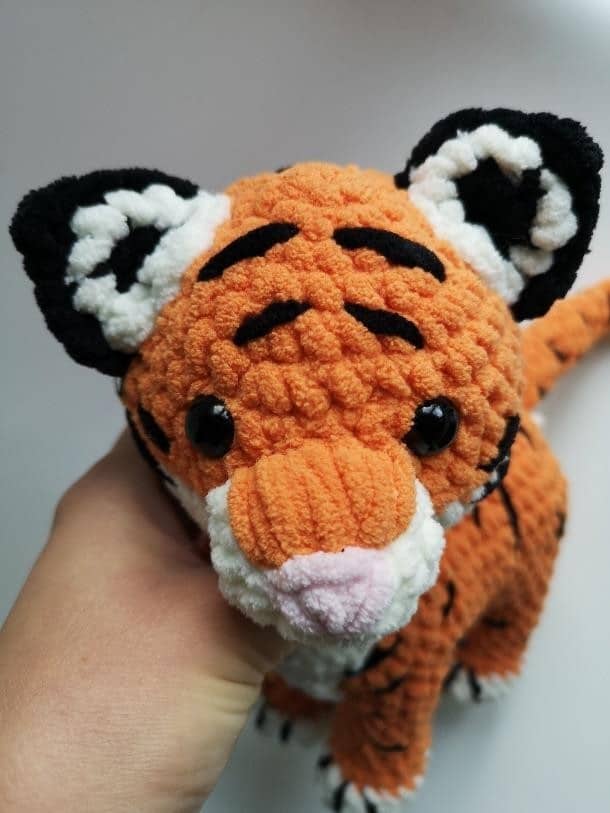
Then sew with the main colour sew top of the muzzle, like on the picture.
Tail
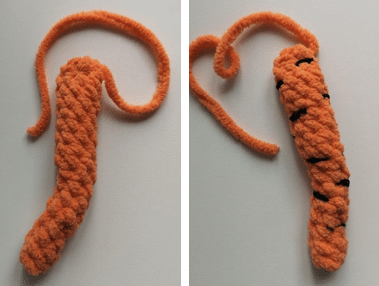
1: 4sc in MR (4)
2: inc, 3sc (5)
3: 5sc
4: inc, 4sc (6)
5- 8: 6sc (6)
9: inc, 5sc (7)
10-17: 7sc (7) – close off with sc, f/o leaving long tail, sew the stripes and sew into the body.
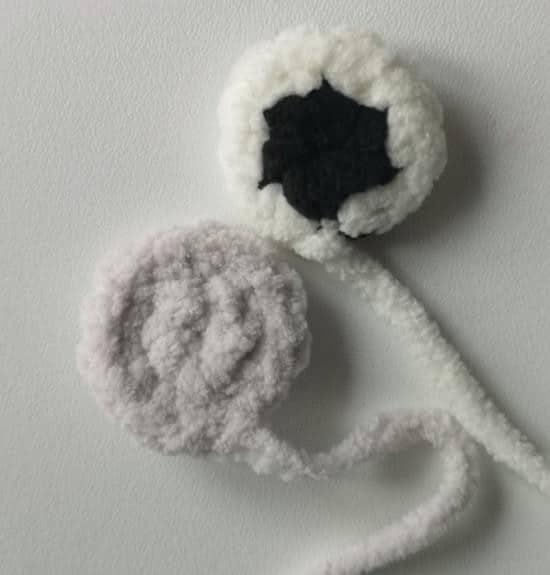
Ears, make 2
Inner ear
Starting with black
1: 6sc in MR (6)
Change colour to the additional (white)
2: inc x 6 (12) – f/o, leaving long tail
Outside ear – with main colour
1: 6sc in MR (6)
2: inc x 6 (12) – f/o, leaving long tail
Attached two parts together and with a black colour make 4sc making sc together thru both parts, ch1 and sc in the same sc back (picot), then another 4 sc, f/o.
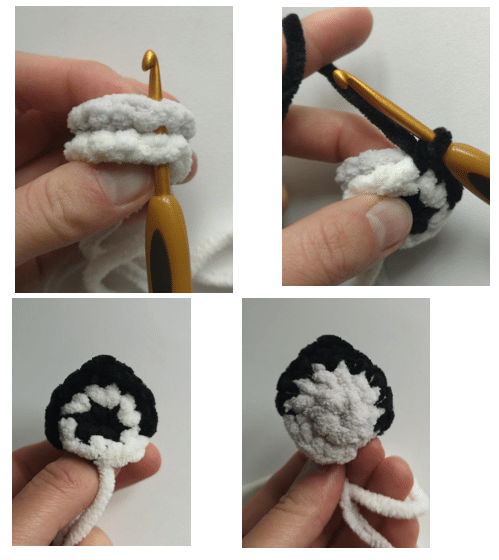
Sew ears to the head by spreading bottom parts, the end of the black should touch the head. See picture below.
Belly
Make chain 4. This part is made in rows, after finishing each row turn and make ch 1 Starting from second chain from the hook.
1-3: 3 sc (3)
4: inc, 1sc, inc (5)
5: 2sc, inc, 2sc (6)
6: 6sc (6)
7: 2sc, dec, 2sc (5)
8: dec, 1sc, dec (3)
9-28: 3sc (3)
29: inc, 1sc, inc (5)
30: 2sc, inc, 2sc (6)
31-32: 6sc (6)
33: dec x 3 (3)
34: 1sc, dec (2) f/o leaving long tail and sew in starting from the top of the neck and under the body to the tail.
Sew stripes and you are done!!! If you have any question, please write to me.