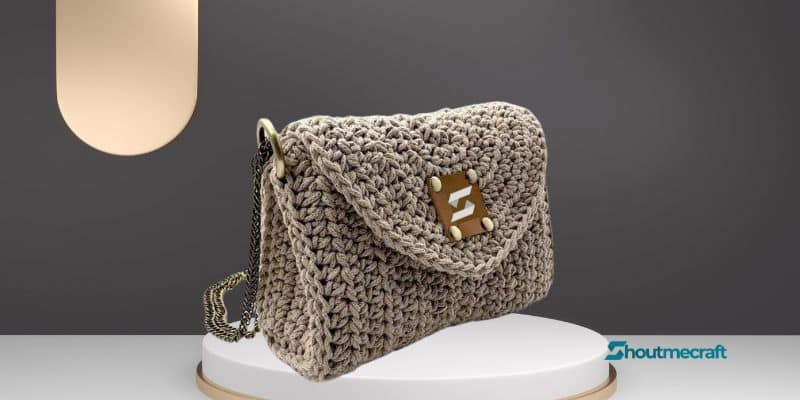
Crochet Purse Pattern – To make things go as smoothly as possible, this pattern contains a link to the video instructional in addition to a visual instruction. There are answers to any questions you could have when creating this design inside; if not, please mail me.
Materials
- #5 Bulky yarn
- I used ICE yarn Macrame Cotton Bulky #5 Bulky yarn ( 150 meters/164 yards per ball )
- Color Picture = Beige
- Crochet hook size 6 mm
- Scissors
- Yarn needle
- Stitch markers
- Magnetic purse closure
- Chain strap
- Ring hooks
Stitches used & code
- ch = chain
- st = stitch(es)
- sc = single crochet
- hdc = half double crochet
- sl st = slip stitch
- rep = repeat
- bl = back loop
- rs = right side
- wr = wrong side
- ” = inches
- Yarn needed : 131 yards / 120 meter
- Gauge : 12 hdc X 8.5 rows = 4″
- Measurements : 8″ Wide X 6.5″ Tall
Here’s the video tutorial for this bag
Bag Body Panel ( Make 1 )
Row 1 ( ws ) : ch 41, 1 hdc into second ch from hook, 1 hdc into each ch until you have 1 ch left, 5 hdc into last ch, 1 hdc into each ch on the other side across.
Total of 83 hdc
Row 2 ( rs ) : Turn, ch 1 ( do not count as a st ), 1 hdc into each of next 41 st, 3 hdc into next st, 1 hdc into next st and each st across.
Total of 85 hdc
Row 3 : Turn, ch 1 ( do not count as a st ), 1 hdc into each of next 41 st, 2 hdc into next st, 3 hdc into next st, 2 hdc into next st,1 hdc into next st and each st across.
Total of 89 hdc
Row 4 : Turn, ch 1 ( do not count as a st ), 1 hdc into each of next 41 st,2 hdc into next st, 2 hdc into next st, 1 hdc into each of next 3 st, 2 hdc into next st, 2 hdc into next st, 1 hdc into next st and each st across.
Total of 93 hdc
Row 5 : Turn, ch 1 ( do not count as a st ), 1 hdc into each of next 41 st,2 hdc into next st, 1 hdc into next st, 2 hdc into next st, 1 hdc into each of next 2 st,3 hdc into next st, 1 hdc into each of next 2 st, 2 hdc into next st, 1 hdc into next st, 2 hdc into next st, 1 hdc into next st and each st across.
Total of 99 hdc
Row 6 : Turn, ch 1 ( do not count as a st ), 1 hdc into each of next 41 st, 2 hdc into next st, 1 hdc into each of next 2 st, 2 hdc into next st,1 hdc into each of next 3 st, 2 hdc into next st, 1 hdc into next st, 2 hdc into next st,1 hdc into each of next 3 st, 2 hdc into next st, 1 hdc into each of next 2 st,2 hdc into next st, 1 hdc into next st and each st across.
Total of 105 hdc
Row 7 : Turn, ch 1 ( do not count as a st ), 1 hdc into each of next 41 st, 2 hdc into next st, 1 hdc into each of next 4 st, 2 hdc into next st,1 hdc into each of next 5 st, 3 hdc into next st, 1 hdc into each of next 5 st,2 hdc into next st, 1 hdc into each of next 4 st, 2 hdc into next st, 1 hdc into next st and each st across.
Total of 111 hdc
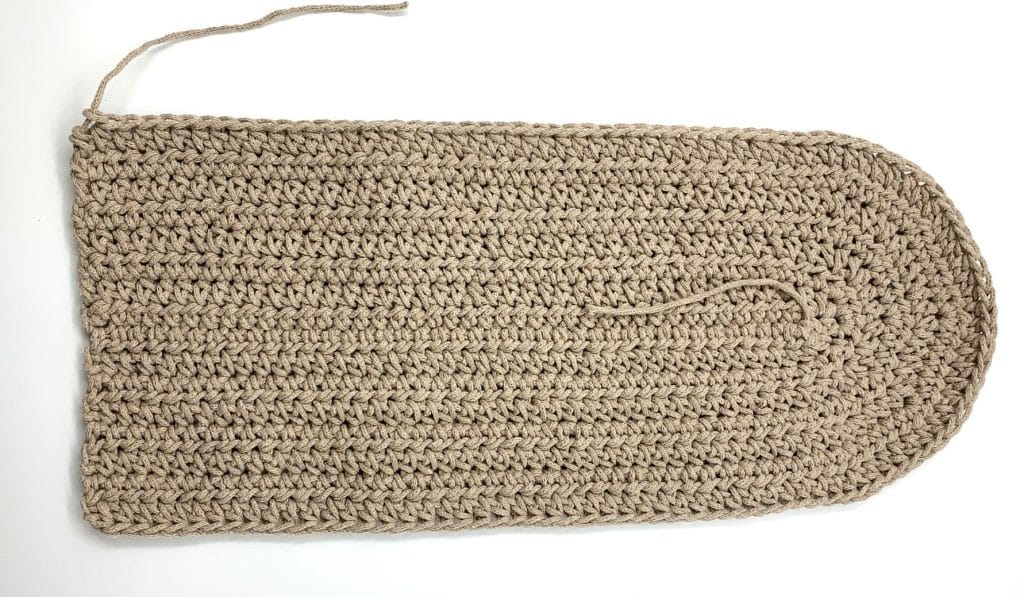
Row 8 : Turn, ch 1 ( do not count as a st ), 1 hdc into each of next 41 st, 2 hdc into next st, 1 hdc into each of next 27 st, 2 hdc into next st,1 hdc into next st and each st across, then cut the yarn.
Total of 113 hdc
( Check picture below )
Bag sides Panels ( Make 2 )
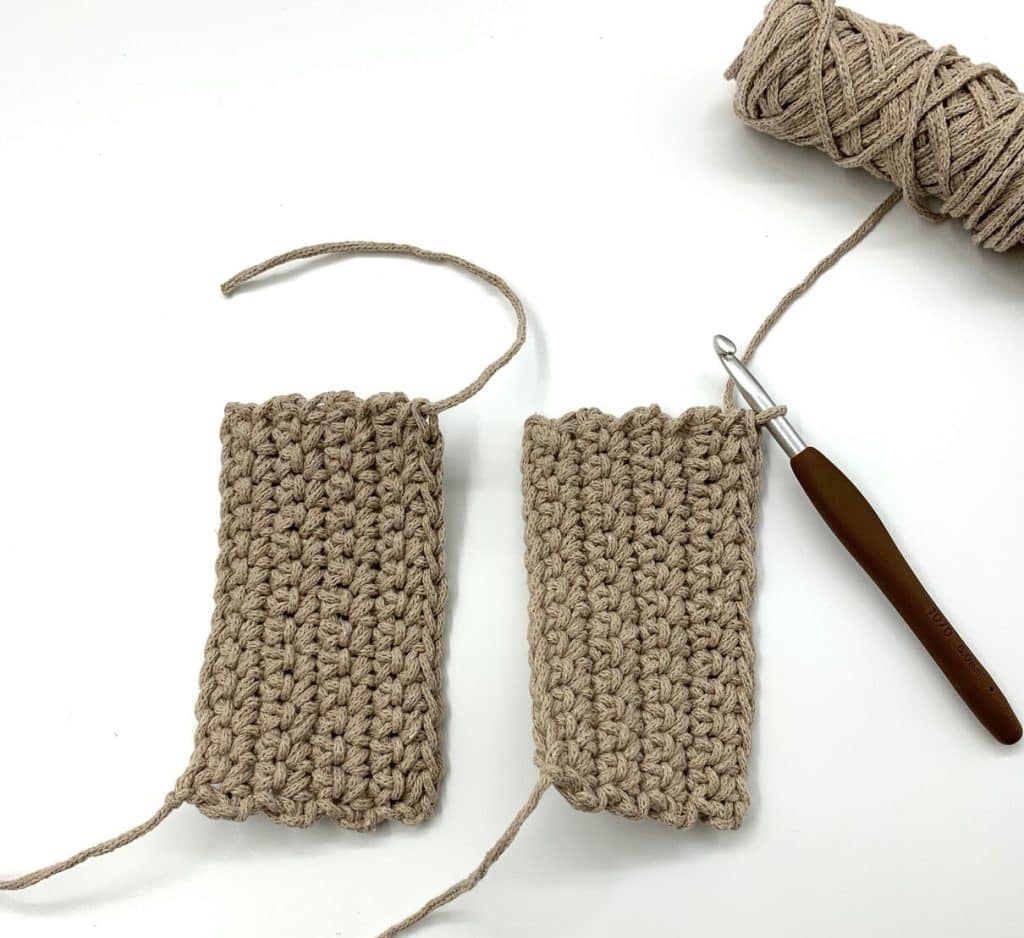
Row 1 ( ws ) : ch 15, 1 sc into second ch from hook and each ch across. Total of 14 sc
Row 2 ( rs ) : Turn, ch 1 ( do not count as a st ), 1 sc into each st across. Total of 14 sc
Row 3 – 8 rep row 2
The end of row 8 cut the yarn, just one panel only.
For the second panel DO NOT cut the yarn,
we’ll use that yarn join all the panels together.
Join all the panels together
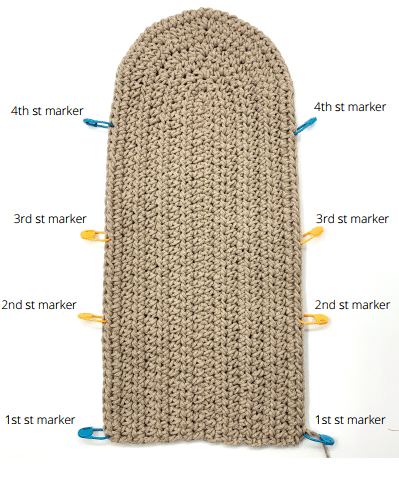
Lay the body panel flat with the rounded flap at the top.
Now, we’re going to place a stitch marker in the 1st st in the bottom right corner.
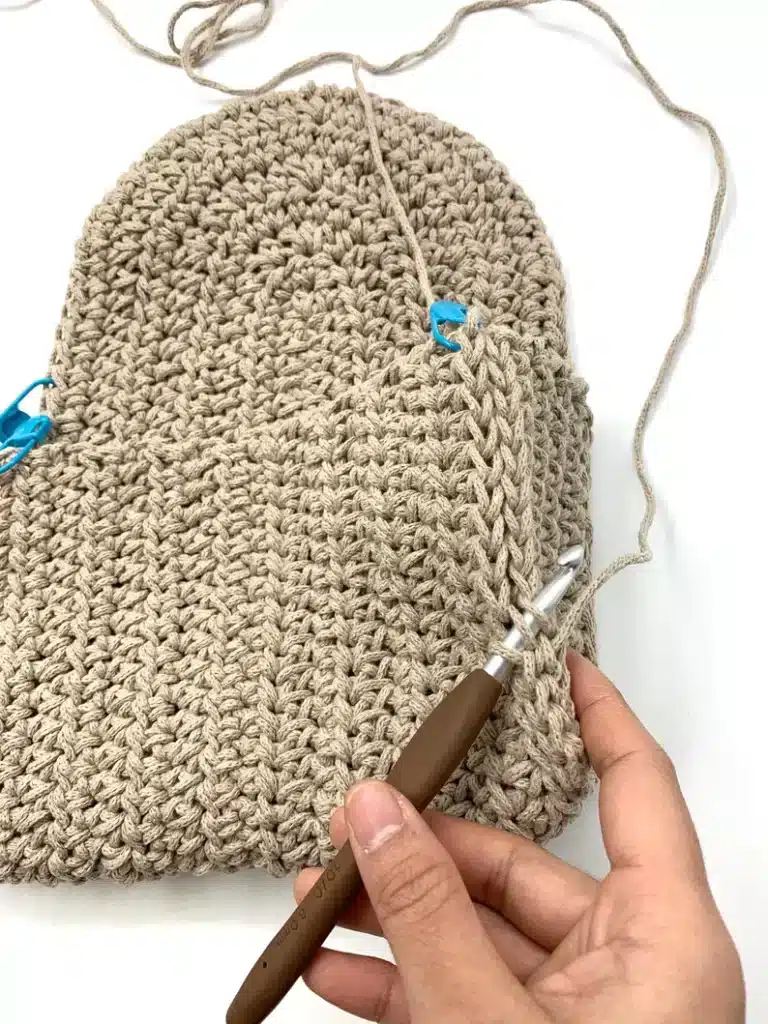
Then place the 2nd st marker into the 14th st. Then place the 3rd st marker into the 23rd st. Then place the 4th st marker into the 36th st.
Repeat the process and place stitch markers along the other side of the panel
( Check picture below )
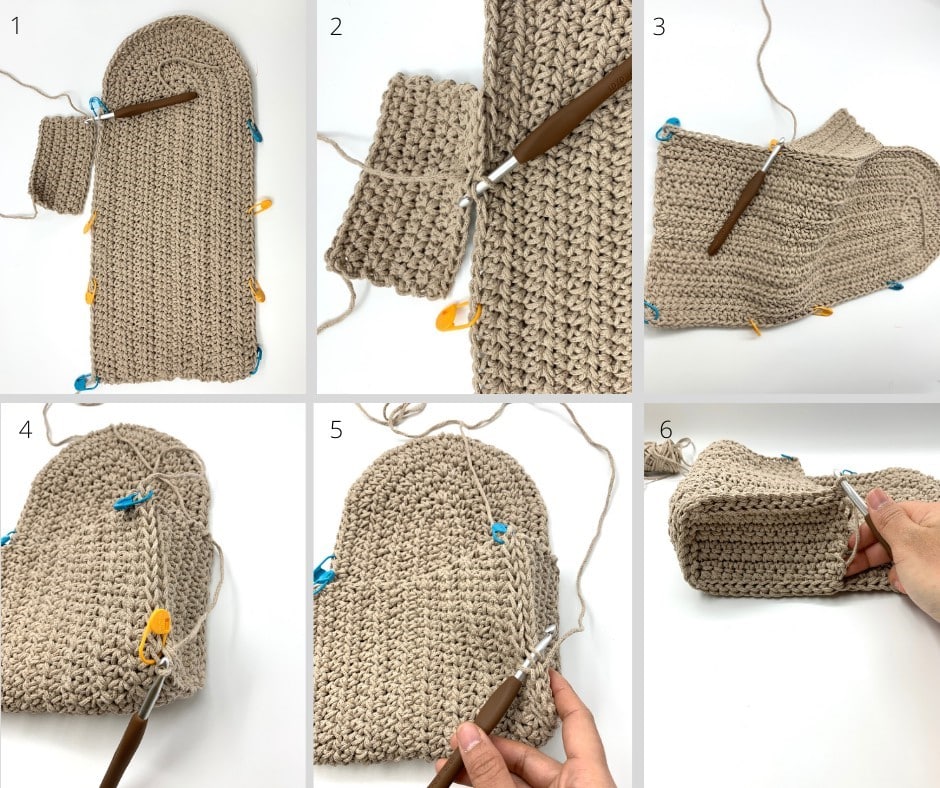
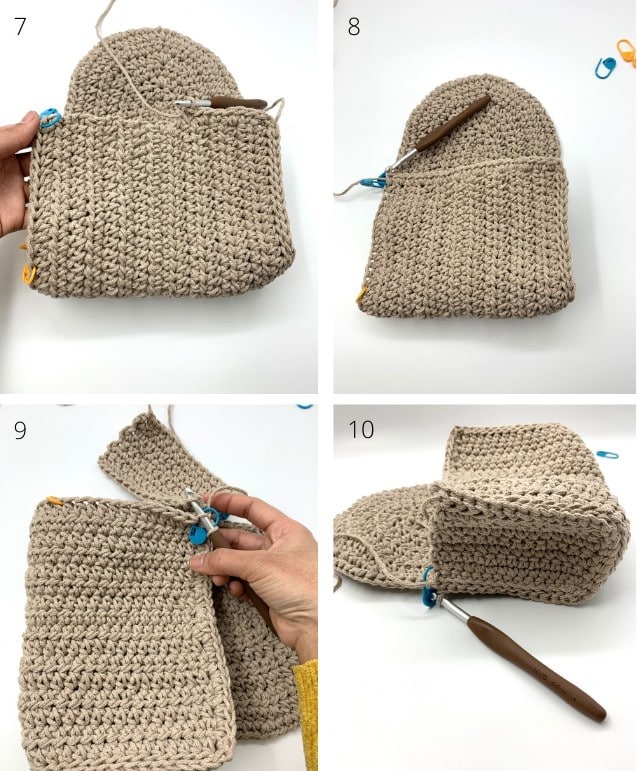
To add the side panels, turn your body and side panels right side out, we’re going to crochet on the right side.
We’ll start with the side panel that we left the long tail and start to, bl sl st into the fourth stitch marker at the 36th st.
Keep bl sl st all the way to the 1st st marker, *2 sc into next sp, 1 sc into next sp* rep from *TO* until you reach the left corner.
Then with your side panel right side out, bl sl st the panel all the way to the 4th st marker/36th st.
Then cut the yarn and weave all the ends
( Check picture below )
Adding The Hardware
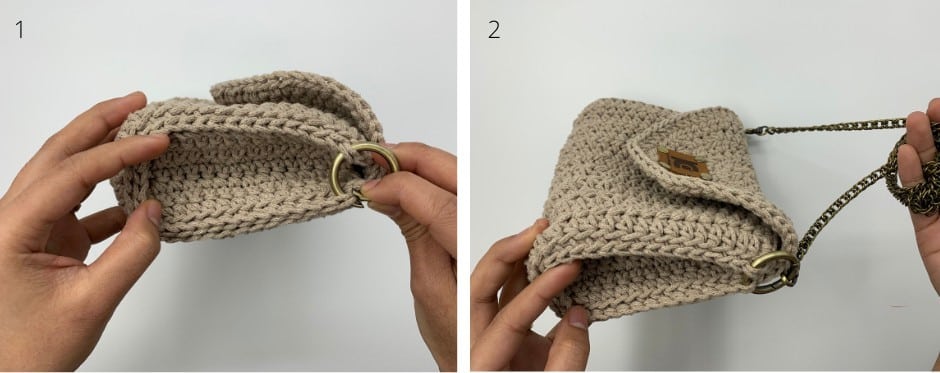
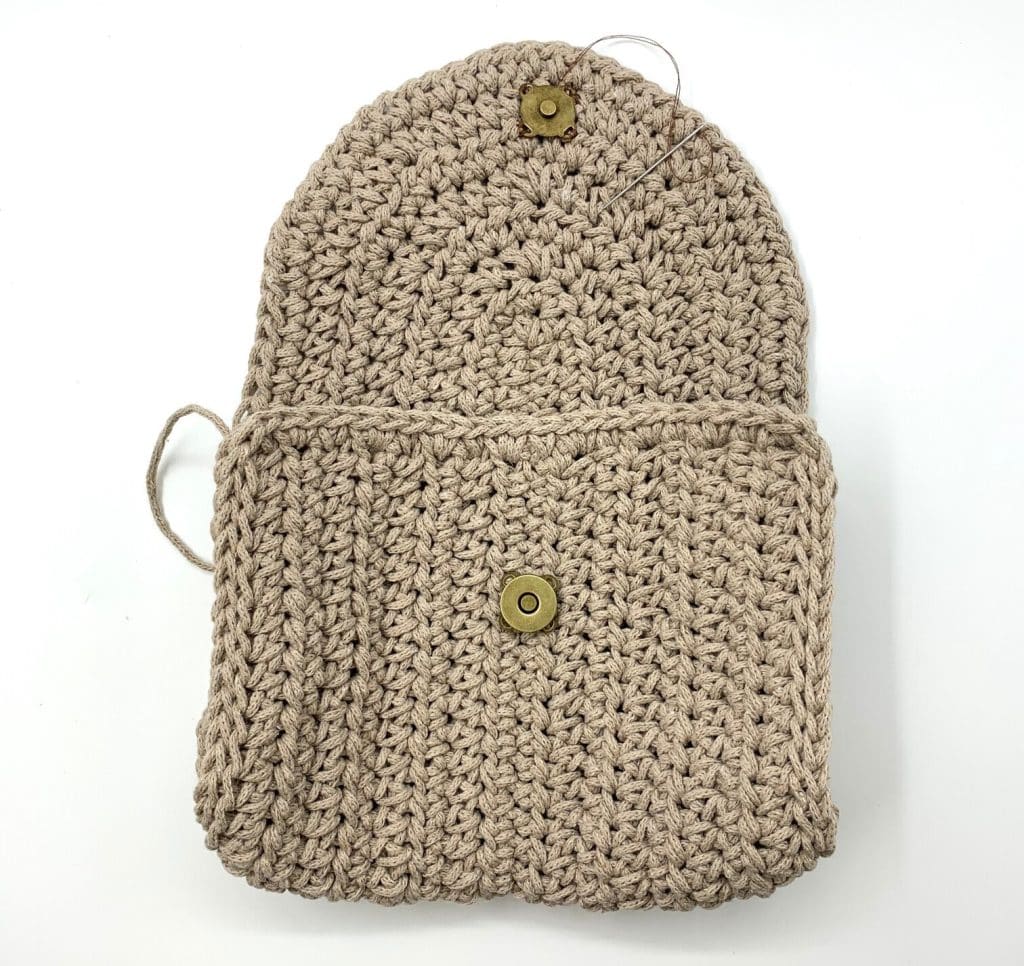
You can begin adding the hardware with the magnetic clasps. They come in a set as top and bottom, with the bottom being the thicker piece. You want to put the thicker piece on the body and the thinner on the flap. You can line them up however you prefer, just make sure they will line up evenly when the bag is closed and sew them into place
( Check picture below )
The loop/snap ring can be placed through the stitches in the seems of the side panels. ( Check picture below ). Then all you have left is to snap your chain strap onto the loops/snap rings and viola! I put my logo on my bag, but you can play around and customize it however you like.
If not, you just finished making an awesome bag, congratulations!
