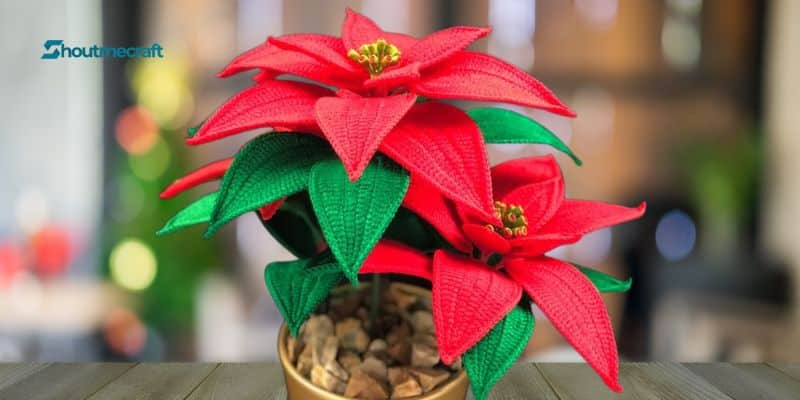
Crochet Poinsettia Christmas Flower – This crocheted 3D poinsettia Christmas flower pattern includes diagrams, photos, and assembly instructions.
More work goes into creating 3D crochet crafts than into regular crochet ones. I have dubbed this project Advanced Beginner because it isn’t truly a project for a beginner.
Both the leaves and the blooms include comprehensive photo lessons.
There are many of pictures and really thorough instructions; crochet diagrams are not necessary to understand!
Skill Level – Advanced Beginner
Materials:
- Crochet Hook size: 1.5mm (US size 8/Canadian & UK size 4.5)
- DK (UK) – DK/Light Worsted (USA) – 8 ply (AUS) Yarn in flower color (red is shown) Any yarn will work
- DK (UK) – DK/Light Worsted (USA) – 8 ply (AUS) Yarn in green for leaves
- 2.0mm (12 Gauge US) wire cut to desired length of stem, 2 lengths of approx. 12-18” per stem
- 0.46mm (25 Gauge US) wire, approx. 148” per Poinsettia bloom and approx. 28” per leaf
- Wire cutters
- Scissors
- Candle and flame source (if using acrylic yarn)
- Paper Floral tape in dark red, green, and yellow
Stitches & Abbreviations:
- ch – chain
- st/sts – stitch/stitches
- sc – single crochet
- sl st – slip stitch
- hdc – half-double crochet
- dc – double crochet
- tr – treble crochet
- dtr – double treble crochet
- 2-sc inc – 2 single crochet in same stitch
- 2-dc inc – 2 double crochet in same stitch
- 2-tr inc – 2 treble crochet in same stitch
- 2-dtr inc – 2 double treble crochet in same stitch
Notes:
Making 3D crochet projects is more difficult than your usual crochet projects. This project is suitable for an Advanced Beginner skill level.
All stitches not made in a foundation chain are to be worked through both legs of the stitch unless otherwise stated.
Small Petal Instructions
Petal: Make 4 per bloom. Color: Flower color (red shown)
Foundation: Slip knot (leave a 2-3” tail), ch 15
Round 1: sc in 2nd ch from hook, hdc in next ch, dc in next st, 2-tr inc in next ch, tr in next 2 chs, 2-tr inc in next ch, tr in next ch, dc in next 2 chs, hdc in next 2 chs, sc in next ch, (sc, ch1, sc) in last ch, rotate work (hold the tail along the chain and wrap the sts down the 2nd side of the petal around the tail), sc in next ch, hdc in next 2 chs, dc in next 2 chs, tr in next ch, 2-tr inc in next ch, tr in next 2 chs, 2-tr inc in next ch, dc in next ch, hdc in next ch, sc in next ch, sl st in turning ch
Round 2: Insert 0.46mm (25 Gauge US) wire through st on hook, leaving a 3-4” tail (work round by wrapping each st around wire all the way around the petal)
Using heavier yarn or a larger hook may require a longer piece of wire – calculate length of wire needed per petal by measuring length of one petal and multiply by 2, add an extra 2-3” for safety and comfort while working.
The same can be applied to the large petals and leaves except multiply by 4 and add an extra 10-12”.
Remember: excess wire can be removed later, but adding more is difficult
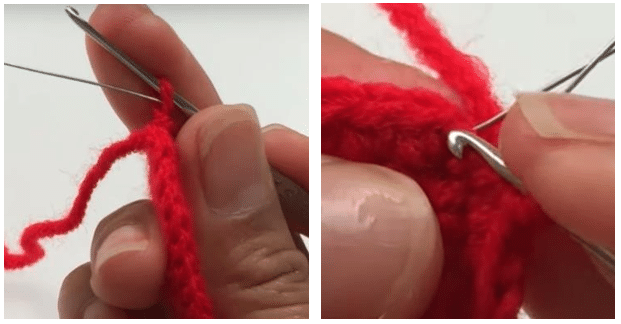
ch 1, sc in next 16 sts, (sc, hdc, ch 2, sl st in 1st ch, sl st in post of hdc, sc) in ch 1 space of Round 1, sc in next 16 sts, sl st in turning ch with hook in front of wires and yarn behind wires, cut the wire leaving a second 3-4” tail.
Finishing: Pull both wire tails through the last st before tightening
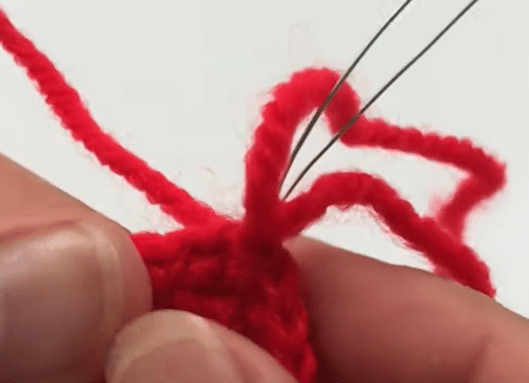
Wrap the yarn tail around the wires for approx. 3”, making sure that the yarn is completely covering the wires. While wrapping the yarn around the wires, push the wrapped yarn down towards the petal to ensure maximum coverage.
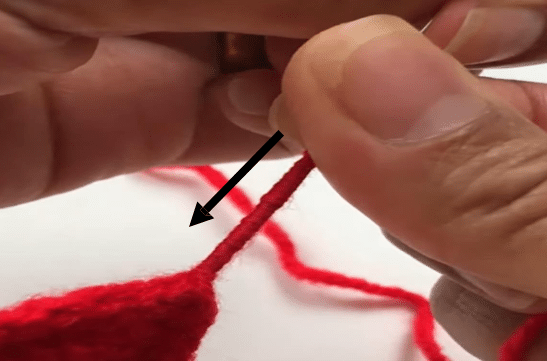
Wrap the yarn around one of the wires so it sits between the two wires. Twist the wires a few times to secure the yarn. Cut the yarn close to the wire.

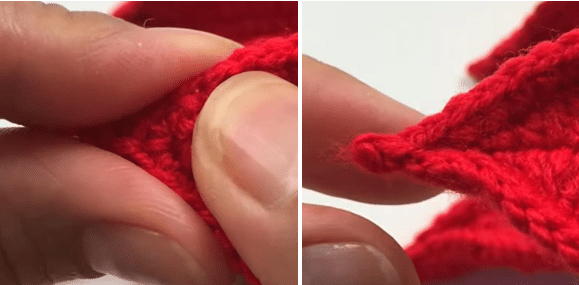
Shaping: While holding the petal facing up, pinch the sides of the tip towards each other while pushing the middle down to create a concave shape.
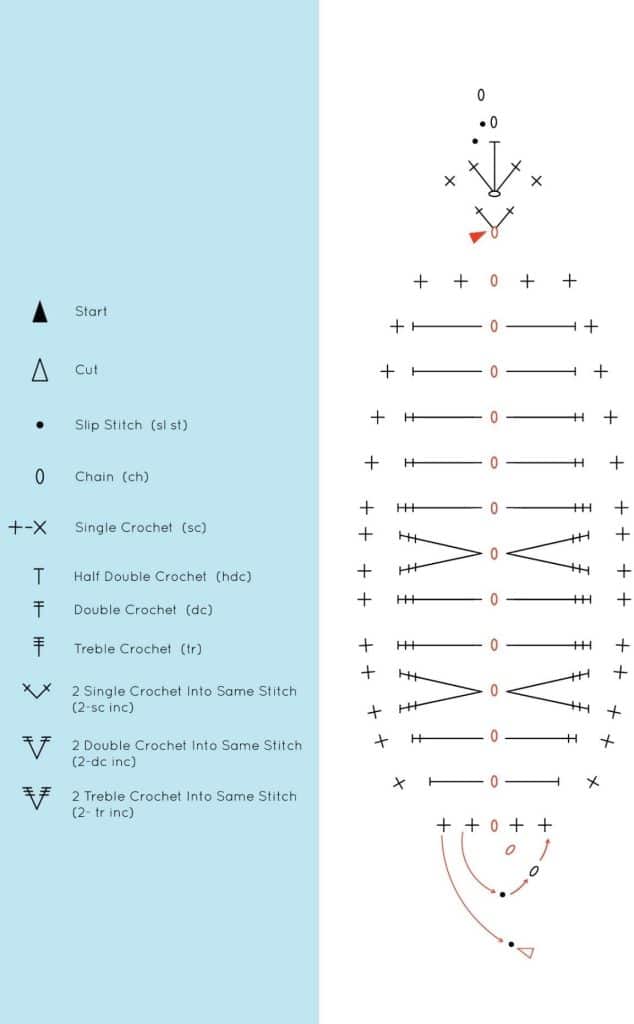
Large Petal & Leaf Chart
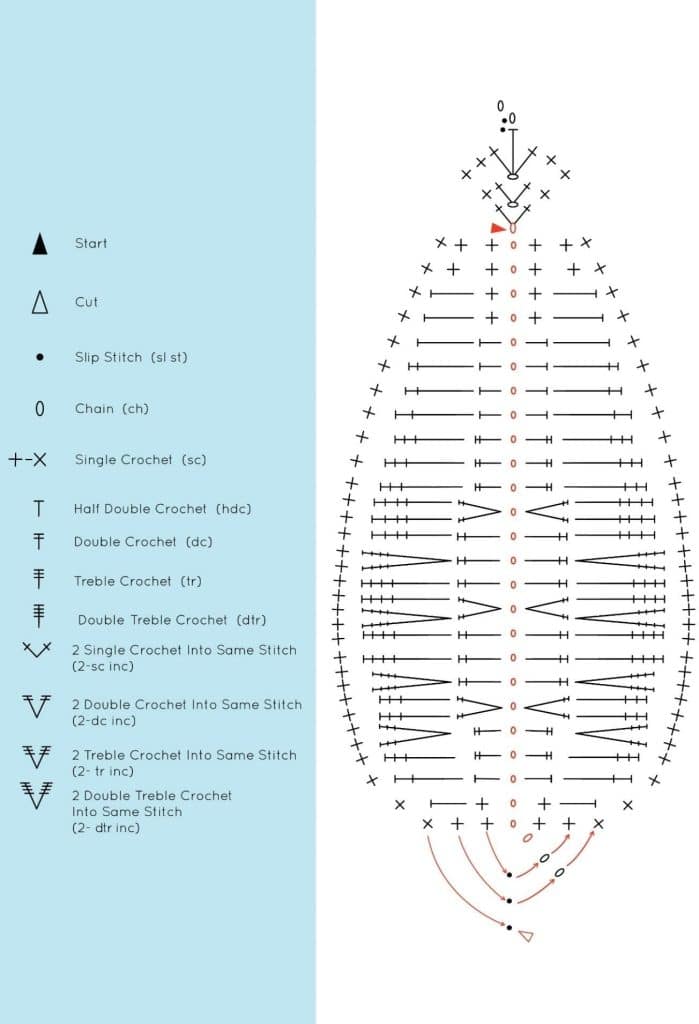
Large Petal & Leaf Instructions
Leaf: Make 4 in red and 4 in green per bloom. Color: Red or Green (light green shown) Foundation: Slip knot (leave a 2-3” tail), ch 27
Round 1: sc in 2nd st from hook and in next ch, hdc in next ch, dc in next 2 chs, [2-dc inc in next ch, dc in next 3 chs] 3x, hdc in next 4 chs, sc in next 4 chs, (sc, ch 1, sc) in last ch, rotate work (hold the tail along the chain and wrap the sts down the 2nd side of the leaf around the tail), sc in next 4 chs, hdc in next 4 chs, [dc in next 3 chs, 2-dc inc in next ch] 3x, dc in next 2 chs, hdc in next ch, sc in next 2 chs, sl st in turning ch
Insert 0.46mm (25 Gauge US) wire through st on hook, leaving a 4-5” tail. Work Round 2 with the loop of every st around the wire.
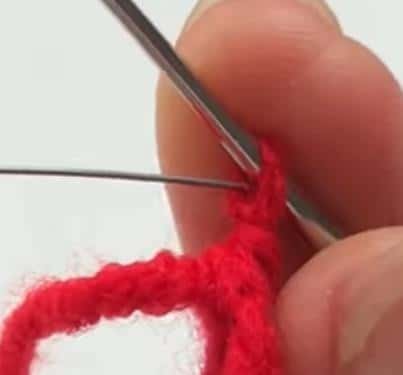
Round 2: ch 1, sc in next st, hdc in next st, dc in next st, tr in next st, 2-tr inc in next st, tr in next 2 sts, [2-dtr inc in next st, dtr in next 2 sts] 2x, 2-dtr inc in next st, dtr in next 3 sts, tr in next 3 sts, dc in next 3 sts, hdc in next 3 sts, sc in next
3 sts, (sc, ch 1, sc) in ch 1 space of Round 1, rotate work, sc in next 3 sts, hdc in next 3 sts, dc in next 3 sts, tr in next 3 sts, dtr in next 3 sts, [2-dtr inc in next st, dtr in next 2 sts] 2x, 2-dtr inc in next st, tr in next 2 sts, 2-tr inc in next st, tr in next st, dc in next st, hdc in next st, sc in next st Bring the wire up to the end of the tail and fold so that the wire doubles back to the petal. The tail of the petal should now be made of 3 wires.

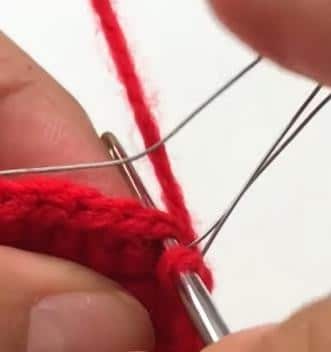
Sl st into the turning ch with the hook in front of the 2 wire tails but behind the live wire and the yarn behind all 3 wires.
Continue working around the live wire in Round 3.
Round 3: ch 1, sc in next 34 sts, (sc, hdc, ch 2, sl st in 1st ch, sl st in post of hdc, sc) in ch 1 space of Round 2, sc in next 34 sts, sl st into the turning ch with hook in front of all 4 wires and yarn
behind all 4 wires, cut the wire leaving a fourth 4-5” tail.
Finishing: Pull all four wire tails through the last st before tightening.
Wrap the yarn tail around the wires for approx. 3” making sure that the yarn is completely covering the wires. While wrapping the yarn around the wires, push the wrapped yarn down towards the petal to ensure maximum coverage.
Wrap the yarn around 2 of the wires so it sits in the middle of the wires. Twist the wires a few times to secure the yarn. Cut the yarn close to the wire.
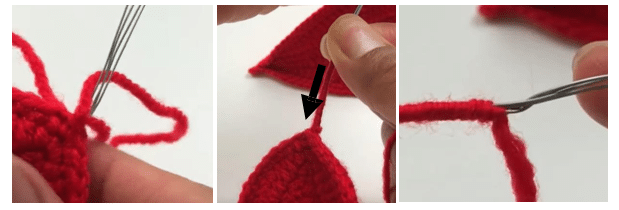
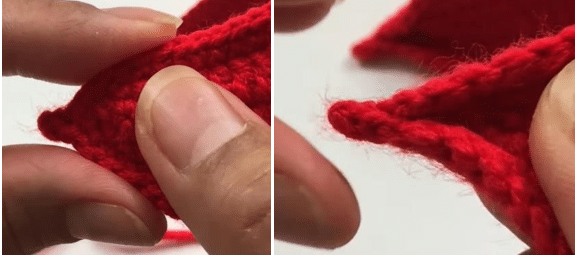
Shaping: While holding the petal or leaf facing up, pinch the sides of the tip towards each other while pushing the middle down to create a concave shape.
Pollen Instructions
Pollen: Make 13 per bloom. Material: 0.46mm (25 Gauge US) wire, and red, green, and yellow floral tape
Step 1: Cut a 3” length of the 0.46mm (25 Gauge US) wire
Step 2: Start wrapping the red floral tape around the wire so that the further side of the red tape is about 1.5-2” from the end of the wire. Wrap the red tape around until it has built up a little thickness.
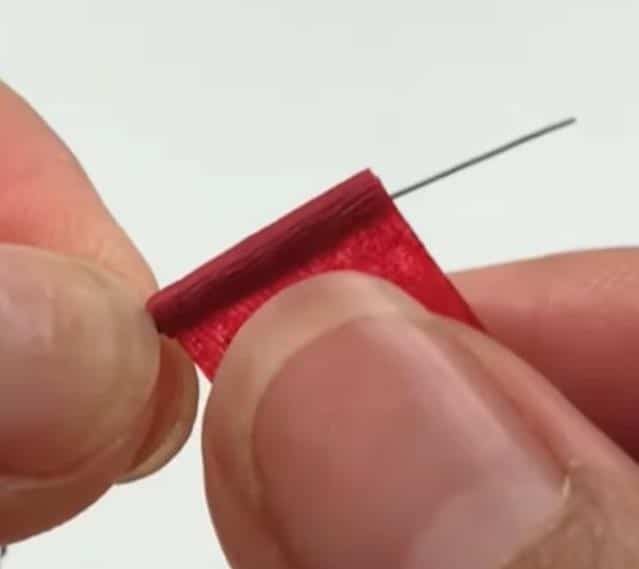
Step 3: Fold the wire and wrapped red tape so that the red tap is folded in half and both ends of the wire are facing the same direction.
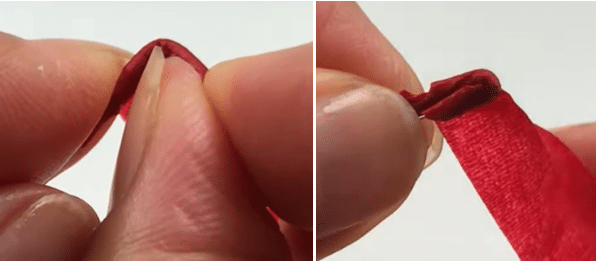
Step 4: The floral tape coming off of the pollen will have a fold in it. Open this up and continue wrapping so that the extra width of the floral tape is above the wire crease.
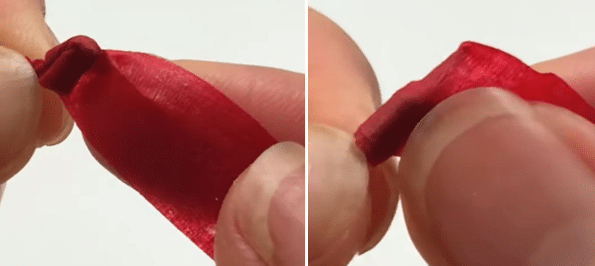
Step 5: Continue wrapping the red floral tape to build up a bit more thickness. The top half of this wrap will not be around any wire.
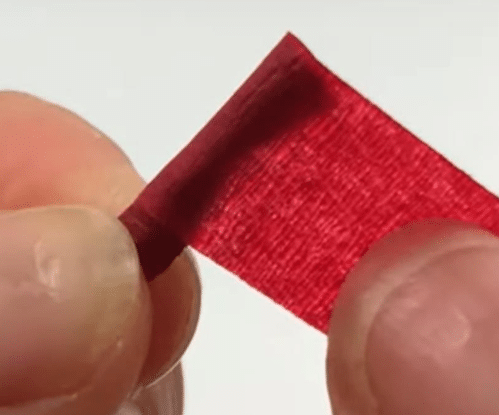
Step 6: Fold the top half of the wrapped tape (the half that isn’t around wire) down so it sits against the rest of the pollen.
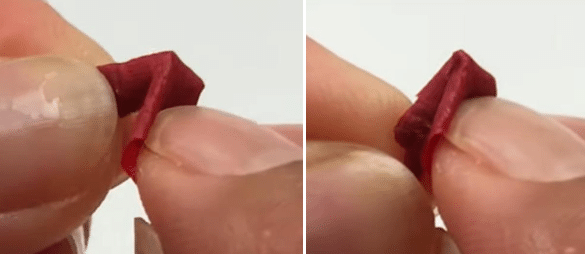
Step 7: Wrap the floral tape around the pollen two or three more times. The top half of this wrap will be around the folded down tape and wire and the bottom half will be around just the wire. Cut the tape and press the end onto the pollen to secure.
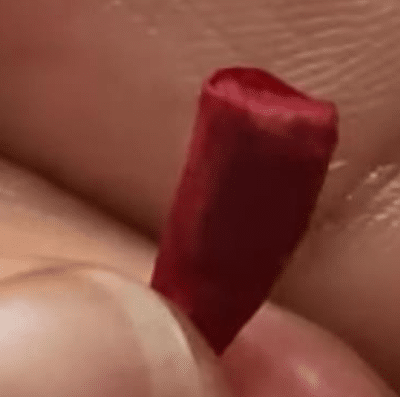
Step 8: Take the yellow floral tape and fold the top quarter of the tape over on itself.
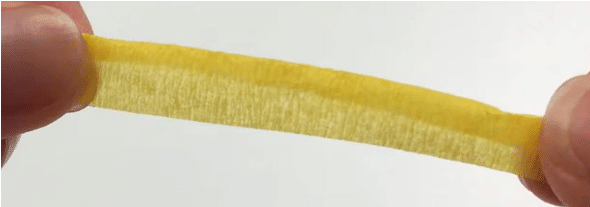
Step 9: Wrap the folded yellow floral tape, with the folded part aligned with the top of the pollen, around the pollen three times. Cut the yellow tape and press the end onto the pollen to secure it.
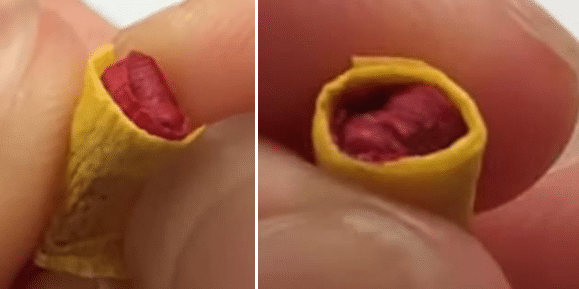
Step 10: Take the green floral tape and fold the top third of the tape over on itself.
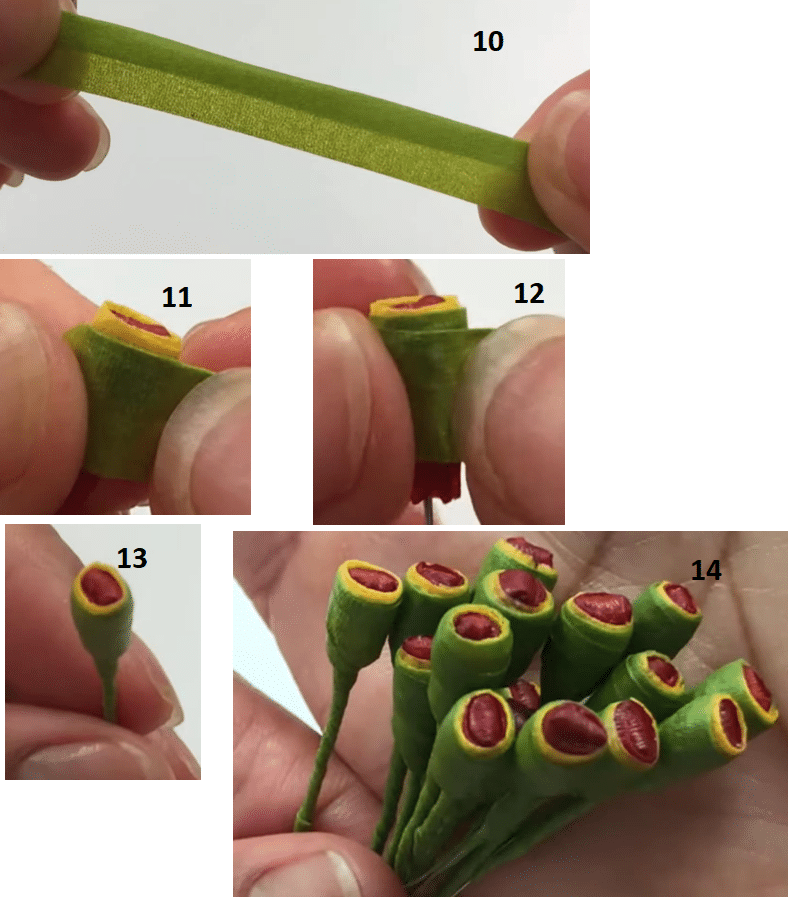
Step 11: Start wrapping the green tape around the pollen with the folded edge aligned slightly below the top of the pollen.
Step 12: Wrap the green tape around the pollen twice then move the green tape down while continuing to wrap the pollen
Step 13: Continue wrapping down the pollen and then the wire. Once half of the wire is wrapped, cut the green floral tape and then press the end onto the wire to secure it.
Repeat until the required number are made.
Assembly
If using Acrylic yarn (if using natural fiber, skip this step): Light the candle and hold each flower part a few inches above (NOT IN) candle flame to let the rising warmth melt the fuzzy stray fibers sticking. Don’t get too close to flame or hold the crochet work in one place for long or the yarn may get smoke stained or burnt.
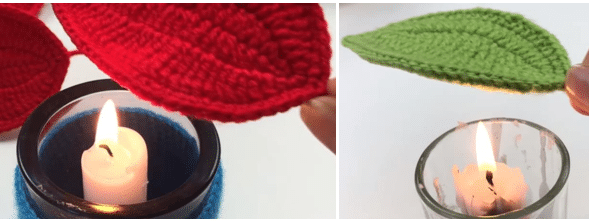
For the Small and Large Petals and Leaves, hold the tip of the Petal or Leaf over the flame very briefly then pinch the end to form more of a point. Do this for each Small and Large Petal and each Leaf.
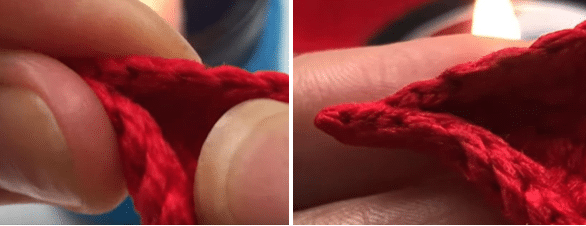
Neatening the Petals (this step is optional and can be done with any fiber)
Turn on the hair straighteners and set it to a medium-high setting. Once warm, clamp the straightener on the Petals and Leaves in very short bursts. If left on for more than a very short amount of time, the straightener can burn the yarn.
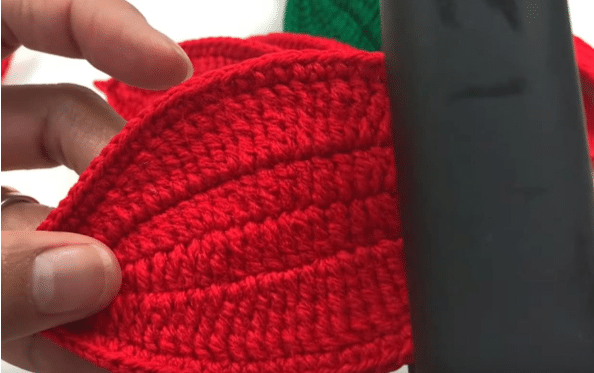
Assemble a Full Bloom
Step 1: Hold the 2 lengths (12-18”) of the 2.0mm (12 Gauge US) wire next to each other with the ends lined up. Wrap the full length on the two wires in red floral tape. Do not break off the floral tape
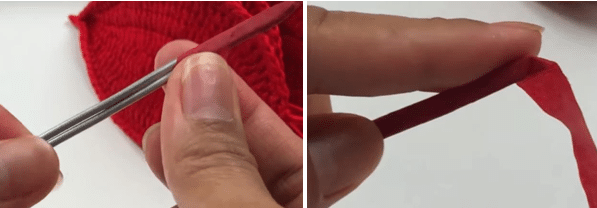
Step 2: Place 2 pollen on the edge of the stem where the floral tape is still connected. Wrap the floral tape in the opposite direction as before around the stem and both pollen one to two times just to secure the pollen to the stem. An inch or so of the stem part of the pollen should be visible before the main stem starts.
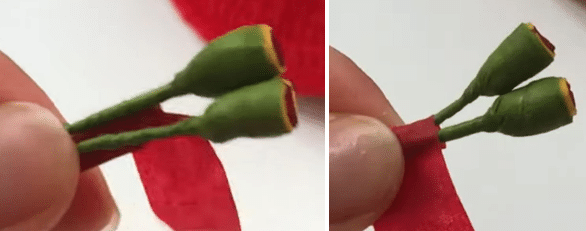
Step 3: Add 2 more pollen and wrap the floral tape halfway around all pollen and the stem. This will just secure the new pollen to the stem. Make sure the tops of the pollen are all alligned.
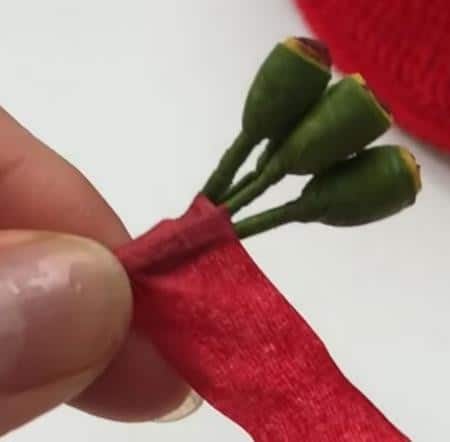
Step 4: Add 3 more pollen and wrap the floral tape once around all pollen and the stem. Make sure as you continue adding pollen that none of the pollen stems are crossed or twisted
Step 5: Repeat Step 4 until all 13 pollen are secured to the stem.
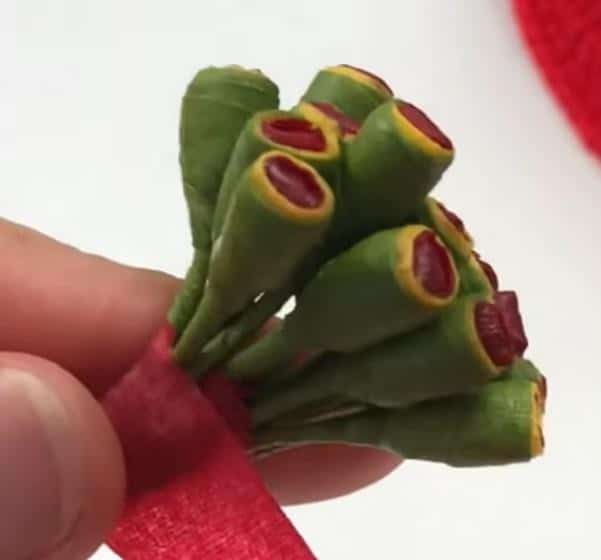
Step 6: Cut the floral tape and reattach it to the stem.
Step 7: Wrap the floral tape down and around the stem and all the pollen. Make sure the pollen wire tails are evenly distributed around the stem. Continue wrapping for about 2”.
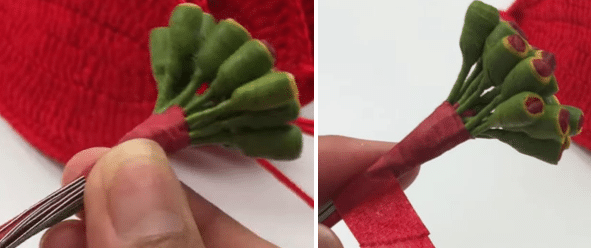
Step 8: Take one of the Small Petals and hold the wire tail against the stem with the top of the petal facing in towards the pollen. Wrap the tape halfway around the stem. The petal base should just below where the red tape starts wrapping around the pollen.
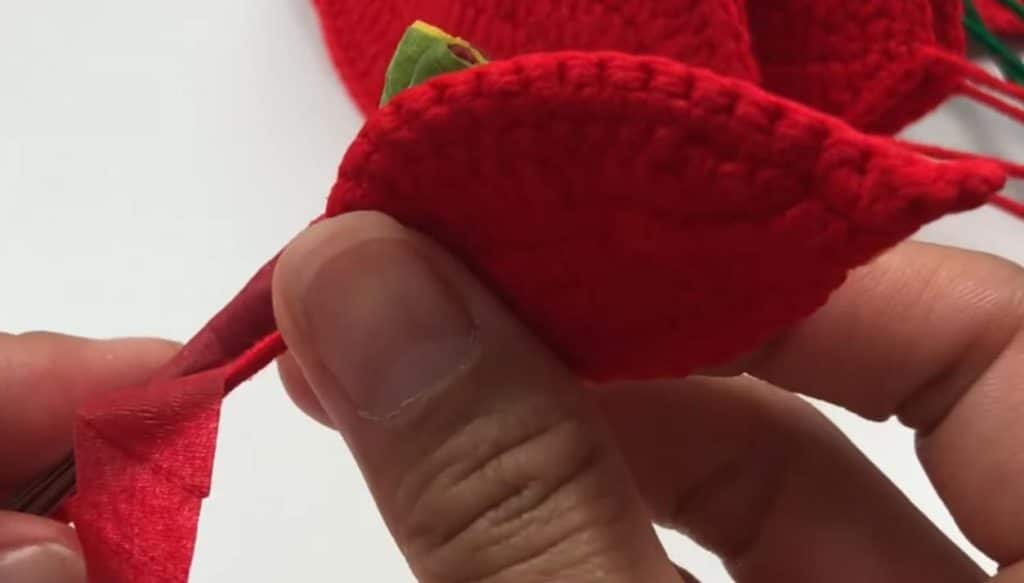
Step 9: Add the second Small Petal opposite of the first Small Petal. Place it so that it is at the same height on the stem as the first petal and have the top facing in towards the pollen. Wrap the floral tape three quarters of the way around.
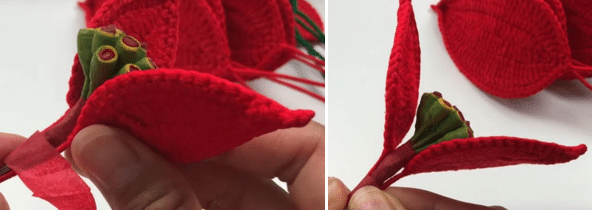
Step 10: Add the third Small Petal to the stem in line with the first two and also with the top facing inward. Wrap the floral tape halfway around.
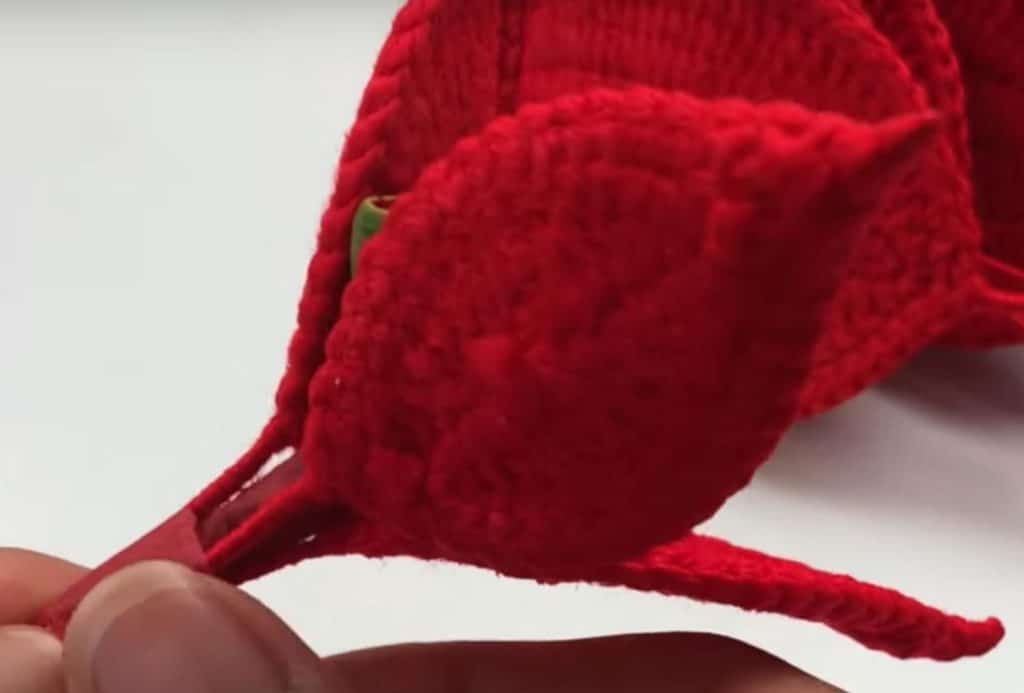
Step 11: Add the fourth Small Petal across from the third petal, in line with the other three petals and with the top facing inward. Continue wrapping the floral tape down the stem for about 2.5”.
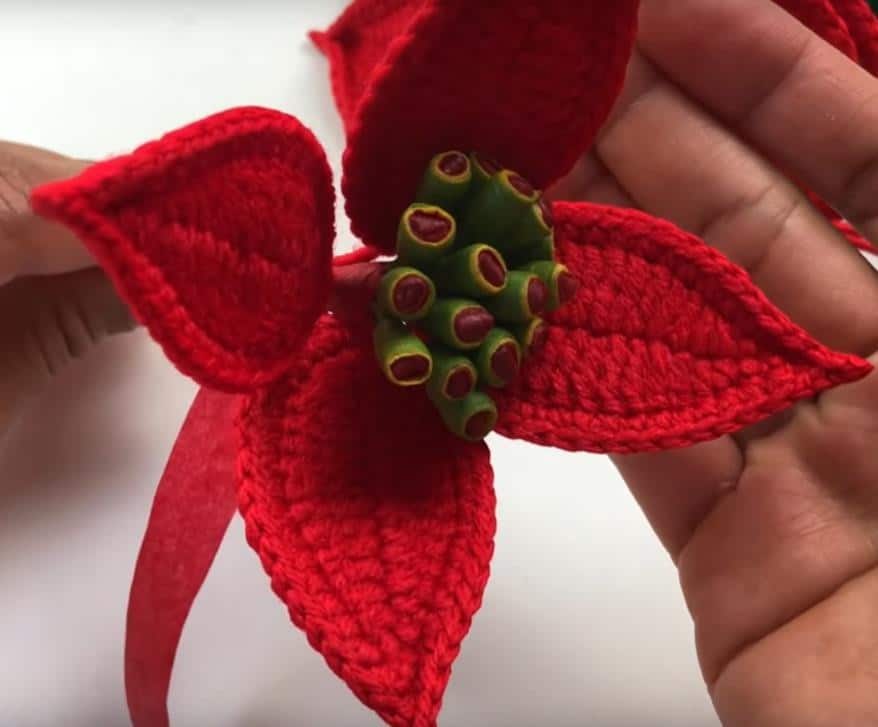
Step 12: Add one of the Large Petals to the stem with the top facing inward so that the Large Petal is inbetween two of the Small Petals. The base of the Large Petal should sit in line with where the tape starts to wrap around the Small Petals. Wrap the tape around the Stem and Large Petal 1.5 times.

Step 13: Add the second Large Petal opposite of the first Large Petal. Place it so that it is at the same height on the stem as the first Large Petal and have the top facing inward. Wrap the floral tape around the stem and petals 1.25 times.
Step 14: Repeat Step 13 to add the third Large Petal. Wrap the floral tape around the stem and petals 1.5 times.
Step 15: Repeat Step 13 to add the fourth Large Petal. Continue wrapping down the stem for about 3”.
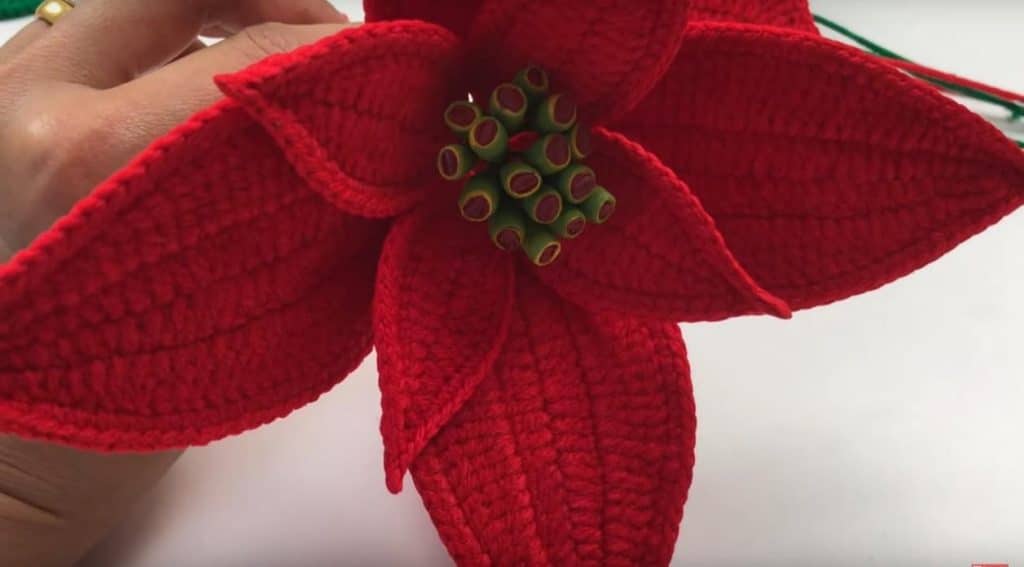
Step 16: Repeat Steps 12-15 to add all four Leaves to the stem so that the base of the Leaves are in line with where the tape starts to wrap around the Large Petals. The Leaves should sit in between the Large Petals.
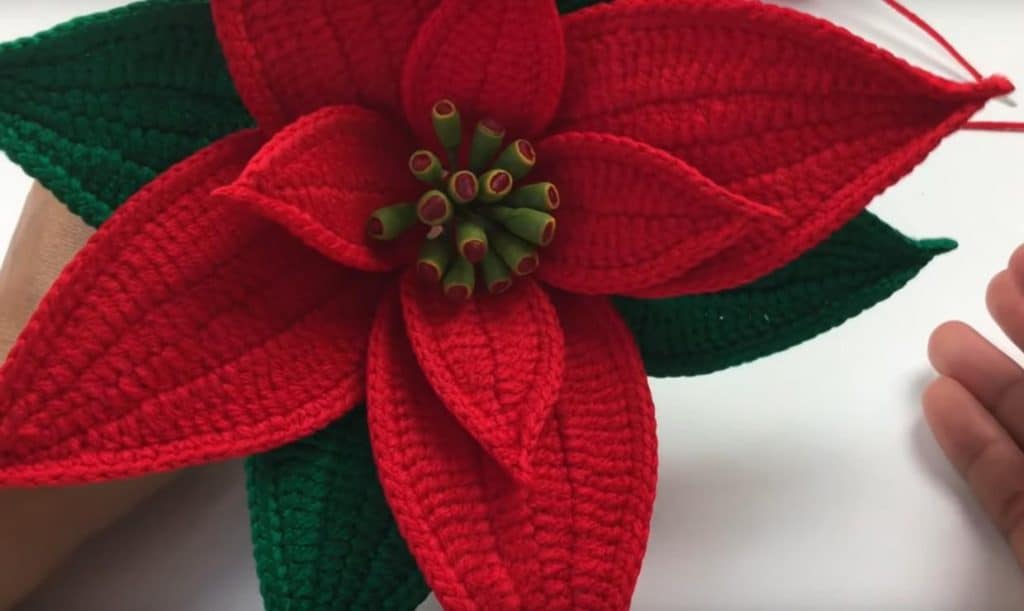
Step 17: Continue to wrap the red floral tape until most of the wire tails from the leaves are covered. Wrap the floral tape back up a few inches. Break off and secure the end of the tape.
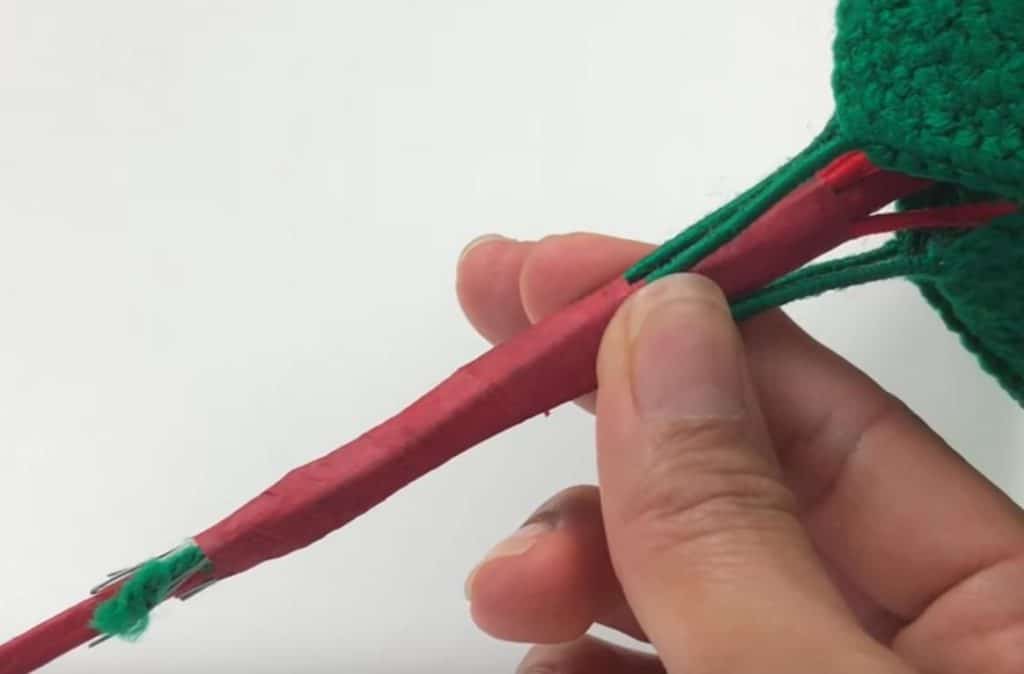
Step 18: Start wrapping the green floral tape around the stem about an inch below where the red floral tape starts to wrap around the Leaves. Wrap the green floral tape up to this same point so that the green floral tape now goes up to where the Leaves are attached to the stem.
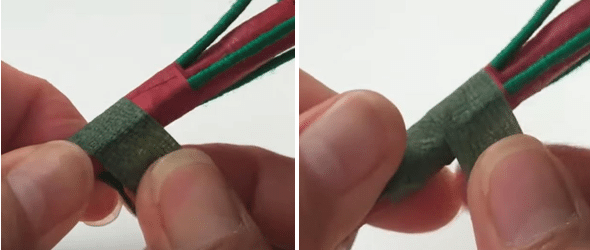
Step 19: Continue wrapping the green floral tape down the rest of the stem so all of the red tape is covered. Break off the tape and secure the end.
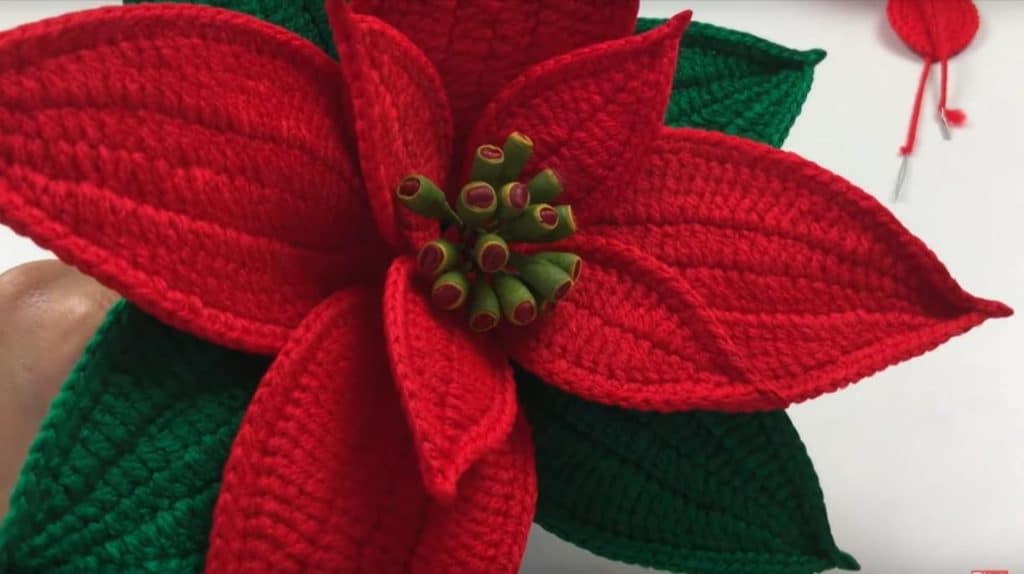
This is the final assembly. You can add a different number of pollen to different blooms for variety between them.