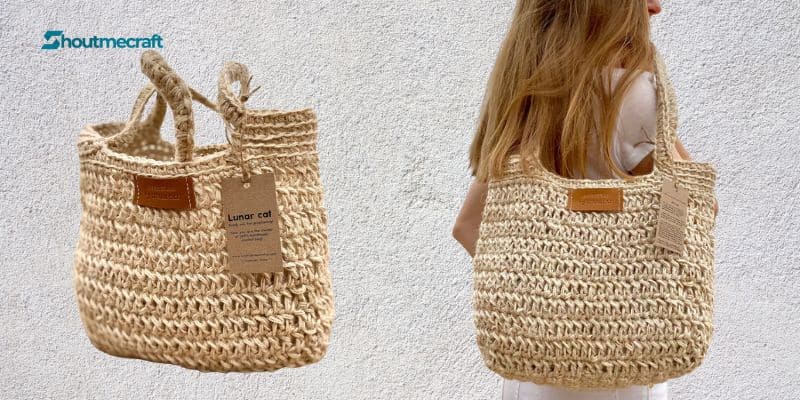
Crochet Granny Square Bag Beach Tutorial – Crochet Bag Pattern, Crochet Granny Square Bag, Reusable Grocery Bag, Country Beach Bag Zero Waste.
To create your project you need the following materials:
- Twine twisted jute rope – 1 lb (0.45 kg)
- Hook No. 7 mm
- Markers – 4 pcs.
Quick reminder and abbreviations of the stitches:
- CH – chain stitch
- DC – double crochet
- SC – single crochet
- 3 INC – 3 DC must be worked in 1 stitch at the point
- BLO – the back loop only
- ST – stitch
Approximate finished size is:
width in the widest place – 15” (38 cm), height – 12” (31 cm), handles length – 20” (50 cm).
So let’s get it started!
To create this bag please use twine-twisted jute rope (any color you like) and work it in TWO THREADS.
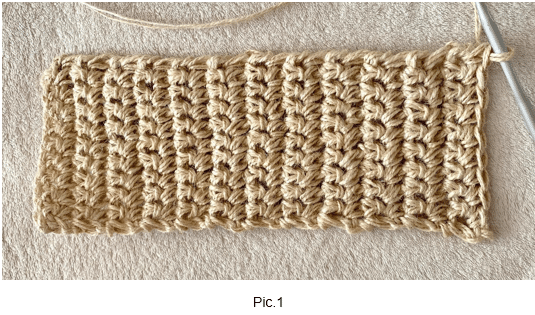
Make a chain of 10+1 CH.
ROW 1: Insert the hook into the second stitch from it and work 10 SC along the chain, work one CH and turn [10 STs].
ROW 2-22: SC 10, one CH and turn [10 STs].
As a result you’ll get a rectangular bag bottom (pic.1).
BAG SIDES
Now we proceed to crochet bag sides. They will be crocheted in Double Crochets. We work without turns but each round ends with a SL ST (slip stitch).
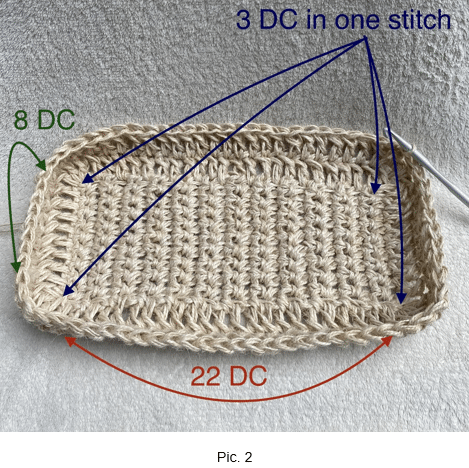
ROUND 1: 3 INC, DC 22, 3 INC, DC 8, 3 INC, DC 22, 3 INC, DC 8 [72 STs]
Join the first DC and the last DC with the SL ST. That is we work according to the scheme:
- along the longer side of the rectangle work 22 DC, along the shorter side – 8 DC;
- work 3 DC in 1 stitch in each corner of the rectangle (pic. 2)
ROUND 2-6: DC 72 around. Join the first DC and the last DC with the SL ST.
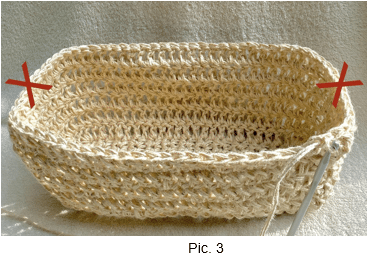
ROUND 7: in this round it is necessary to make 2 decreases in the places indicated on the pic. 3 – symmetrical on the sides of the bag. Total quantity of stitches is 70 STs.
How to decrease DC:
Yarn over the hook.
Insert your hook into the next stitch. Yarn over.
Draw the yarn through the stitch. Yarn over.
Draw the yarn through the first 2 loops on your hook.
Two loops remain on the hook (pic.4.1)
Yarn over the hook.
Insert your hook into the next stitch. Yarn over.
Draw the yarn through the stitch. Yarn over.
Draw the yarn through the first 2 loops on your hook.
You should have 3 loops remaining on your hook (pic. 4.2).
Yarn over. Draw the yarn through all 3 loops on your hook.
You’ve made 1 complete double crochet stitch decrease (pic. 4.3).

ROUND 8: DC around with making 2 decreases in the same places as in ROUND 7 [68 STs]. Complete the round with the SL ST.
ROUND 9-10: DC around [68 STs].
ROUND 11: SC around [68 STs] – pic.5.
Complete the round with the SL ST.
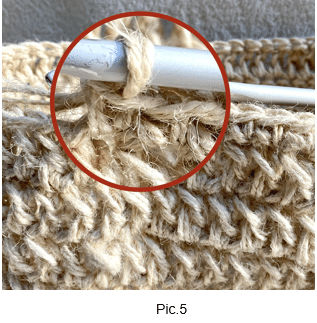
ROUND 11: SC in the BLO around (back loop only – the loops further away from you. It leaves the front loops untouched and creates a beautiful pattern) [68 STs] – pic. 6.
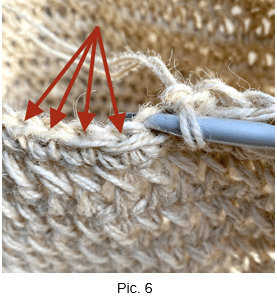
Break the rope, fasten off and hide the tail. Bag “body” is done.
BAG HANDLES
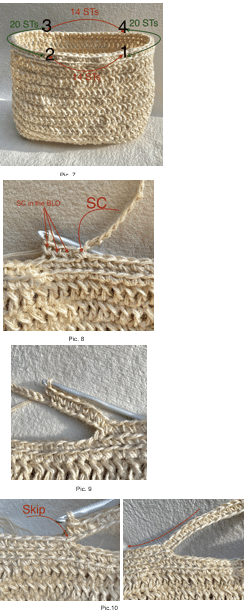
Place 2 markers in the center of the bag “body” at a distance of 14 SC from each other.
These will be the joining points of the first bag handle.
Do the same symmetrically on the other side of the bag (pic. 7). The distance from handle to handle should be 20 SC
ROUND 12: (starting from the first marker): SC under 2 loops, CH 45, skip 14 STs, SC under 2 loops (the second marker), SC in the BLO 18 repeat the same from the 3rd marker till the end of the round. See pic. 8.
From now every round is worked without joining. That means we’ll work in spiral rounds.
ROUND 13: SC 45, skip 1 ST, SC in the BLO 17 repeat the same from the 3rd marker till the end of the round.
Life hack! to get a smooth joint of handles and bag “body” I recommend to skip one stitch on the left side of each handle. And work 17 SC (instead of 18 SC) from handle to handle (see red arrow on pic. 10).
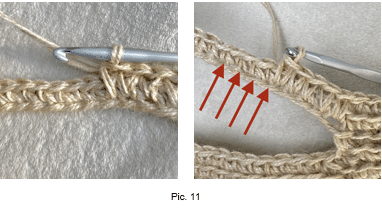
ROUND 14: *SC 45 in each stitch of the initial chain, SC in the BLO 17* repeat the same from the 3rd marker till the end of the round (pic. 11).
So that the handles will be stronger and will have a great look we work SC along the entire length of the handles in each stitch of the previous round (initial handles chain) (pic.11).
Break the rope, fasten off and hide the tail.
Congratulations!!!
You’ve just finished your Country jute bag!