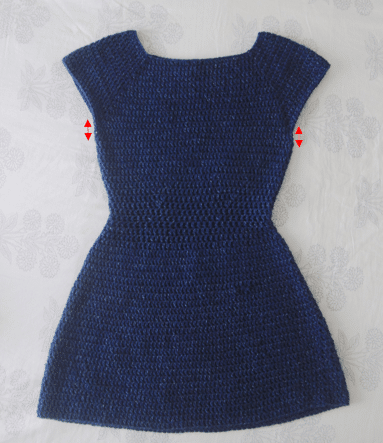
Crochet Dress Cap – The short sleeves and flowing skirt make the sleek and elegant silhouette ideal for summer; it also makes a very adaptable garment!
*Sample is a size XS shown on a 5’3” model with a 32” bust.
*The sizing guide follows size XS(S, M, L, XL, 2XL, 3XL).
*”DC 10” means DC into the next 10 stitches.
*”3DC” means place 3DC into the same stitch.
*This dress is created from the top down so the body and skirt length are customisable. I suggest trying on the dress at the end of the ‘YOKE’, ‘BODY’ and ‘SKIRT’ instructions. You can add or remove rounds after each stage to customise fit.
*Lion Brand Jeans yarn does have lovely drape to it but keep in mind that the dress will drop/become longer once you’ve worn it.
*Ch 3 always counts as a stitch and can be replaced with a no turning chain to reduce the seam.
*Total stitches are indicated between < >. This pattern uses US crochet terms.
MATERIALS
- Lion Brand Jeans Yarn – Aran/Worsted (10 ply), 225m/100g, 100% Acrylic in Classic XS = 4 skeins, S = 5, M = 6, L = 6, XL = 7, 2XL = 7, 3XL = 8
- 5mm (US H/8) Crochet Hook
- 4 Stitch Markers
- Darning Needle, scissors
STITCHES
- Ch = Chain
- Sl st = Slip Stitch
- DC = Double Crochet
- DC2tog = Double Crochet 2 stitches together
MEASUREMENTS
Measurements (cm):
- Bust: 76(86, 94, 100, 111, 122, 132)
- Armhole depth: (16, 18, 20, 23, 25, 28, 30)
- Waist: 60(66, 74, 84, 94, 104, 114)
- Length: 76(78, 81, 84, 87, 90, 93)
Measurements (inches):
- Bust: 30(34, 37, 40, 44, 48, 52)
- Armhole depth: 6.5(7, 8, 9, 10, 11, 12)
- Waist: 23.5(26, 29, 33, 37, 41, 45)
- Length: 30(31, 32, 33, 34, 35.5, 36.5)
*Measurements are taken from the garment lying flat, before the yarn has stretched out/dropped.
GAUGE
10cm/4” square = 13 stitches wide x 8 rows tall in double crochet

YOKE
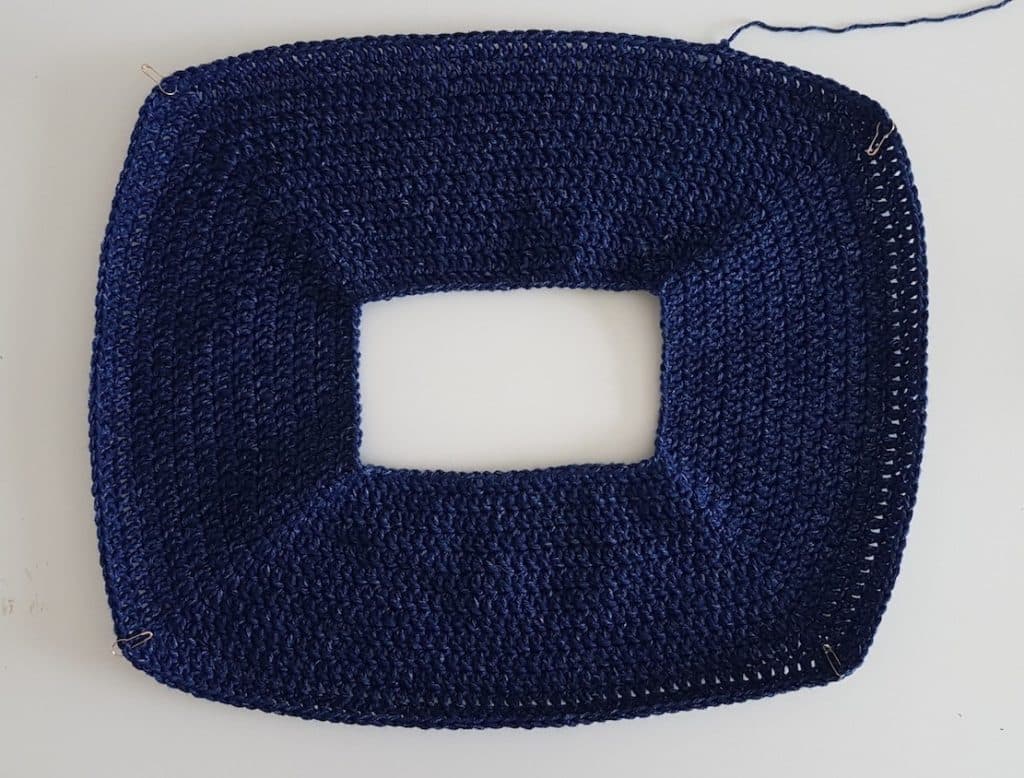
FOUNDATION CHAIN: Ch 84(92, 100, 108, 116, 124, 132). Sl st into the first chain. Make sure your ring of chains is not twisted!
ROUND 1: Ch 3, DC 24(26, 28, 30, 32, 34, 36), 3DC into the same stitch – insert a stitch marker on top of the 2nd stitch in the 3 DC cluster.
DC 15(17, 19, 21, 23, 25, 27), 3DC – insert a stitch marker on top of the 2nd stitch in the 3DC cluster. DC 25(27, 29, 31, 33, 35, 37), 3DC – insert a stitch marker on top of the 2nd stitch in the 3DC cluster. DC 15(17, 19, 21, 23, 25, 27), 3DC – insert a stitch marker on top of the 2nd stitch in the 3DC cluster. Sl st into the 3rd chain at the beginning of the round.
<92(100, 108, 116, 124, 132, 140)>
*After every 3DC cluster move the stitch marker on top of the 2nd stitch.
ROUND 2: Ch 3, DC 25(27, 29, 31, 33, 35, 37), 3DC, DC 17(19, 21, 23, 25, 27, 29), 3DC, DC 27(29, 31,
33, 35, 37, 39), 3DC, DC 17(19, 21, 23, 25, 27, 29), 3DC, DC 1.
Sl st into the 3rd chain at the beginning of the round.
<100(108, 116, 124, 132, 140, 148)>
ROUND 3: Ch 3, DC 26(28, 30, 32, 34, 36, 38), 3DC, DC 19(21, 23, 25, 27, 29, 31), 3DC, DC 29(31, 33,
35, 37, 39, 41), 3DC, DC 19(21, 23, 25, 27, 29, 31), 3DC, DC 2.
Sl st into the 3rd chain at the beginning of the round.
<108(116, 124, 132, 140, 148, 156)>
ROUND 4: Ch 3, DC in every stitch until the stitch marker, 3 DC into the stitch with a stitch marker. DC in every stitch until the stitch marker, 3 DC into the stitch with a stitch marker. DC in every stitch until the stitch marker, 3 DC into the stitch with a stitch marker. DC in every stitch until the stitch marker, 3 DC into the stitch with a stitch marker, DC in every stitch until the end of the round.
Sl st into the 3rd chain at the beginning of the round.
<116(124, 132, 140, 148, 156, 164)>
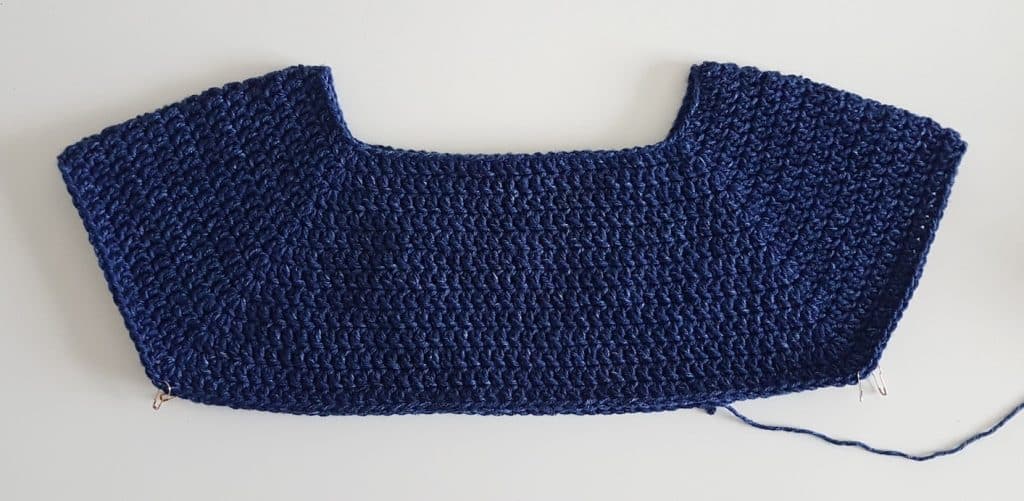
Repeat ROUND 4 until ROUND 13(14, 15, 16,18, 20, 22). <188(204, 220, 236, 260, 284, 308)>

*Note – I suggest trying on the yoke. The corners/stitch markers should meet underneath your arms on both sides (e.g. the front left stitch marker should be able to reach the back left stitch marker and the same for the right side). The top should fit over your bust.
If the top or armholes are too tight enough ADD more rounds. If the top or armholes are too large REMOVE rounds.
*Note – If you’ve altered the yoke, this will change total stitch count. Follow the stitch patterns for the size with the closet number to the total number of stitches in your yoke to achieve the fit and flare shape.
<188(204, 220, 236, 260, 284, 308)>
BODY

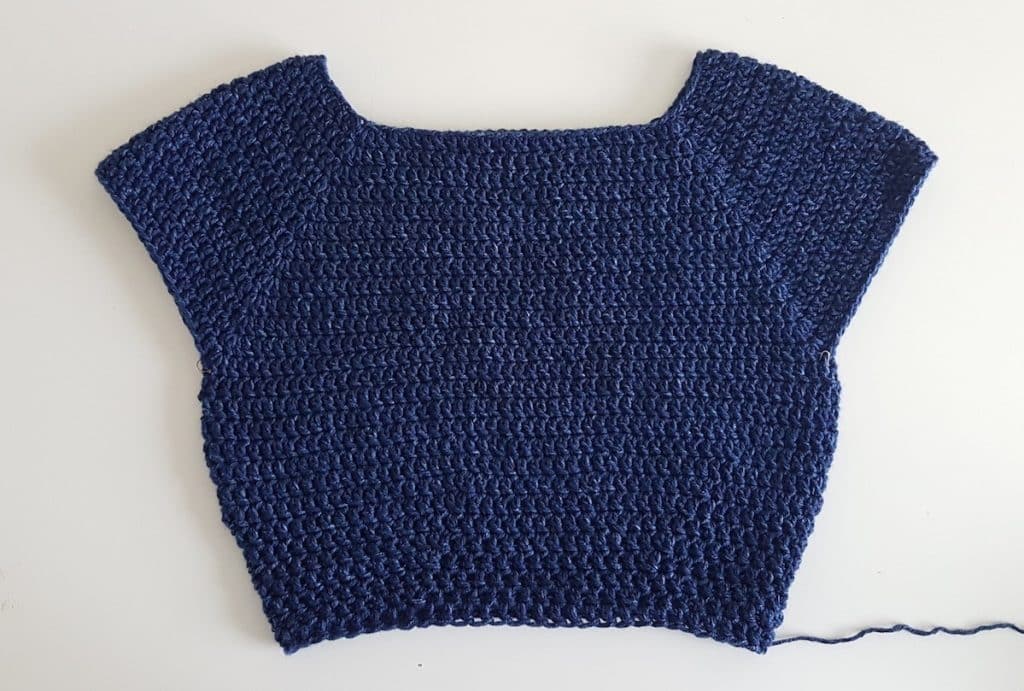
ROUND 1: Ch 3, DC in every stitch until the 1st stitch marker, DC into the stitch with a stitch marker, DC into the next stitch with a stitch marker. DC in every stitch until the 3rd stitch marker, DC into the stitch with the 3rd stitch marker, DC into the last stitch with a stitch marker. DC in each stitch until the end of the round. Sl st into the 3rd chain at the beginning of the round.
<106(114, 122, 130, 142, 154, 166)>
ROUNDS 2 – 4: Ch 3, DC in each stitch of the round. Sl st into the 3rd chain at the beginning of the round.
ROUND 5: Ch 3, *DC 8(9, 10, 10, 11, 12, 14), DC2tog*; rep * – * around, DC in all remaining sts to end. Sl st into the 3rd chain at the beginning of the round.
<96(104, 112, 120, 132, 144, 156)>
ROUND 6: Ch 3, DC in each stitch of the round. Sl st into the 3rd chain at the beginning of the round.
ROUND 7: Ch 3, *DC 7(8, 9, 9, 11, 12, 13), DC2tog*; rep *-* around, DC in any remaining sts to end. Sl st into the 3rd chain at the beginning of the round.
<86(94, 102, 110, 122, 134, 146)>
ROUND 8: Ch 3, *DC 15(16, 18, 19, 22, 24, 27), DC2tog*; rep *-* around, DC in any remaining sts to end. Sl st into the 3rd chain at the beginning of the round.
<81(89, 97, 105, 117, 129, 141)>
ROUND 9: Ch 3, *DC 14(15, 17, 18, 21, 23, 25), DC2tog*; rep *-* around, DC in any remaining sts to end. Sl st into the 3rd chain at the beginning of the round.
<76(84, 92, 100, 112, 124, 136)>
ROUND 10: Ch 3, *DC 13(14, 16, 17, 20, 22, 24), DC2tog*; rep *-* around, DC in any remaining sts to end. Sl st into the 3rd chain at the beginning of the round.
<71(79, 87, 95, 107, 119, 131)>
ROUND 11: Ch 3, *DC 12(13, 15, 16, 19, 21, 23), DC2tog*; rep *-* around, DC in any remaining sts to end. Sl st into the 3rd chain at the beginning of the round.
<66(74, 82, 90, 102, 114, 126)>
ROUND 12: Ch 3, *DC 11(12, 14, 15, 18, 20, 22), DC2tog*; rep *-* around, DC in any remaining sts to end. Sl st into the 3rd chain at the beginning of the round.
<61(69, 77, 85, 97, 109, 121)>
ROUND 13: Ch 3, DC in each stitch of the round. Sl st into the 3rd chain at the beginning of the round.

*Note – You can remove Round 13 or add more rounds of Round 13 to make the body shorter or longer.
*If the waist is too tight, you can replace decrease rounds (e.g. ROUND 12 and 11) with Round 13.
SKIRT
ROUND 1: Ch 3, *DC 3, 2DC*; rep *-* until the end of the round. Sl st into the 3rd chain at the beginning of the round.
<76(86, 96, 106, 121, 136, 151)>
ROUND 2: Ch 3, DC in each stitch of the round. Sl st into the 3rd chain at the beginning of the round.
ROUND 3: Ch 3, *DC 3, 2DC*; rep *-* around, DC in any remaining sts to end. Sl st into the 3rd chain at the beginning of the round.
<94(107, 119, 132, 151, 169, 188)>
ROUND 4: Ch 3, *DC 3, 2 DC*; rep *-* around, DC in any remaining sts to end. Sl st into the 3rd chain at the beginning of the round.
<117(133, 148, 164, 188, 211, 234)>
ROUNDS 5 – 9: Ch 3, DC in each stitch of the round. Sl st into the 3rd chain at the beginning of the round.
ROUND 10: Ch 3, *DC 7, 2 DC*; rep *-* around, DC in any remaining sts to end. Sl st into the 3rd chain at the beginning of the round.
<131(149, 166, 184, 211, 237, 263)>
ROUNDS 11 – 15: Ch 3, DC in each stitch of the round. Sl st into the 3rd chain at the beginning of the round.
ROUND 16: Ch 3, *DC 7, 2 DC*; rep *-* around, DC in any remaining sts to end. Sl st into the 3rd chain at the beginning of the round.
<147(167, 186, 206, 237, 266, 295)>
ROUND 17: Ch 3, DC in each stitch of the round. Sl st into the 3rd chain at the beginning of the round.
Repeat ROUND 17 until ROUND 30.

*You can add or remove rounds to have a longer/shorter dress. Once you’re satisfied with the length, fasten off.
Weave in all of your ends.
*If you find the armholes slightly large, you can sew the edges together – from the base of the armholes to 2-8cm/1-3” up the edge.
BELT
ROW 1: Ch 7, DC into the 3rd chain from the hook, DC 4.
ROW 2: Ch 2 (does not count as a stitch), turn. DC 5.
Repeat ROW 2 until ROW 84(90, 96, 104, 110, 116, 122).
*You can add or remove rounds to have a longer/shorter belt. Once you’re satisfied with the length, fasten off and weave in ends.