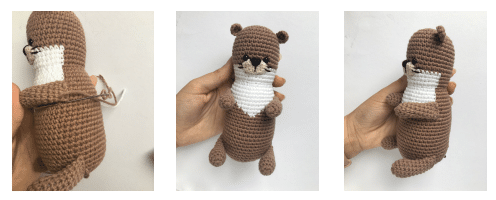
List of Materials and Tools:
1. Sport weight/4ply yarn (50g/160m):
- For body and head – light brown – Yarn Art Jeans № 71
- white – Yarn Art Jeans № 62
- For muzzle – beige – Yarn Art Jeans № 05
2. Hook size 2 mm
3. Polyester toy filling (I used fiberfill)
4. Black safety eyes size 6 mm (2 pcs.)
5. Black thread for embroider of a nose and whiskers
6. Needle with a wide eye for assembly and toy decoration
7. Sewing pins for assembly
Abbreviations:
- MR – magic ring
- sc – single crochet
- inc – increase (2 sc in one stitch)
- dec – decrease (2 sc together)
- sl st – slip stitch
- (…)*N – instruction in brackets N times
Note
- The pattern does not contain crochet lessons;
- All pieces are crocheted in a spiral, unless otherwise indicated;
- When crocheting, there is no need to follow the marker, i.e. no need to crochet extra stitches;
- When using this yarn and hook, the toy is 9 4/5 inch (25 cm). When using a different yarn and hook size, the size of the finished toy changes.
Required Skills:
– amigurumi ring
– single crochet
– increase
– decrease
– slip stitch
– color changing
— pull off the opening
– amigurumi ring
– single crochet
– increase
– decrease
– slip stitch
– color changing
— pull off the opening
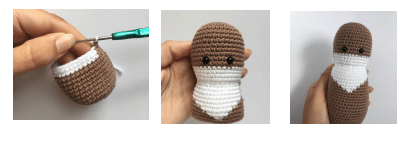
Head & Body
Black text – crochet in brown color
Red text – crochet in white color.
Do not stuff until you insert the eyes.
- 1 Rnd: 6 sc in MR
- 2 Rnd: 6 inc (12)
- 3 Rnd: (1 sc, inc)*6 (18)
- 4 Rnd: (1 sc, inc)*9, (27)
- 5 Rnd: (2 sc, inc)*9 (36)
- 6-14 Rnds: 36 sc (9 rounds)
- 15-18 Rnds: 9 sc, 18 sc, 9 sc (4 rounds of 36 sc)
- 19 Rnd: 1 sc, (dec, 2 sc)*2, (dec, 2 sc)*4, dec, (2 sc, dec)*2, 1 sc (27)
- 20 Rnd: (1 sc, inc)*3, 1 sc, (inc, 1 sc)*6, inc, (1 sc, inc)*3, 1 sc (40)
- 21 Rnd: 9 sc, inc, ( 9 sc, inc)*2, 9 sc, inc (44)
- 22 Rnd: 11 sc, 22 sc, 11 sc (44)
- 23 Rnd: 11 sc, 22 sc, 11 sc (44)
- 24 Rnd: 13 sc, 18 sc, 13 sc (44)
- 25 Rnd: 16 sc, 13 sc, 15 sc (44)
- 26 Rnd: 19 sc, 8 sc, 17 sc (44)
- 27 Rnd: 21 sc, 5 sc, 18 sc (44)
- 28 Rnd: 23 sc, 2 sc, 19 sc (44)
Insert the eyes between rounds 13 and 14 at a distance of 5 sc so that they are located symmetrically to 2 sc of the white part in round 28. Begin to tightly stuff the head and body in the process.
- 29-38 Rnds: 44 sc (10 rounds)
- 39 Rnd: (9 sc, dec)*4 (40)
- 40-42 Rnds: 40 sc (3 rounds)
- 43 Rnd: (8 sc, dec)*4 (36)
- 44 Rnd: (4 sc, dec)* 6 (30)
- 45 Rnd: (3 sc, dec)* 6 (24)
- 46 Rnd: (2 sc, dec)* 6 (18)
- 47 Rnd: (1 sc, dec)* 6 (12)
- 48 Rnd: 6 dec
Tighten the hole. Fasten off and cut the yarn.
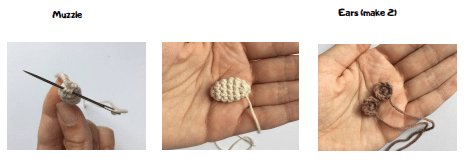
Muzzle
Crochet in beige color. Do not stuff.
- 1 Rnd: 6 sc in MR
- 2 Rnd: (1 sc, inc)*3 (9)
- 3-5 Rnds: 9 sc (3 rounds)
- 6 Rnd: (1 sc, dec)*3 (6)
Tighten the hole. Fasten off, cut the yarn, leaving a long tail for sewing pieces.
Ears(make 2)
Crochet in brown color.
- 1 Rnd: 6 sc in MR
- 2 Rnd: (1 sc, inc)*3 (9) + extra sl st
Fasten off, cut the yarn, leaving a long tail for sewing pieces
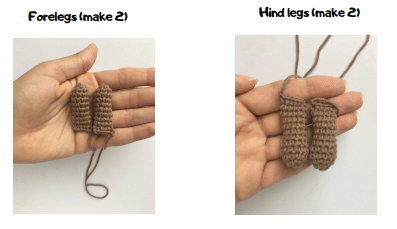
Forelegs(make 2)
- 1 Rnd: 5 sc in MR
- 2 Rnd: 5 inc (10)
- 3-10 Rnds: 10 sc (8 rounds)
Fold in half and crochet 5 sc through both sides. Fasten off, cut the yarn, leaving a long tail for sewing pieces.
Hind legs(make 2)
Crochet in brown color. Stuff to the middle in the process.
- 1 Rnd: 6 sc in MR
- 2 Rnd: 6 inc (12)
- 3-5 Rnds: 12 sc (3 rounds)
- 6 Rnd: 4 sc, 2 dec, 4 sc (10)
- 7-11 Rnds: 10 sc (5 rounds)
Fold in half and crochet 5 sc through both sides. Fasten off, cut the yarn, leaving a long tail for sewing pieces.
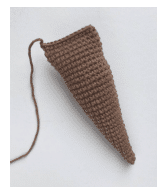
Tail
Crochet in brown color. Stuff in the process. Do not stuff 1/2-4/5 inch (1.5-2 cm) from above.
- 1 Rnd: 6 sc in MR
- 2 Rnd: 6 sc
- 3 Rnd: (1 sc, inc)*3 (9)
- 4-5 Rnds: 9 sc (2 rounds)
- 6 Rnd: (2 sc, inc)*3 (12)
- 7- 8 Rnds: 12 sc (2 rounds)
- 9 Rnd: (3 sc, inc)*3 (15)
- 10- 11 Rnds: 15 sc (2 rounds)
- 12 Rnd: (4 sc, inc)*3 (18)
- 13-15 Rnds: 18 sc (3 rounds)
- 16 Rnd: (5 sc, inc)*3 (21)
- 17-19 Rnds: 21 sc (3 rounds)
- 20 Rnd: (6 sc, inc)*3 ( 24)
- 21-31 Rnds: 24 sc (11 rounds)
Fold in half and crochet 12 sc through both sides. Fasten off, cut the yarn, leaving a long tail for sewing pieces.
Assembly & Decoration
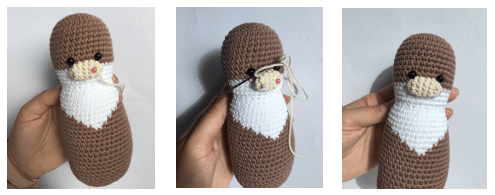
Sew the muzzle between rounds 13 and 17 as close as possible to the eyes.
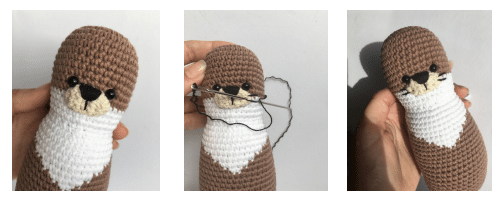
Embroider a nose and whiskers with a black thread.
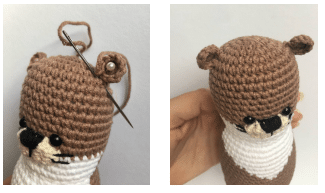
Sew the ears at the level of round 6.
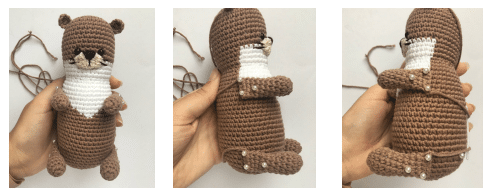
Sew the forelegs between rounds 23 and 28.
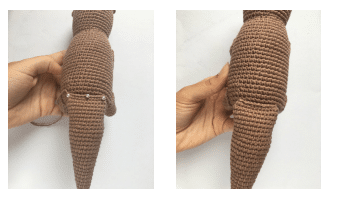
Sew the hind legs between rounds 38 and 43.
Sew the hind legs between rounds 38 and 43.
Optionally, you can make 2 stitches on the top and bottom of each leg to fix them.
Sew the tail between rounds 42 and 43.
Congratulations! The otter isready!
