This adorable chameleon rattle is a great baby shower or birthday gift for the little ones in your life.
In this pattern you will find detailed instructions and variety of pictures explaining how to make this toy. If you have any questions, you can always contact me. I will do my best to help you.
Size of a finished toy is about 14 cm (5.5 inch) if using indicated yarn and wooden ring.
Abbreviations
- st – stitch
- sl – slip stitch
- ch – chain
- sc – single crochet
- hdc – half double crochet
- dc – double crochet
- inc – increase (2 single crochets in one stitch)
- dec – invisible decrease (2 stitches together working in front loops only)
- BLO – back loops only
- (..) – repeat between () number of times indicated
- [..] – total number of stitches in the round or row
Crochet in continuous rounds. Do not join, slip stitch or turn unless otherwise stated in the pattern.
Materials needed
- DK (3 or light worsted) weight yarn in colours purple, blue, royal purple, lavender, magenta and black (The exact weight of the yarn is 260m in 100g ball (3,53Oz – 274 yds))
- Embroidery thread in colours black and white
- 2 mm crochet hook
- Fiberfill for stuffing
- Sewing needle and scissors
- Rattle box insert
- 7 cm diameter wooden teething ring
- Pins and stitch markers
The length of the finished rattle is about 14 cm. The size might vary if you use a different weight yarn or hook size.
Yarn info
Yarn used for the rattle:
• Scheepjes CATONA 100% mercerized cotton yarn
• Alize BAHAR 100% mercerized cotton yarn Embroidery thread used for the rattle: DMC embroidery thread
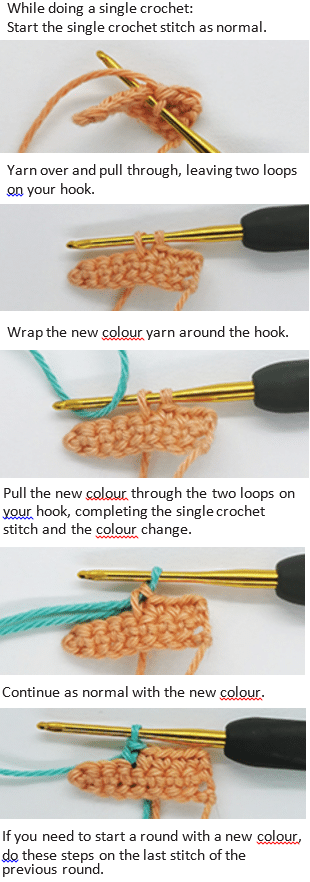
Changing the yarn colour
Head
• Work in rounds
• Use purple colour yarn
- 1 – sc 6 in a magic ring [6]
- 2 – (inc) repeat 6 times [12]
- 3 – (sc 3, inc) repeat 3 times [15]
- 4 – (sc 2, inc, sc 2) repeat 3 times [18]
- 5 – (sc 5, inc) repeat 3 times [21]
- 6 – (sc 3, inc, sc 3) repeat 3 times [24]
- 7 – (sc 7, inc) repeat 3 times [27]
- 8 – (sc 4, inc, sc 4) repeat 3 times [30]
- 9 – (sc 9, inc) repeat 3 times [33]
- 10 – (sc 5, inc, sc 5) repeat 3 times [36]
- 11 – (sc 3, inc) repeat 6 times, sc 12 [42]
- 12 – (sc 2, inc, sc 2) repeat 6 times, sc 12 [48]
- 13 – sc 48 [48]
- 14 – sc 4, work in BLO: sc 1, mark the first remaining front loop with a stitch marker, sc 27, work in both loops: sc 16 [48]
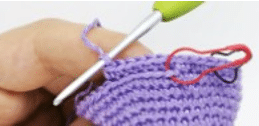
- 15 – sc 18, flatten the head and crochet through both sides to close the part of the head: sc 8.
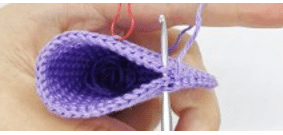
Finish closing here and continue working around the open part of the head. You should have 32 stitches left.
- 16 – (sc 1, dec, sc 1) repeat 8 times [24] Stuff the half of the head with fiberfill and insert the rattle box.
- 17 – (sc 1, dec) repeat 8 times [16]
Head Advanced
Finish stuffing the head firmly.
- 18 – (dec) repeat 8 times [8]
Fasten off and leave a tail for sewing.
Take a yarn needle and weave the remaining tail through the front loops of round 18.
Pull it tight to close the head completely.
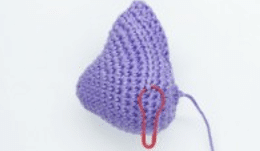
Work in the remaining front loops of round 14:
• Work in rows
• Use purple colour yarn
- 1 – Insert your hook in the marked front loop, pull the yarn through, ch 1, sc 1 in the same stitch, sc 4, hdc 4, dc 10, hdc 4, sc 5 [28]
- 2 – ch 1, turn, sc 5, hdc 4, dc 10, hdc 4, sc 5 [28]
- 3 – ch 1, turn, sc 9, dec 5, sc 9 [23]
Fasten off and leave a tail for sewing.
Take a yarn needle and sew each side to the head, so they blend in and hold better.
Eyes (make 2)
Inner part
• Work in rounds
• Use black colour yarn
- 1 – sc 5 in a magic ring [5]
- 2 – (inc) repeat 5 times [10]
- 3 – sc 10 [10]
sl 1 and fasten off.
Take a strand of white embroidery thread and embroider a light reflection on round 1.
Outer part
• Work in rounds
• Use purple colour yarn
- 1 – ch 7 [7]
- 2 – sl 1 in the first chain st, to create a ring. Work inside the ring: sc 12 [12]
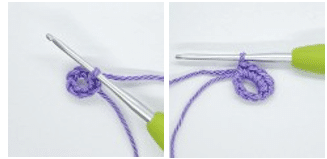
- 3 – 4. sc 12 [12]
- sl 1, fasten off and leave a long tail for sewing.
Assemble the eyes
Place the inner part inside the outer part and hide all the remaining ends inside (except the one left for sewing). Add some fiberfill if needed.
Body
- Work in rows
- Start with purple colour yarn
- Note that you may need to increase or decrease the number of stitches and/or rows needed to match your wooden ring
- Work over the strand of unused colour after you make a colour change and carry the yarn all the way across
- You may also follow the chart instead of written instructions
- 1 – ch 11 [11]
- 2 – Start in the 2nd ch from the hook: sc 10 [10]
- 3 – 6. ch 1, turn, sc 10 [10]
- 7 – 8. ch 1, turn, sc 3, change to blue, sc 4,change to purple, sc 3 [10]
- 9 – ch 1, turn, sc 10 [10]
- 10 – ch 1, turn, sc 2, (change to blue, sc 2,change to purple, sc 2) repeat 2 times [10]
- 11 – ch 1, turn, sc 1, change to blue, sc 3,change to purple, sc 1, change to blue, sc 4,change to purple, sc 1 [10]
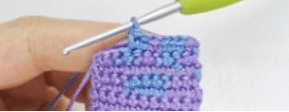
- 12 – ch 1, turn, sc 10 [10]
- 13 – ch 1, turn, sc 2, change to blue, sc 6,change to purple, sc 2 [10]
- 14 – ch 1, turn, sc 10 [10]
- 15 – ch 1, turn, sc 3, change to blue, sc 4,change to purple, sc 3 [10]
- 16 – ch 1, turn, sc 4, change to blue, sc 2,change to purple, sc 4 [10]
- 17 – ch 1, turn, sc 1, change to blue, sc 2,change to purple, sc 1, (change to blue, sc 1, change to purple, sc 2) repeat 2 times [10]
- 18 – ch 1, turn, sc 7, change to blue, sc 2,change to purple, sc 1 [10]
- 19 – ch 1, turn, sc 5, change to blue, sc 3,change to purple, sc 2 [10]
- 20 – 21. ch 1, turn, sc 3, change to blue, sc 4,change to purple, sc 3 [10]
- 22 – 23. ch 1, turn, sc 2, change to blue, sc 2,change to purple, sc 6 [10]
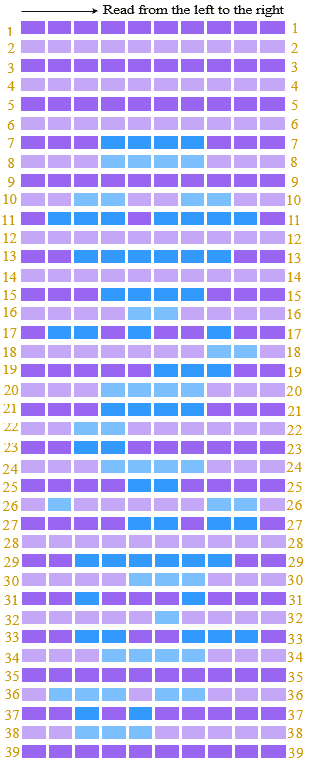
- 24 – ch 1, turn, sc 3, change to blue, sc 4,change to purple, sc 3 [10]
- 25 – ch 1, turn, sc 4, change to blue, sc 2,change to purple, sc 4 [10]
- 26 – ch 1, turn, sc 1, change to blue, sc 1, change to purple, sc 5, change to blue, sc 2, change to purple, sc 1 [10]
- 27 – ch 1, turn, sc 4, (change to blue, sc 2,change to purple, sc 1) repeat 2 times [10]
- 28 – ch 1, turn, sc 10 [10]
Body Advanced
- 29 – ch 1, turn, sc 2, change to blue, sc 6,change to purple, sc 2 [10]
- 30 – ch 1, turn, sc 4, change to blue, sc 3,change to purple, sc 3 [10]
- 31 – ch 1, turn, sc 2, (change to blue, sc 1,change to purple, sc 3) repeat 2 times [10]
- 32 – ch 1, turn, sc 5, change to blue, sc 1,change to purple, sc 4 [10]
- 33 – ch 1, turn, sc 2, change to blue, sc 2, change to purple, sc 2, change to blue, sc 3, change to purple, sc 1 [10]
- 34 – ch 1, turn, sc 3, change to blue, sc 4,change to purple, sc 3 [10]
- 35 – ch 1, turn, sc 10 [10]
- 36 – ch 1, turn, sc 1, change to blue, sc 3, change to purple, sc 1, change to blue, sc 2, change to purple, sc 3 [10]
- 37 – ch 1, turn, sc 2, change to blue, sc 1, change to purple, sc 1, change to blue, sc 1, change to purple, sc 5 [10]
- 38 – ch 1, turn, sc 2, change to blue, sc 3,change to purple, sc 5 [10]
- 39 – ch 1, turn, sc 10 [10]
Fasten off and leave a tail for sewing.
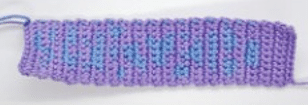
Tail
• Work in rounds
• Start with blue colour yarn
• Stuff the tail lightly as you go
- 1 – sc 6 in a magic ring [6]
- 2 – sc 5, inc [7]
- 3 – 6. sc 7 [7]
- 7 – sc 3, change to purple, sc 1, change to blue, sc 2, change to purple, sc 1, change to blue [7]
- 8 – sc 1, change to purple, sc 2, change to blue, sc 4 [7]
- 9 – sc 3, change to purple, sc 4, change to blue [7]
- 10 – sc 1, change to purple, sc 2, change to blue, sc 2, change to purple, sc 2 [7]
- 11 – sc 2, change to blue, sc 5 [7]
- 12 – sc 3, change to purple, sc 4 [7]
- 13 – sc 7 [7]
Tail Advanced
- 14 – sc 1, change to blue, sc 2, change to purple, sc 2, change to blue, sc 2, change to purple [7]
- 15 – sc 7 [7]
- 16 – sc 2, change to blue, sc 3, change to purple, sc 2 [7]
- 17 – sc 1, change to blue, sc 1, change to purple, sc 3, change to blue, sc 2 [7]
- 18 – sc 1, change to purple, sc 5, change to blue, sc 1, change to purple [7]
- 19 – sc 3, inc, sc 2, inc [9]
- 20 – sc 2, inc, change to blue, sc 2, inc, change to purple, sc 2, inc [12]
- 21 – (sc 3, inc) repeat 3 times [15]
- 22 – (sc 1, inc, change to blue, sc 3, change to purple) repeat 3 times [18]
- 23 – (sc 5, inc) repeat 3 times [21] Fasten off and leave a tail for sewing.

Ridge
• Work in rows
• Use royal purple colour
- 1 – ch 35 [35]
- 2 – Start in the 2nd ch from the hook: (sl 2, ch 2, sl 1 in 2nd ch from the hook) repeat 15 times, sl 4 [15 spikes]
Fasten off and leave a tail for sewing.
Assembly
- Assemble the head:
- Place the eyes on the sides of the head. They should appear on the rounds 6 – 11. Secure with pins and sew around using the remaining tail.
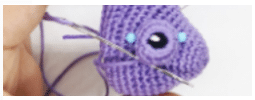
- Take a strand of black embroidery thread and embroider the mouth. It should range from one side to the other right below the eyes.
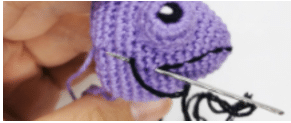
- Embroider some dots around the eyes using magenta, lavender and royal purple colour yarn.

- Sew the body around the wooden ring using the remaining yarn tail.
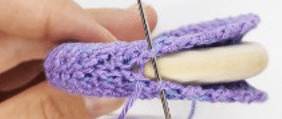
- Place the tail on the body. It should cover the rounds 33 – 39. Secure the position with pins and sew it with the remaining yarn tail. Do not cut the remaining end for completing the tail.
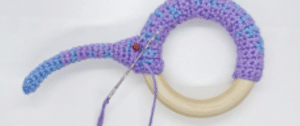
- Shape the tail: form a spiral towards the uncovered part of the wooden ring, secure it with pins and sew it using the same yarn end you used for sewing the tail.
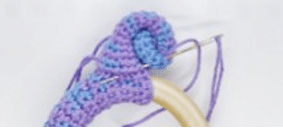
- Place the ridge on top of the body and the tail. It should start on round 7 of the body (the first blue spot). The last 4 sl stitches of the ridge should appear on the rounds 15 – 18 of the tail.
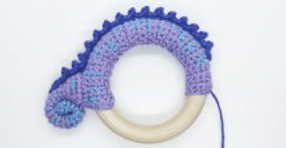
- Embroider some dots around the ridge using magenta and lavender colour yarn.
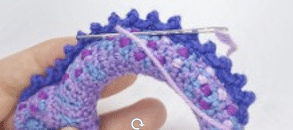
- Attach the head on the body using the remaining yarn tail.