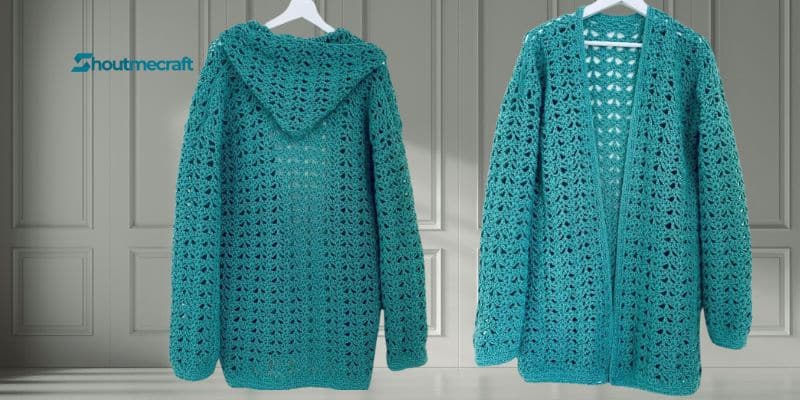
Cardigans are a girl’s best friend! Add this soft, feminine cardigan to your winter ensemble. Very quick and simple to create, perfect for layering. You can choose not to use the hood.
All skill levels may use this pattern. Dimensions: small, medium, big, extra large.
A link to my YouTube channel, written instructions, and a step-by-step photo tutorial for crafting and assembling the cardigan are included.
MEASUREMENTS:
- If you want to make your cardigan larger or smaller than the given instructions, make sure your chain will be dividable by 7 + 1!
- 4 sets ( rows 2 and 3 ) of stitching in heigth = about 10 cm/ 4”
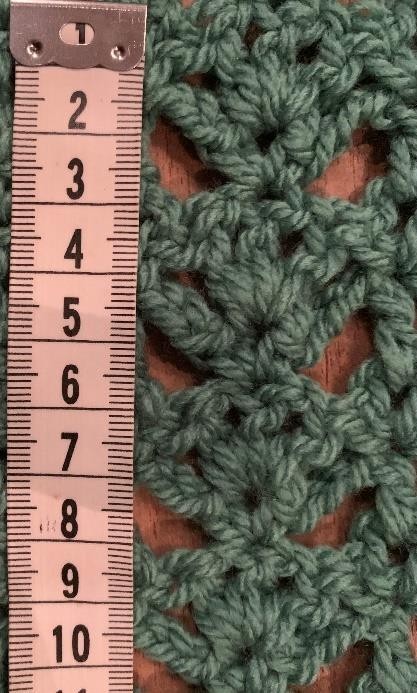
- 2 sets in width = about 8 cm/ 3.2”
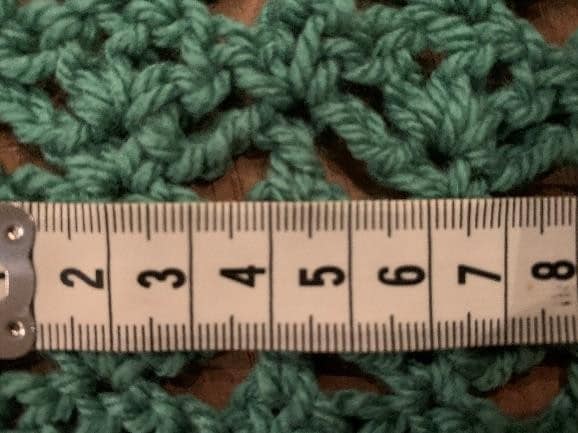
- Length of the cardigan in the picture is approximately: 82 cm (you can make the cardigan as short as as long as you want to, just add or subtract some rows;) )
- Width of the back panel is approximately is approoximately: 54 cm – 21.2”/ 60 cm – 23.6”/ 72 cm – 28.3”
- Width of the front panels without the final border approximatley : 18 cm –
- 7.1”/ 24 cm – 9.5”/ 30 cm – 11.8”
- Length of the sleeves in my example in the picture they are 52 cm – 20.5”, but that also up to you, however long (or short) you like to make them.
- Width of the sleeves( before folding in half) is approximately 32 cm/ 12.6” for small and medium / 38 cm/ 15”for large / 44 cm – / 17.3” for X-large
- Rows 2 and 3 form a “SET”
Materials used:
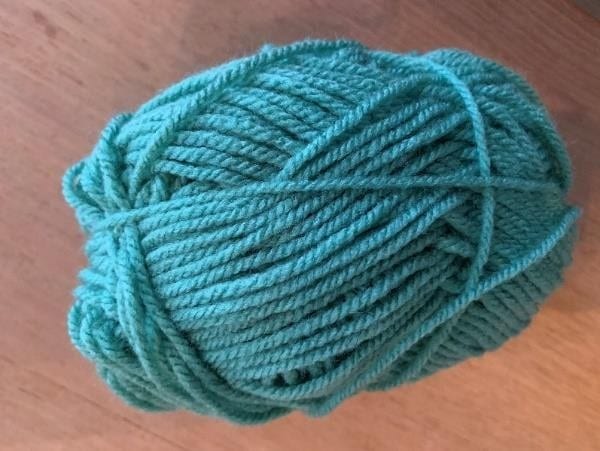
- I used medium acrylic worsted weight yarn( ARAN) color light green/ turquoise suitable for hook 5mm(H) but I used a hook up( I) 5,5mm. That way the stitching of this particular pattern will fall less stiff.
- I used a hook H (5mm) only for the borders on the sleeves.
- For small 400 grams /medium and large 500 grams / X-large 600 grams
- If you decide on making the hood, you will need an additional 100 grams.
- Needle with a large eye.
- Scissors
Measuring tape Stitches used:
- Tripple Crochet: TC
- Double crochet: DC
- Single crochet: SC
- Slip stitch: SS
- Chain stitches
Special stitch is on Youtube Click Here
Instructions Back panel
With hook I (5,5 mm) Chain 78 / 85 / 99
Row 1:
1 SC in the second chain stitch from the hook. *** Skip 2 chain stitches / in the next chain stitch ( 1 DC – 1 chain – 1 DC- 1 chain – 1 DC) / skip 2 chain stitches / 1 SC in the next chain stitch / chain 3 / 1 SC in the next chain stitch. ***
Repeat from *** – *** Finish the row 1 SC in the last chain stitch.
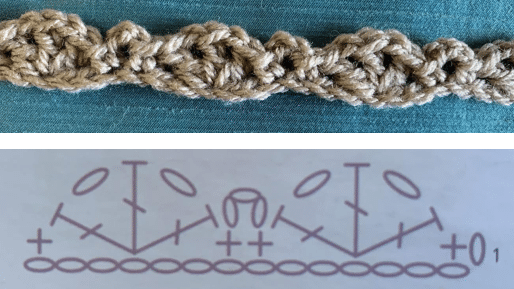
TURN
Row 2: Chain 7( count for 1 TC and 3 chain stitches)/ *** 1 SC in the middle of the 3 DC cluster of the previous row/ chain 3 / 1 SC in the same DC as the first SC/ chain 3/ 1 DC in the chain 3 arch of the previous row / chain 3 *** Repeat from *** – *** End the row with 1 TR in the last SC.
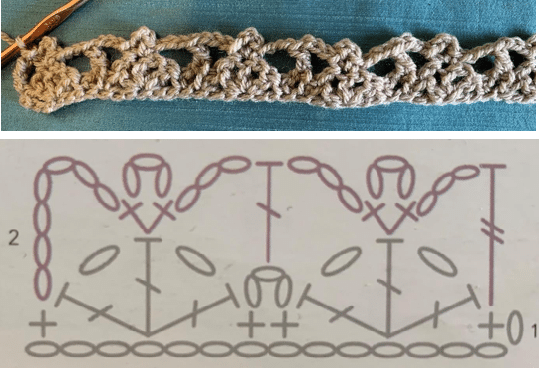
TURN
Row 3: Chain 1/ 1 SC in the TR/ skip opening/ in the chain 3 arch (1DC-chain1-1DC- chain 1- 1 DC)/ skip opening/ *** 1 SC- chain 3- and 1 SC in the next DC/ skip opening (1DC – chain 1- 1 DC- chain 1- 1DC in the next chain 3 arch/ skip opening *** Repeat from *** –
*** Finish the row with 1 SC in the 4th chain stitch of the 7 chain stitches.
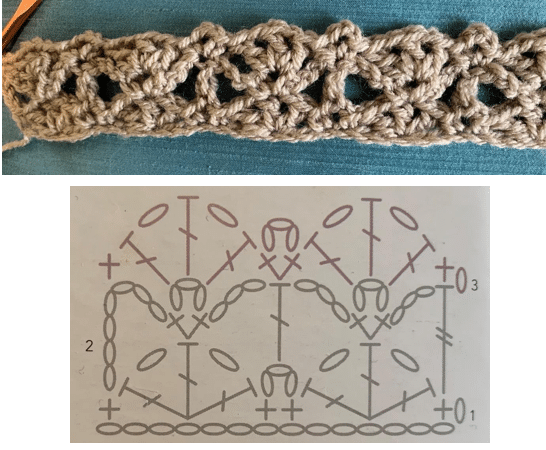
REPEAT ROWS 2 AND 3
Till you have reached your desired heigth.
- In my medium/ large example pattern it’s :
- 28 sets
Finish the top of the back panel as follows:
After you turn and you have crocheted your 7 chain stitches:
Row A: 1 ***SC in the middle DC of the DC cluster/ chain 3/ 1 SC in the chain 3 arch/ chain 3 *** Repeat from *** – *** Finish the row with 1 DC in the last SC.
- Turn your panel and cast on to the basic starting chain.
- Chain 1/ 1 SC in the first SC/ ***chain 3/ 1 SC in the next SC ***
- Repeat from *** – *** and finish the row with chain 3 and 1 SC in the last stitch.TURN
- And repeat the row you just did.
- Make the border as long as you prefer. Mine is 5 rows.
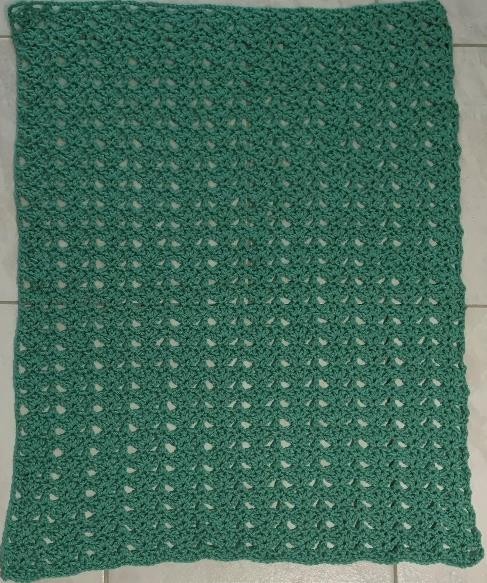
Finished back panel without the finishing border
FRONT PANELS ( 2 identical pieces)
Chain 29 / 36 / 43
- Crochet in the pattern like you did the back panel.
- Starting with row 1 and continuing on with 2 and 3. Repeating rows 2 and 3 till you
- have reached the exact same length as your backpanel.
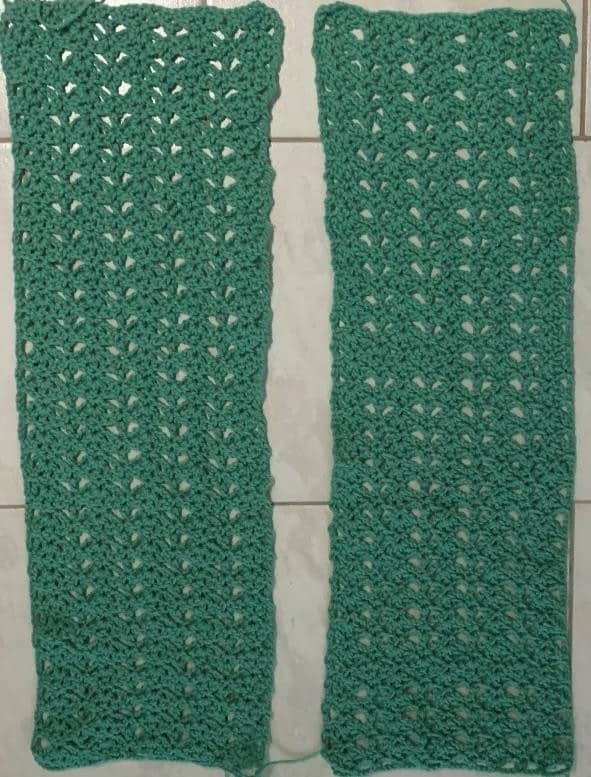
Two front panels without bottom borders.
SLEEVES
Chain 43 43 / 50/ 57 (small and medium are the same)
- Again crochet rows 1, 2 and 3 like you did your panels.
- After 14 sets /16 sets/ 17 sets/ 17 sets/ (or however short or long you want your sleeves to be)
- Finish with a last row as follows:
- Chain 7/ ***1 SC in the middle DC of the cluster DC / chain 3/ 1 SC in the chain 3 arch *** Repeat from *** – *** Finish the row with chain 3 and 1 DC in the last stitch.
- Turn the sleeve so the basic chain is your starting chain again.
- Cast on with HOOK H(5mm)
Row A:
- Chain 1 and SC in the first SC/ chain 3/ skip 3 stitches/ 1 SC in the next SC
- Repeat from *** – ***. End the row with a SC in the last SC.
- Turn and repeat Row A for 4 more rows . Cast off and weave in ends.
- If you make the Large and X- large sleeves and you find them too wide at the bottom, make the sleeves narower to get a tighter fit around your wrist:
- Chain 1 and SC in the first SC/ 1 SC in the next 2 stitches/ ***skip 1 stitch/ 1 SC in the next 3 stitches *** Repeat from *** – *** and finish the row with 1 SC in the last SC. Turn.
- Chain 1/ 1 SC in the first SC/ chain 3 / *** 1 SC/ chain 3 *** Repeat from *** – *** End the row with 1 SC in the last SC.
- Repeat this row 4 more times.
- 2 small/ medium size sleeves before folded in half and without the borders.
- Fold sleeves in half and sew the seams closed.

Bottom of the Large and XL sleeves with the borders
FINISHING OFF THE CARDIGAN
Sew the shoulders of the front panels and the back panel together. Sew the sides, leaving enough space to insert the sleeves.
Sew the sleeves in the space you left open on the side of the panels.
Cast on to the bottom of the right panel.
Chain 1 and SC in the same space. ***Chain 3/ Skip about ½ inch to the next space / 1 SC – chain3 – 1SC in the same space *** Repeat from ***- *** on the side, around the neck and down the other side. Cast off when you have reached the bottom of the left front panel.
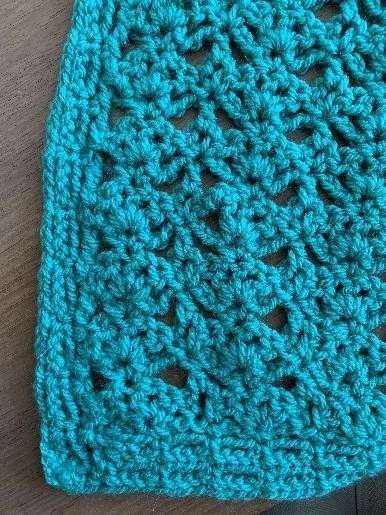
Bottom and front of the sidepanels
HOOD ( make a rectangle)
Chain 78 / 85 /99
Crochet in the pattern Row 1 and then repeats of rows 2 and 3 till you have a total of 9 / 11 / 13 sets in heigth.
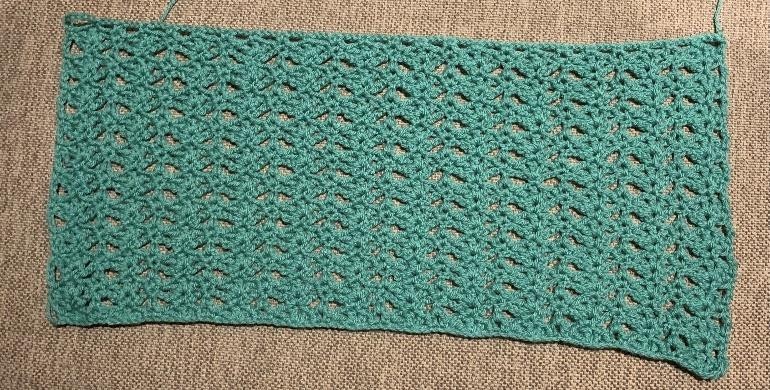
Fold the rectangle and sew a seam in the middle
the seam will be on the back when you sew the hood onto the cardigan
When you turn the hood you will see that the back is slightly higer.
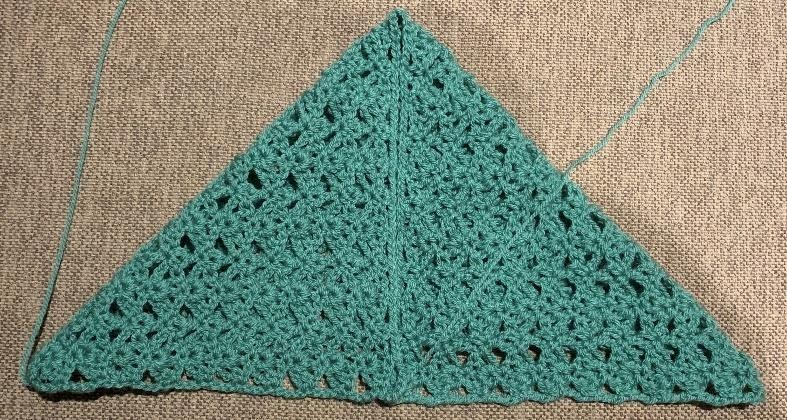
This is the part you will sew to the caridgan.
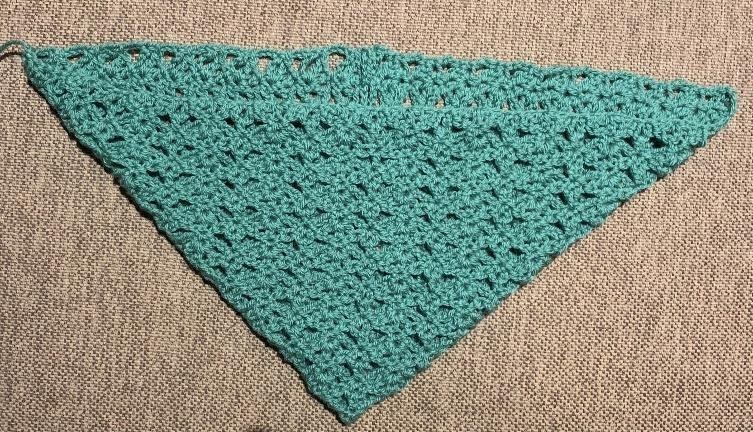
Line the hood up to the back panel/ neck.
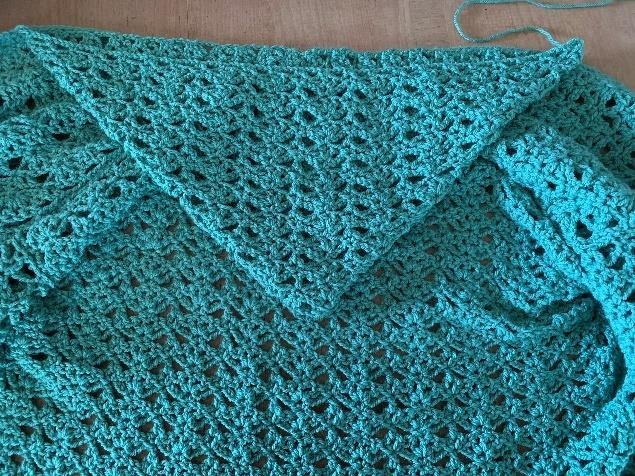
I sew it on temporarely with a different contrasting color so you can easily take it back of if it happens tob e on crooked.
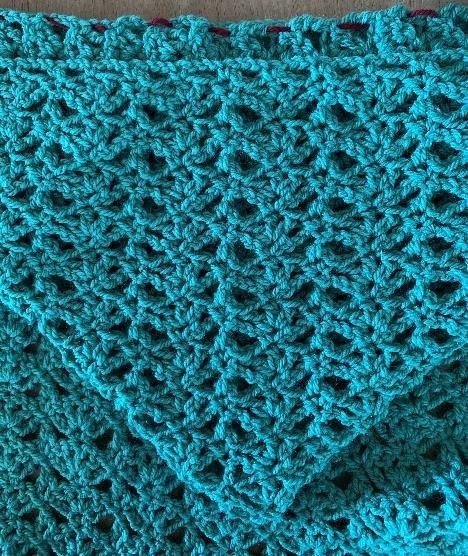
If it is on nicely, then sew it on with the same color as the caridigan and pull out the other thread 😉
ENJOY WORKING ON YOUR PROJECT!