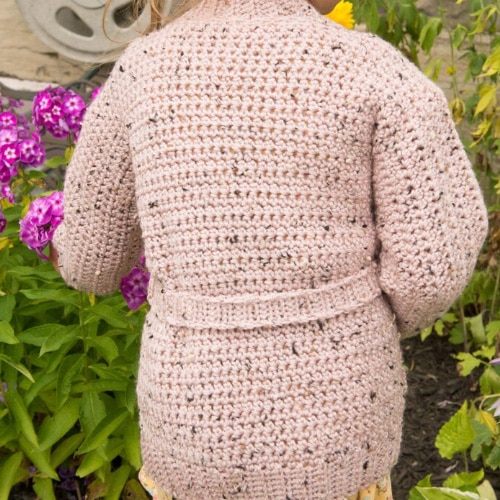
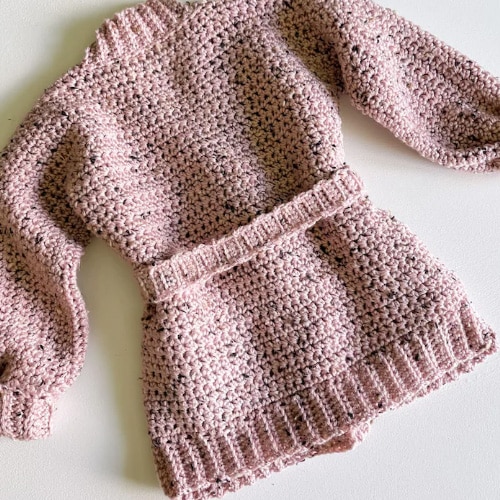
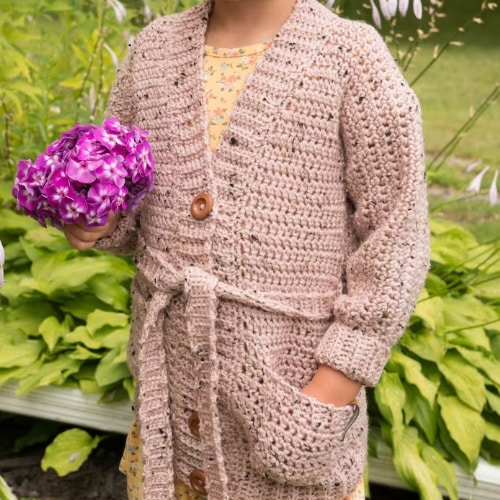
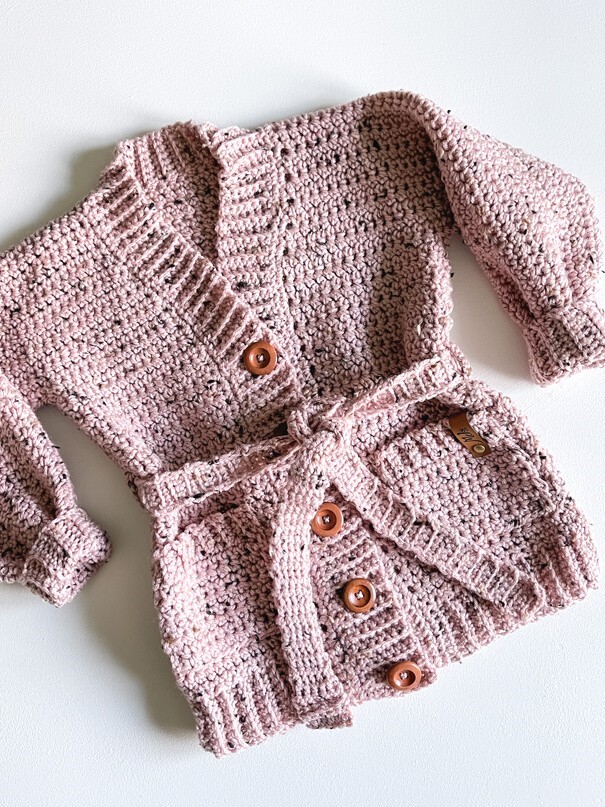
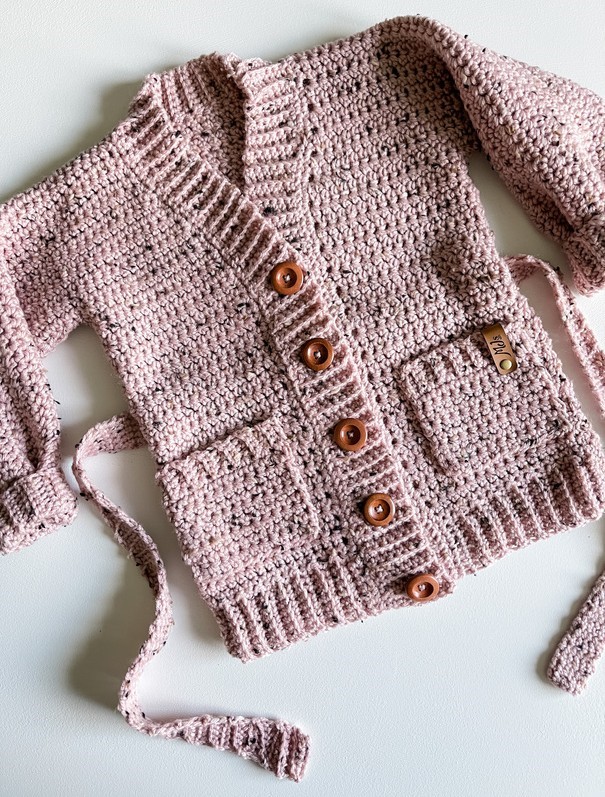
Cardigan Crochet Pattern – Simplified stitching is utilized to complete the Mini Lakeside Cardigan in a single piece. The pattern assembles rapidly with minimal seaming, and the cardigan is readily modifiable to accommodate garments of any length. Button details, a belt, and compartments are additional options.
This warm and cozy cardigan design is made in Knit Picks/WeCrochet Brava Tweed worsted weight yarn and includes a step-by-step tutorial
YARN
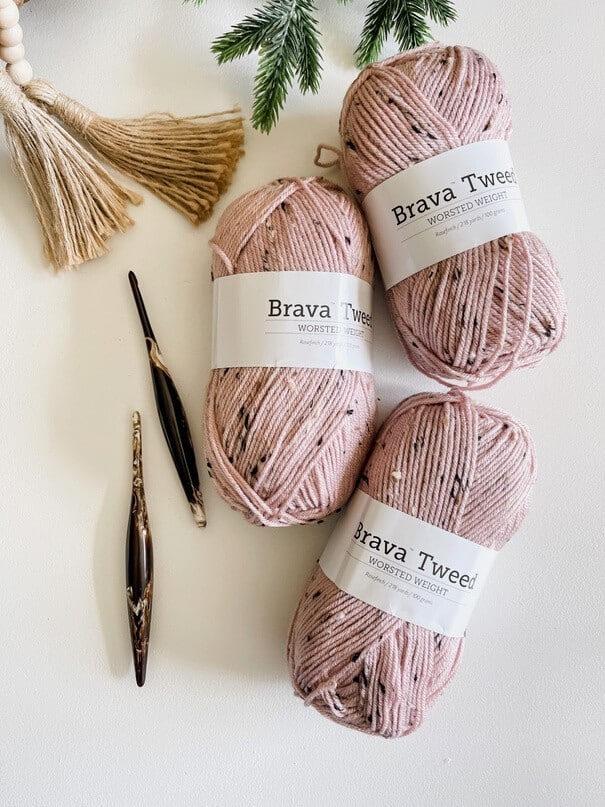
- Brava Tweed Worsted Weight #4- 97% Premium Acrylic, 3% Viscose (218yds/100g) shown in Rosefinch
Yarn Subs:
- Comfy Color Mist
- Chroma Worsted Heatherly
- Mighty Stitch Worsted
- Brava / Brava Speckle
HOOK
- US 8/H (5mm)
- US 9/I (5.5mm) or size needed to obtain gauge
MATERIALS
- Tapestry Needle
- Stitch Markers
- Scissors
- Measuring Tape
- Blocking Pins
- Blocking Mats 24″x24″ Woolwash
- 3-6 Wooden Buttons (25mm)
GAUGE
- 12 sts and 12 rows equal to 4″ in esc with 5.5mm hook
- 7.5 sts and 8 rows equal to 2″ in ribbed pattern with 5mm hook
SIZING
- 1 (2, 4, 6, 8, 10, 12)
VIDEO
- CLICK HERE FOR VIDEO
SIZING CHART / YARN REQUIREMENTS
| SIZE | 1 | 2 | 4 | 6 | 8 | 10 | 12 |
| To Fit Chest (IN) | 19 | 21 | 23 | 25 | 26.5 | 28 | 30 |
| Finished Chest (IN) | 22.5 | 24 | 25.5 | 28 | 29.5 | 31 | 33 |
| Balls | 3 | 3 | 3 | 4 | 4 | 5 | 5 |
| Yards | 550 | 600 | 650 | 750 | 850 | 950 | 1000 |
ABBREVIATIONS
- Blo – Back Loop Only Ch – Chain
- Esc – Extended Single Crochet Flo – Front Loop Only
- Pm – Place Marker Rep – Repeat
- RS – Right Side Sc – Single Crochet
- Sk – Skip
- Sl St – Slip Stitch Sp(s) – Space(s)
- St(s) – Stitch(es)
- WS – Wrong Side
- ( ) – Work step in parentheses in indicated stitch
- [ ] – Work step in brackets number of times indicated
CONSTRUCTION
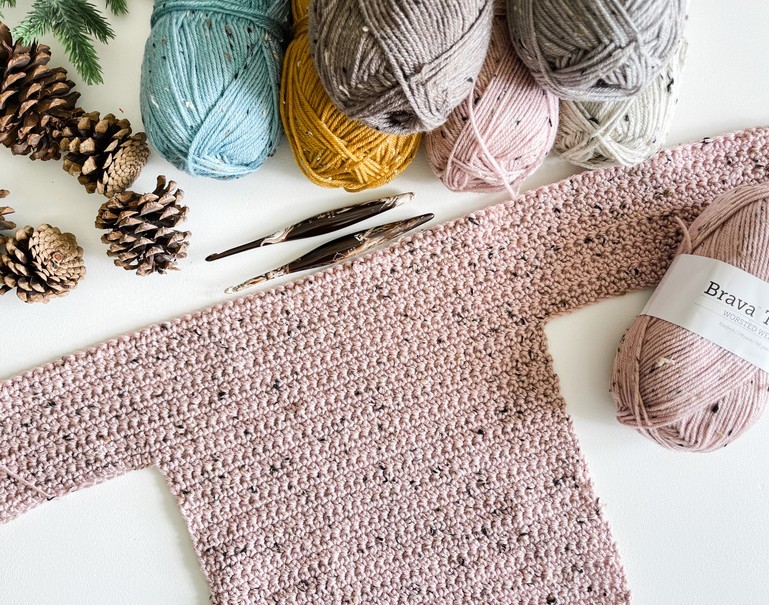
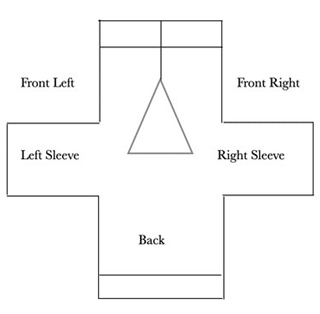
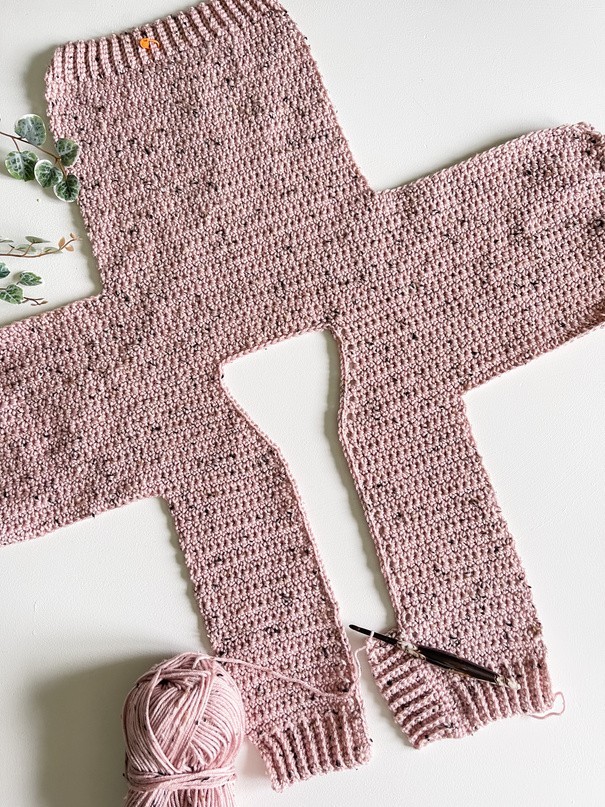
The Cardigan is worked in one piece flat, starting at the back band and finishing with the front panels. The sleeve cuffs and button-up ribbing is added at the end.
The pattern is written for the smallest size with larger sizes in parentheses ( ). If there is only 1 number, it applies to all sizes.
A step-by-step video tutorial is provided on our YouTube channel for Adult size medium. Although the sizing and style are different, it will still walk you through the same construction process.
SPECIAL STITCHES
Extended Single Crochet (esc): Insert hook through indicated st and pull up a loop, yarn over (YO), pull through 1 loop, YO pull through the last 2 loops on the hook.
Extended Single Crochet Decrease (esc2tog): Insert hook through indicated st and pull up a loop, insert hook in next st, pull up a loop, yarn over (YO), pull through 2 loops, YO pull through the last 2 loops on the hook.
Simple I-cord – Crochet the cord by working with the yarn tail and working yarn. Place the yarn tail to the front of your work and the working yarn to the back. Yo with the tail going from front to back, yo with the working yarn pulling through 2 loops on the hook.
Repeat making the cord as long as needed.
SCHEMATIC
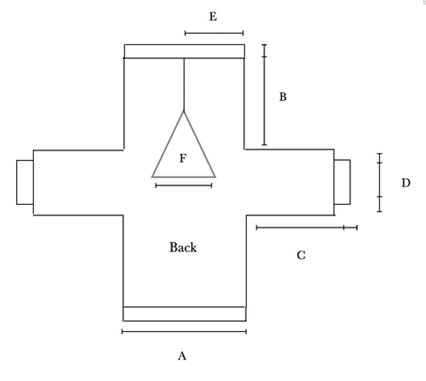
- A: 11.25 (12.75, 14, 14.75, 15.5, 16.5)”
- B: 9.25 (10.5, 11.25, 11.25, 12.5, 14, 15.25)” includes 2″ band
- C: 8.5 (9.5, 11.5, 12.5, 14, 15.5, 17)” includes 2″ band
- D: 8 (8, 9.5, 10.5, 10.5, 12, 12)”
- Cuff 4 (4, 4.5, 5.5, 5.5, 6, 6)”
- F: 4.5 (4.5, 5.25, 5.25, 5.25, 6, 6)” (before edging)
- Edging Approx. 2″
MEASURING INSTRUCTIONS – CUSTOMIZING TIPS
The cardigan can easily be modified for a customized fit. Before beginning the cardigan, measure arm width, chest and desired length by measuring from the shoulder to waist, hip, thigh or knee.
The size 4 is modelled on a 4- year-old that typically wears a 5/6. Choose the correct size by looking at the finished chest sizing and schematic.
To change the length of the cardigan, work fewer or more rows before beginning the sleeves ending on the WS of work. The buttonholes are optional.
I suggest increasing the width of the ribbed collar from 7-10 sts if you prefer the look of the adult version pictured. The arm length can also be adjusted.
Work more or fewer stitches for the arm by altering the chain length.
Pattern & Tutorial
Notes
The cardigan is worked in one piece from the bottom up, starting at the back. The bands and edging are worked with a 5mm hook and the body with a 5.5mm hook. A chain is worked out from each side of the body for the sleeves.
The sleeves and body are worked as one piece. The neck opening is marked, next half of the sleeve is worked with each front panel. Fasten off once the sleeve is at the correct width.
The front body is marked, then worked, finishing with the band. Finish with buttonhole edging and sleeve cuffs. The pattern is written for the smallest size with larger sizes in parentheses ( ).
A step-by-step video tutorial is provided on our YouTube channel for medium adult crop style.
Back
1 (2, 4, 6, 8, 10, 12)
Band
Row 1: With the smaller hook, ch 9, work 1 sc in 2nd ch from hook and in each ch across, turn—8 sts.
Row 2: Ch 1 (not included as a st here and throughout), work 1 sc in the blo of each st across, turn—8 sts.
Rows 3-34 (36, 38, 42, 44, 46, 50): Rep
Row 2. After the final Row, turn and change to the larger hook.
Body
Row 1(RS): With the larger hook, ch 1 and work sc sts evenly along the length of the band (1 st per row)—34 (36, 38, 42, 44, 46,50) sts.
Row 2 (WS): Ch 1 (not included as a st here and throughout), 1 esc in each st across, turn—34 (36, 38, 42, 44, 46, 50) sts.
Tunic Length
Rows 3-22 (26, 28, 28, 32, 36, 40): Rep row 2 ending on WS.
Sleeves
Notes: To lengthen or shorten the sleeve, increase or reduce the sleeve chain.
Measure underarm to the wrist to determine the required sleeve length.
Left Sleeve: With a new ball of yarn, join to the opposite side of the working yarn. RS facing join to top left side of work with a sl st, ch 20 (22, 28, 32, 36, 40, 44) and fasten off (this sets up the left sleeve).
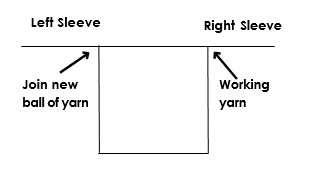
Right Sleeve: Join back into working yarn top right.
Row 1 (RS): Ch 21 (23, 29, 33, 37, 41, 45),
work 1 esc in the 2nd ch from hook, work 1 esc in each ch across the right sleeve, work 1 esc in each st across the body, work 1 esc in each ch across the left sleeve, turn—74, 80, 94, 106, 116, 126, 138) sts.
Row 2 (WS): Ch 1, work 1 esc in each st across, turn—74, 80, 94, 106, 116, 126, 138)sts.
Rows 3- 12 (12, 14, 16, 16, 18, 18): Rep row 2 ending on WS. Don’t fasten off.
Mark Neck Opening
Left and Right side count over 30 (33, 39,
45, 50, 54, 60) sts, pm in next st. The neck opening is 14 (14, 16, 16, 16, 18, 18) sts.
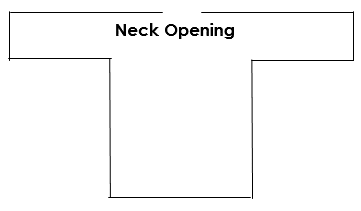
Right Sleeve/ Front Panel:
Row 1 (RS): With working yarn, ch 1, 1 esc in each st across to marker (leave neck opening unworked), turn—30 (33, 39, 45,50, 54, 60) sts.
Row 2 (WS): Ch 1, 1 esc in each st across, turn—30 (33, 39, 45, 50, 54, 60) sts.
Rows 3-4 (4, 4, 6, 6, 6, 6): Rep Row 2,ending with—30 (33, 39, 45, 50, 54, 60) sts.
Increase Rows
Row 1: Ch 1, 1 esc in each st across to the last st, 2 esc in the last st, turn—31 (34, 40, 46, 51, 55, 61) sts.
Row 2: Ch 1, 1 esc in each st across, turn— 31 (34, 40, 46, 51, 55, 61) sts.
Rows 3-8 (8, 10, 10, 10, 12, 12): Rep Row
1 & 2, ending with—34 (37, 44, 50, 55, 60, 66) sts. Fasten off and weave in ends.
Mark Body
From sleeve edge count over 20 (22, 28, 32, 36, 40, 44) sts, pm in the next st (marks off the sleeve length).
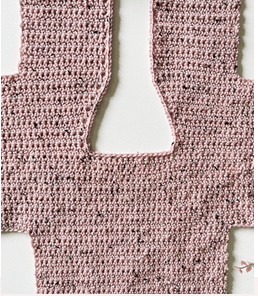
Front Right Panel
Notes: Work even in rows so that the front equals the back in length.
Skip over the sleeve. Join yarn in marked st. Row 1(RS): Ch 1, work 1 esc in each st across, turn—14 (15, 16, 18, 19, 20, 22) sts.
Rows 2-21 (25, 27, 27, 31, 35, 39): Rep Row 1—14 (15, 16, 18, 19, 20, 22) sts.
Row 22 (26, 28, 28, 32, 36, 40): Ch 1, work 1 sc in each st across, turn—14 (15, 16, 18,19, 20, 22) sts.
Band
The band is joined as you go to the panel edge.
Row 1: With smaller hook, ch 9, 1 sc in 2nd ch from hook and in each ch across, sk first st at the panel edge, sl st in next 2 sts (base row), turn—8 sts.
Row 2: Sk sl sts, 1 sc in the blo of each st across, turn—8 sts.
Row 3: Ch 1, work 1 sc in the blo of each st across, sl st in next 2 sts (base row), turn—8 sts.
Rows 4-14 (14, 16, 18, 18, 20, 22) sts.:
Rep Row 2 & 3, ending on row 2. The last Row fasten off and weave in ends.
Left Sleeve/ Front Panel:
Row 1 (RS): With the larger hook and RS facing sk over the neck opening. Join yarn in st next to marked st, ch 1, 1 esc in each st across, turn—30 (33, 39, 45, 50, 54, 60) sts.
Row 2 (WS): Ch 1, 1 esc in each st across, turn—30 (33, 39, 45, 50, 54, 60) sts.
Rows 3-4 (4, 4, 6, 6, 6, 6): Rep Row 2,ending with—30 (33, 39, 45, 50, 54, 60) sts.
Increase Rows
Row 1: Ch 1, 2 esc in the first st, 1 esc in each st across, turn—31 (34, 40, 46, 51, 55,61) sts.
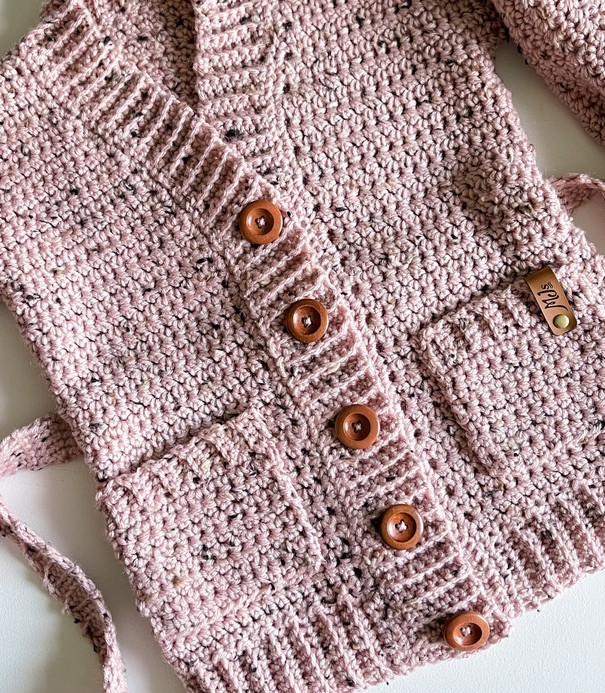
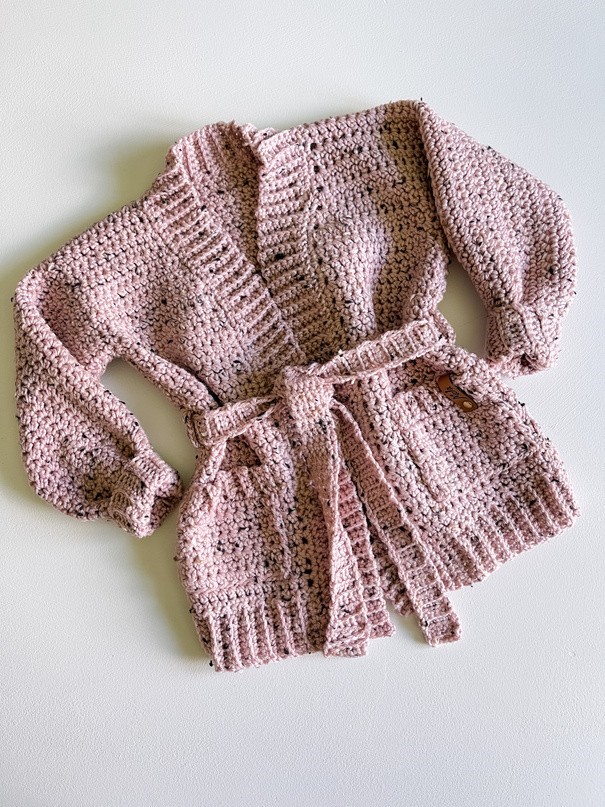
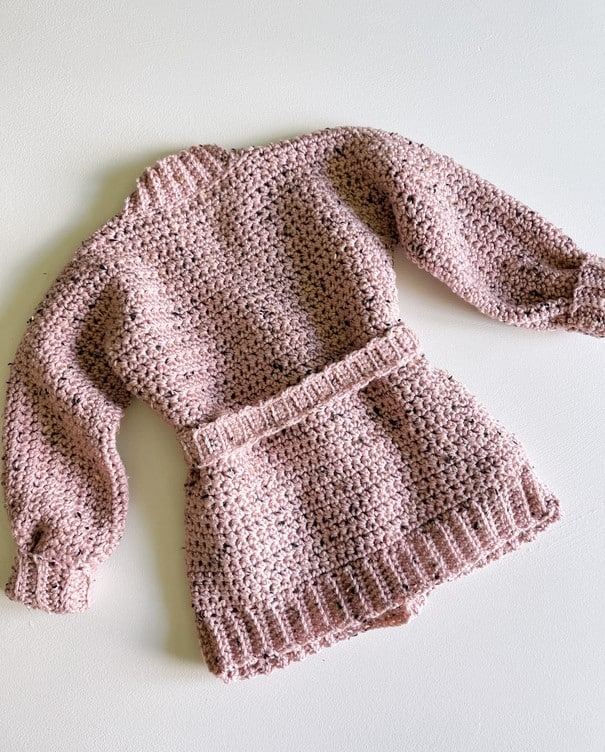
Row 2: Ch 1, 1 esc in each st across, turn— 31 (34, 40, 46, 51, 55, 61) sts.
Rows 3-8 (8, 10, 10, 10, 12, 12): Rep Row 1& 2, ending with—34 (37, 44, 50, 55, 60, 66) sts. Don’t fasten off.
Mark Body
From sleeve edge count over 20 (22, 28, 32, 36, 40, 44) sts, pm in the next st (marks off the sleeve length).
Front Left Panel
Notes: Work even in rows so that the front equals the back in length.
Row 1 (RS): Ch 1, work 1 esc in each st across to marked st (leave sleeve unworked), turn—14 (15, 16, 18, 19, 20, 22) sts.
Rows 2-21 (25, 27, 27, 31, 35, 39): Rep
Row 1—14 (15, 16, 18, 19, 20, 22) sts.
Row 22 (26, 28, 28, 32, 36, 40): Ch 1, work 1 sc in each st across, turn—14 (15, 16, 18,19, 20, 22) sts.
Band
Work the same as Front Right.
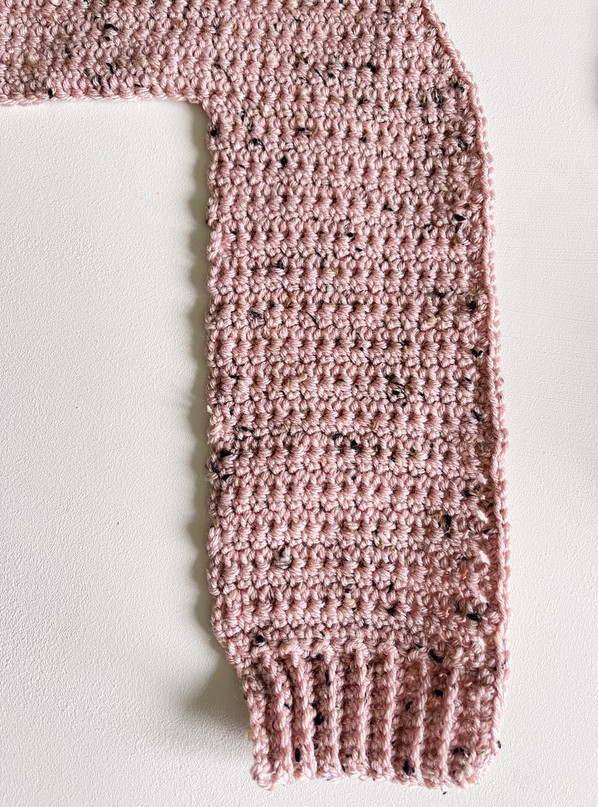
Sleeve Cuff:
Repeat for left and right sleeves.
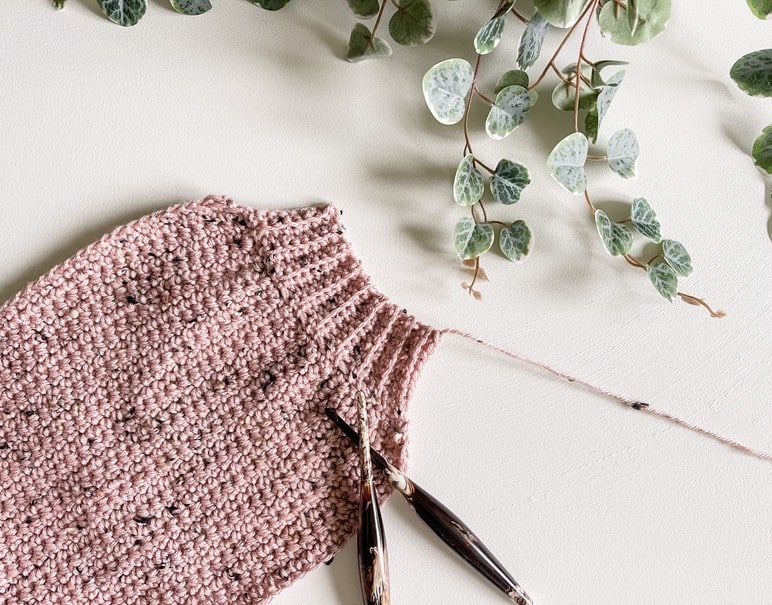
Sleeve Edge: With RS facing and the smaller hook, join yarn to the edge of the sleeve, ch 1, work 16 (16, 18, 22, 22, 24, 24) sc sts
evenly across the edge (sk approx. every 3rd row), turn—16 (16, 18, 22, 22, 24, 24) sts.
Band
The band is joined as you go to the sleeve edge.
Row 1: With smaller hook, ch 9, 1 sc in 2nd ch from hook and in each ch across, sk first st at the sleeve edge, sl st in next 2 sts (sleeve edge), turn—8 sts.
Row 2: Sk sl sts, 1 sc in the blo of each st across, turn—8 sts.
Row 3: Ch 1, work 1 sc in the blo of each st across, sl st in next 2 sts (sleeve edge), turn—8 sts.
Rows 4- 16 (16, 18, 22, 22, 24, 24): Rep
Rows 2 & 3 ending on Row 2. After the last row fasten off with a long tail for seaming.
Edging:
Row 1: With the smaller hook join yarn to front right panel edge with a sl st, ch 1, work 1 sc evenly across the band and evenly across the front right panel, (approx 3 sts per 2 rows), sc across the neck opening, sc evenly across the front left panel and band. Don’t fasten off and proceed to Collar.
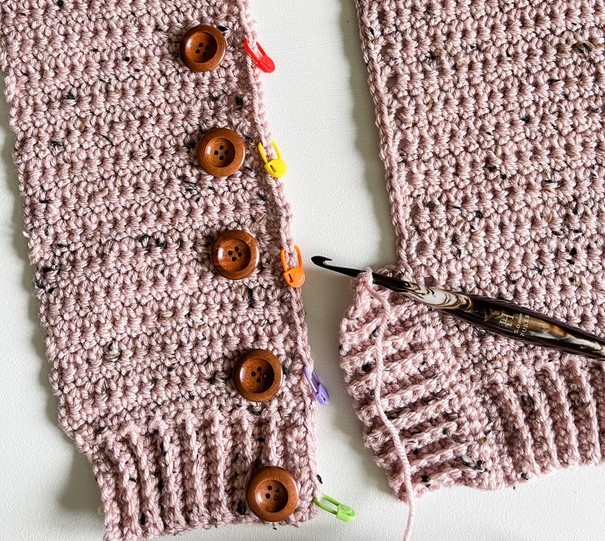
Mark Buttonholes: Watch the tutorial for directions
With RS facing at the front right side, count 2 sts from the bottom edge, pm in the 3rd st,
*count 8 sts, pm in 9th st; rep from *making as many buttonholes as desired. The buttonhole will be 1 st.
Collar
The collar is joined as you go to the edging. Buttonhole Row: Ch 1, work 1 sc in the blo 3 sts, ch 1, sk 1 st, 1 sc in the blo last 3 sts.
Next Row: Ch 1, work 1 sc in the blo 3 sts, 1 sc in ch-1 sp, 1 sc in the blo last 3 sts.
As you are working the collar rows and come to a place marker, use these two rows in place to create the buttonhole.
Row 1: With smaller hook, ch 8, 1 sc in 2nd ch from hook and in each ch across, sk first st at the edge, sl st in next 2 sts, turn—7 sts.
Row 2: Sk sl sts, 1 sc in the blo of each st across, turn—7 sts.
Row 3: Ch 1, work 1 sc in the blo of each st across, sl st in next 2 sts, turn—7 sts.
Rep Row 2 & 3 for the entire edge of the cardigan working buttonhole row at each marked st. Fasten off and weave in tails Blocking:
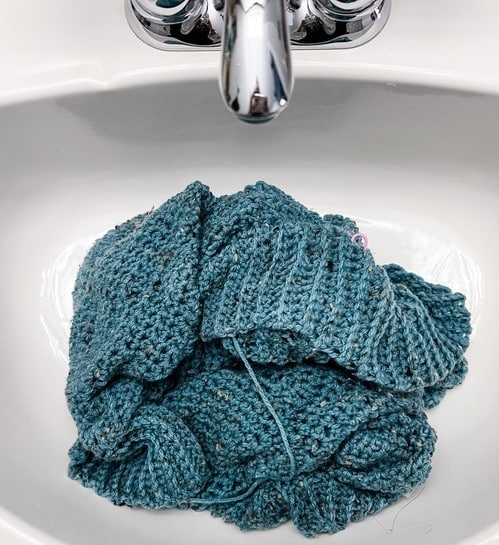
Wet the entire garment in lukewarm water with a small amount of dish soap or woolwash. Allow soaking for around 30 min. Squeeze out as much water as possible.
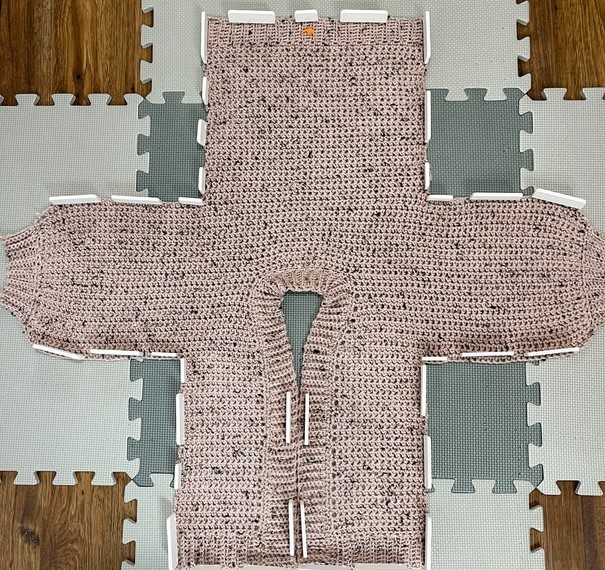
Wrap the garment in a towel to press out the excess water. Lay the garment out on blocking mats and pin it to the schematic measurements. Allow the garment to dry thoroughly.
Seaming:
Repeat for the Left and Right Sides.
Fold garment RS facing, lining up sides and sleeves. With yarn needle and yarn, whip stitch sleeve and side together. Weave in ends.
Belt:
Row 1: With the smaller hook, ch 7, work 1 sc in the 2nd ch from hook and in each ch across, turn—6 sts.
Row 2: Ch 1, 1 sc in the blo of each st across, turn—6 sts.
Rep Row 2 crocheting the belt approximately 42 (44, 46, 48, 50, 52, 54)” in length. Shorten or lengthen the belt as desired.
Belt Loops: Make 2 at each side seam From underarm, measure down approximately 3″, insert the smaller hook through the seam and crochet a simple icord 8 sts. Fasten to seam 1.25″ down from starting cord and weave in tails.
Pockets: Make 2
Band
Row 1: With the smaller hook, ch 5, work 1 sc in 2nd ch from hook and in each ch across, turn—4 sts.
Row 2: Ch 1 (not included as a st here and throughout), work 1 sc in the blo of each st across, turn—4 sts.
Rows 3-10 (10, 12, 12, 14, 16, 16): Rep
Row 2. After the final Row, turn and change to the larger hook.
Body
Row 1 (RS): With the larger hook, ch 1 and work sc sts evenly along the length of the band (1 st per row)—10 (10, 12, 12, 14, 16,16) sts.
Row 2 (WS): Ch 1 (not included as a st here and throughout), 1 esc in each st across, turn—10 (10, 12, 12, 14, 16, 16) sts.
Rows 3-7 (7, 9, 9, 11, 13, 13): Rep Row 2.
Fasten off and weave in ends. Steam or block the pockets. With a yarn needle and yarn, tail sew pockets to the front panels. Sew approximately 1″ from the bottom band in the centre of the panel. Weave in tails.
