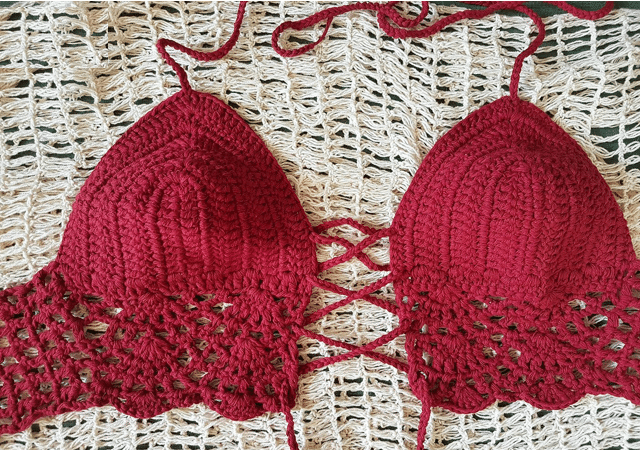
Crochet Halter Top Beach Wear Pattern – The step-by-step instructions will lead you through the process of making your own heart halter top.
Skill level: Advance Beginner
Material
- 100% cotton
Suggestion for material
- Rico creative cotton Aran or Record 210
- In the photo above used Rico creative aran but the written pattern I used Record 210
- Crochet hook 3.5mm
- Scissors & yarn needle
Stitch used & code
- Ch = chain
- St = stitch
- Sc = single crochet
- Dc = double crochet
- Sh st = shell stitch (5dc)
- Rep = repeat
Size
- XXS – 30A,32A,30B
- XS – 34A,32B,34B,30C
- S – 36A,38A,36B,32C,34C,30D,32D,30DD
- M- 40A,38B,40B,36C,34D,32DD,34DD,30DDD,32DDD
- L – 38C,40C,36D,38D,40D,36DD,34DDD
- XL – 38DD,40DD,36DDD,38DDD,40DDD
Bra cup size info
- XXS – Start with 11ch +3ch(to build up the yarn) 5 rounds
- XS – Start with 11ch +3ch(to build up the yarn) 6 rounds
- S – Start with 13ch +3ch(to build up the yarn) 7 rounds
- M – Start with 15ch +3ch(to build up the yarn) 6 rounds
- L – Start with 17ch +3ch(to build up the yarn) 6 rounds
- XL – Start with 17ch +3ch(to build up the yarn) 7 rounds
THIS IS AN APPROXIMATE GUIDELINE FOR THE BRA CUP SIZE. FEEL FREE TO MODIFY TO FIT YOUR BODY IF NEEDED.
Note: If You don´t understand the bra sizing. Please check the YouTube video or read up the whole pattern before start Your project.
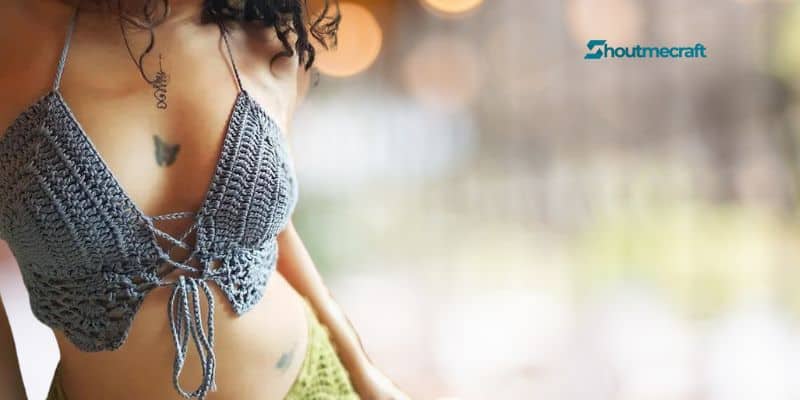
Bra cup part (make ch according to the bra size, I´m making size s)
Round 1 – ch13 + 3 ch, dc in 4th ch from hook, 1dc in each ch st, (2dc, ch1, 2dc) in last ch, 1dc in each ch st the other side across = total of 28dc st (see in photos)

Round 2 – Ch3, 1dc in each st across, (2dc, ch1, 2dc in ch 1 space at the middle part) 1dc in each ch st the other side across
Round 3 – Round 7 rep round 2
Note: In each round will increase 4 st in the ch space at the middle part
Round 7 – total of 52dc st
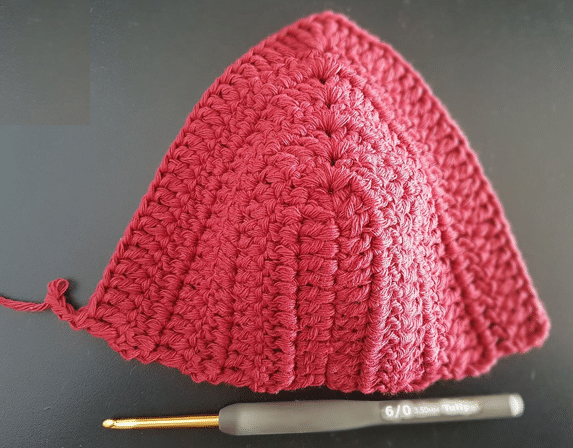
Turn Your work around to the bottom part. To make the bottom border – ch3 (count as 1dc), 1dc in ch space of the bottom round (see in photos)
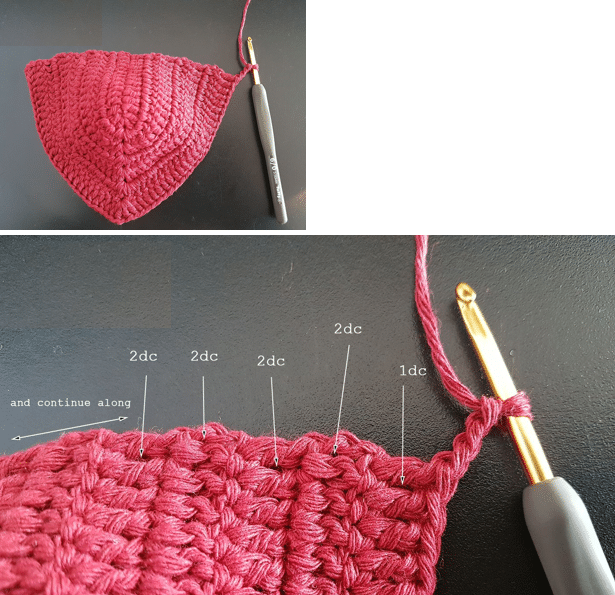
*2dc in next ch space of the bottom round (see in photo below) rep from * across = total of 28dc st
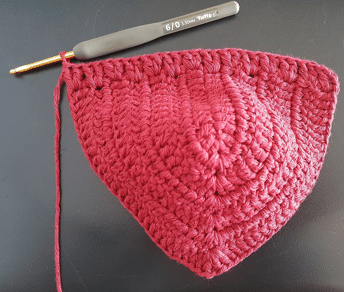
Now start the lace part
Row 1 – ch5, sc in 7th ch from hook, *ch2, skip next 3 ch, sh st in next ch, ch2, skip next 3 ch, sc in next ch**, ch5, skip next 3 ch, sc in next ch***; rep from* across, You might be ending at ** (sh st) or *** (ch5-space) depends on the cup size, ch2, skip next ch, dc in last ch, turn
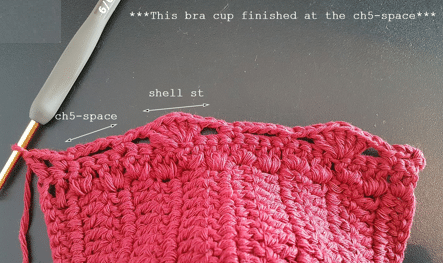
If You finished with sh st follow this guideline
Row 2 – ch1, sc in first dc, *ch2, skip next 2ch,sc,2ch, (1dc in the dc st in the previous row, ch1) in each of next 4 dc from the previous row, ch2 skip next ch2-space**, 1sc in 3rd st of ch5-space, rep from* across ending last rep at **, skip next 2 ch, end with sc in 3rd ch,turn
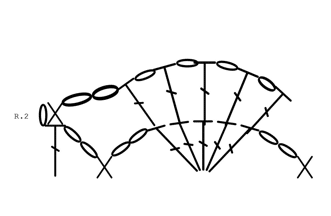
If You finished with ch5-space like me, follow this
Row 2 – ch1, sc in first dc, ch4, 1sc in 3rd st of ch5-space, *ch2, skip next 2ch,sc,2ch,(1dc in the dc st in the previous row, ch1) in each of next 4 dc from the previous row, ch2 skip next ch2-space, 1sc in 3rd st of ch5-space, rep from* across, ending with; skip next 2
ch, end with sc in 3rd ch, turn
Note: at this part I´ve modified it, so the video shows differently
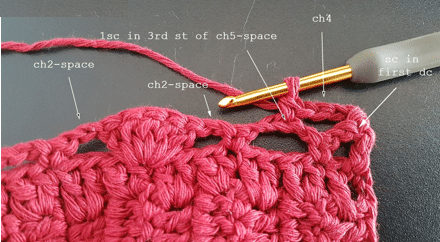
Both ways are work well.
Finished of row 2
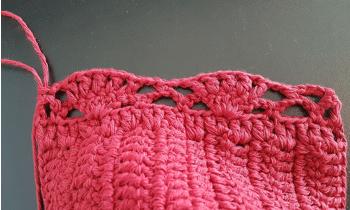
Row 3 – ch3,skip n ext ch2-space, *(1dc,ch2) in each of next 4dc, dc in next dc**, skip next ch2-space,sc,ch2-space, rep from * across, ending last rep at **, skip next ch2-space,sc,ch2-space, 1dc in 3rd st of ch5-space, turn
Do not worry about the slanting here. If You don´t like this look check the video as it´s slightly different also because of the material is different. Record 210 is harder, while Rico is softer and more flexible.
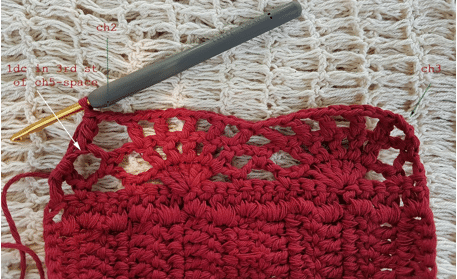
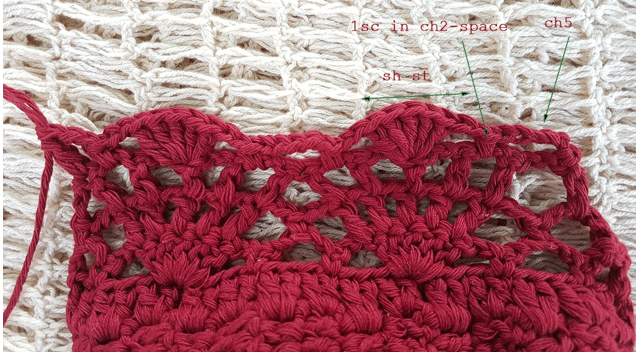
Row 4 – ch5, *1sc in next ch2-space, ch2, skip ch2-space, sh st in next dc from previous row, ch2, 1sc in next ch2-space**, ch5; rep from* across, ending last rep at**, ch2, 1dc in 3rd ch of turning ch, turn
Rep rows 2 – 4 for pattern

I stop here but You can continue to the length of Your desire
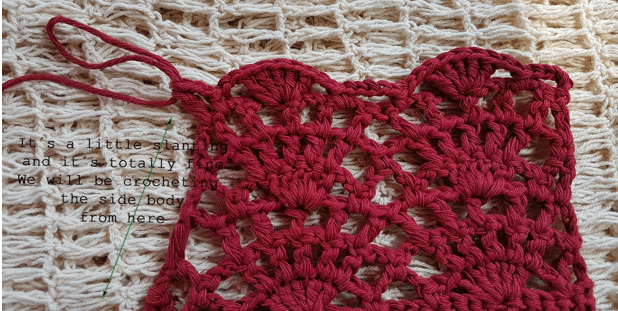
Don´t cut the yarn just yet, we are continuing the side body from here.
And as You see, the side body is slanting, do not worry it will turn out just fine.
Side body
Row 1 – ch5, 1dc i n the space as You see in photos. See the close-up on the right photo
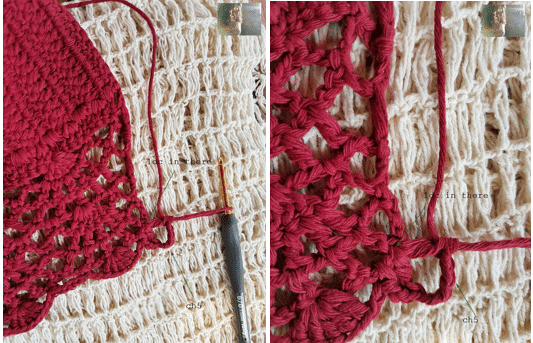
*ch2, 1dc in the next space (see in photo), rep from * in total of 7 boxes
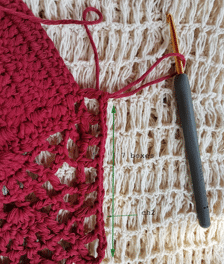
Row 2 – Row 7 rep Row 1
You can make more row as needed.
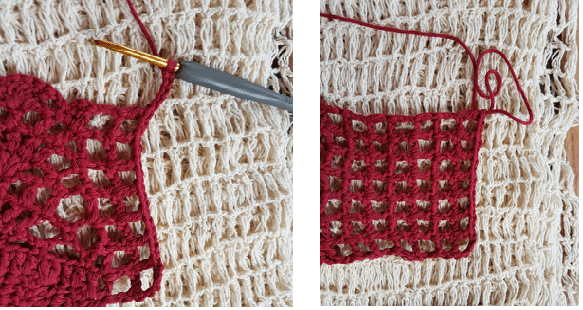
here is my 7 rows
Row 8 – ch3 (count as 1dc), *1dc in ch space, 1dc on top of dc st from previous row, rep from* across, turn
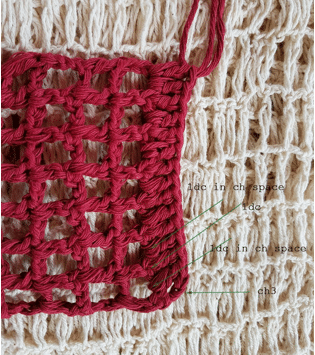
Row 9 – ch5, skip 2ch st, 1dc in the next, *ch2, skip 2ch st, 1dc in the next, rep from* across
Ch1, cut the thread about 2 inches to weave in later
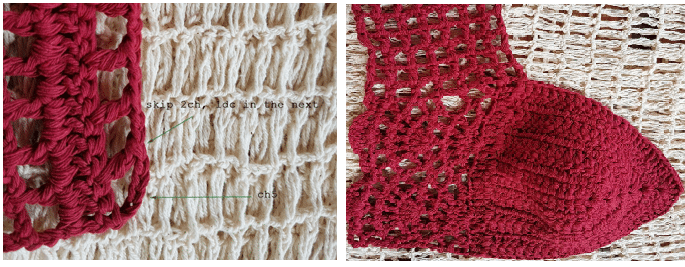
Here is what You have so far 🙂
Slip knot on the top of the cup to create the strap for tying behind the neck. I made 99ch (80 – 100ch is good) If You need a better support for bigger cup, You can do hdc instead of just ch
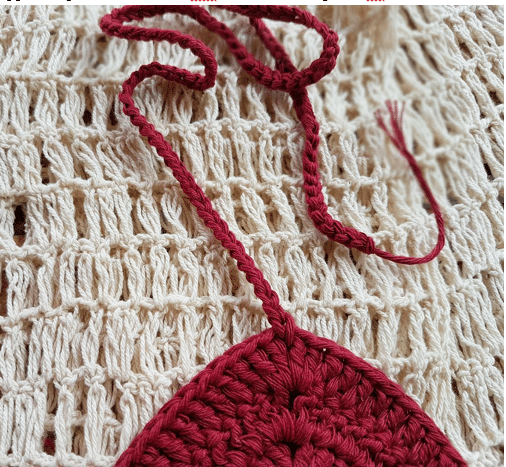
Vola…. You are now have done one side and now do the other side the same then You are finished!! 😉
When You have done the other side,then make an extra 2 long straps. I made 200ch for the corset front And 350ch for the corset back
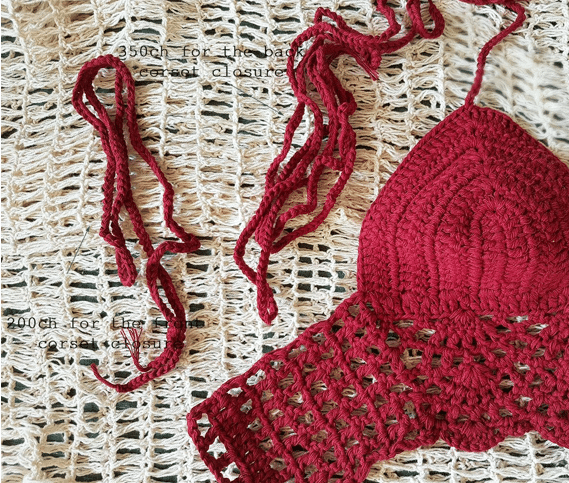
And the finished piece should look something like this 😉
